
How To Use WordPress Widgets – Part 2
 In part 2 of this tutorial series on using widgets, you will learn how to add commonly used widgets to your sidebar, header, or footer.
This tutorial covers:
- Default Widgets
- Commonly-Used WordPress Widgets
- Create Your Own Custom Widgets Without Coding – Simple Cheat
For additional tutorials, go here:
- WordPress Widgets Explained – Learn what WordPress widgets are, how widgets work, and how widgets can help you customize and extend the functionality of your website or blog.
- How To Use WordPress Widgets – Part 1 – The basics of using and managing widgets in WordPress.
- How To Use WordPress Widgets – Part 2 – (You are here)
- How To Use WordPress Widgets – Part 3 – Set up useful widgets to boost user engagement on your site.
Default Widgets
As explained in Part 1, WordPress includes many default widgets.
These widgets allow you to add useful functions and features to widgetized areas of your site like displaying a search box, archives, calendar, RSS feed, categories, tags, pages, latest posts, latest comments, custom menus, etc.
The block-based widget editor provides great flexibility, as it allows you to add any type of block available to your widget areas.
In this tutorial, we will use the Classic Widgets editor and refer to the related blocks you can use to add the same functionality.
Commonly Used WordPress Widgets
We’ll add the following widgets to a site:
- A text box containing some text.
- A clickable image linking visitors to your contact page.
- A post categories section with a drop-down menu.
- A section to display your latest posts.
- A section to display your latest post comments.
- A list of your site’s pages.
- A custom menu widget with links to useful resources.
- A video.
- An audio file.
- A list of clickable tags using a tag cloud.
- Post archives.
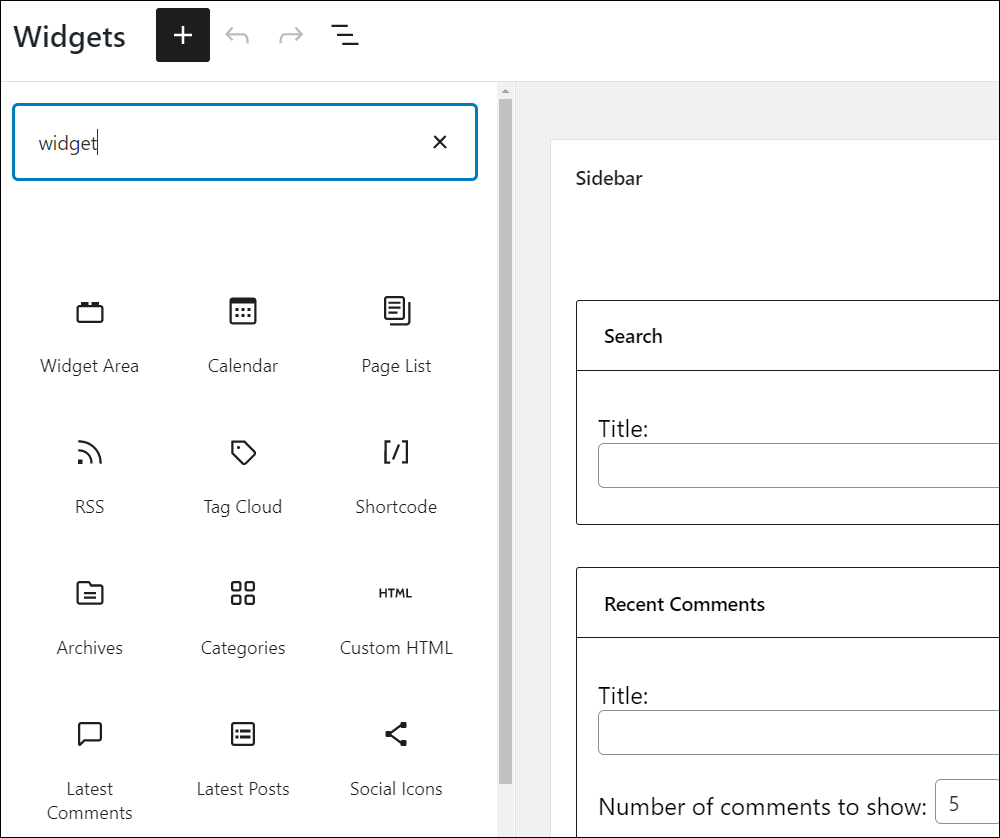
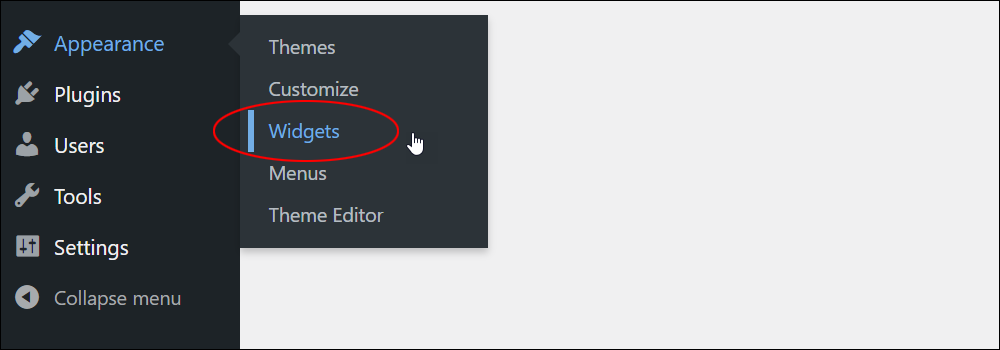
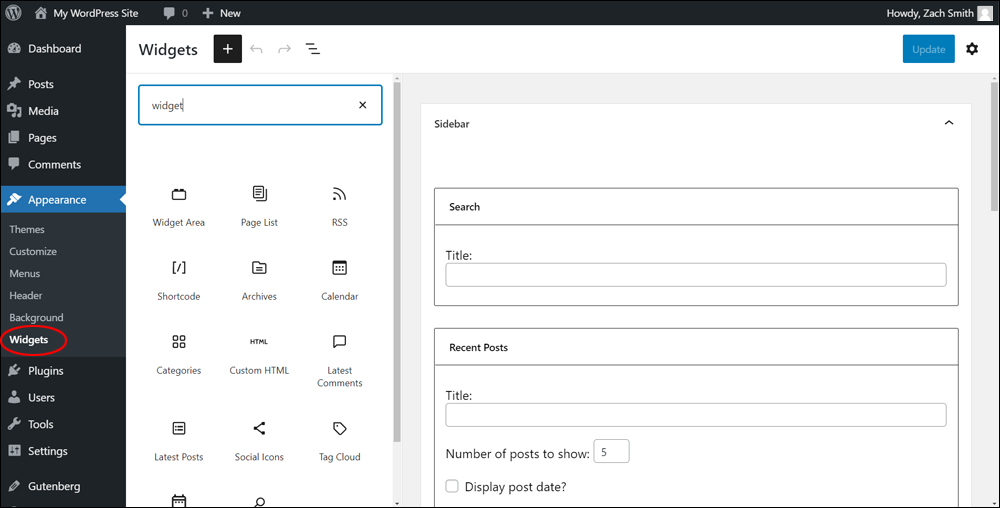
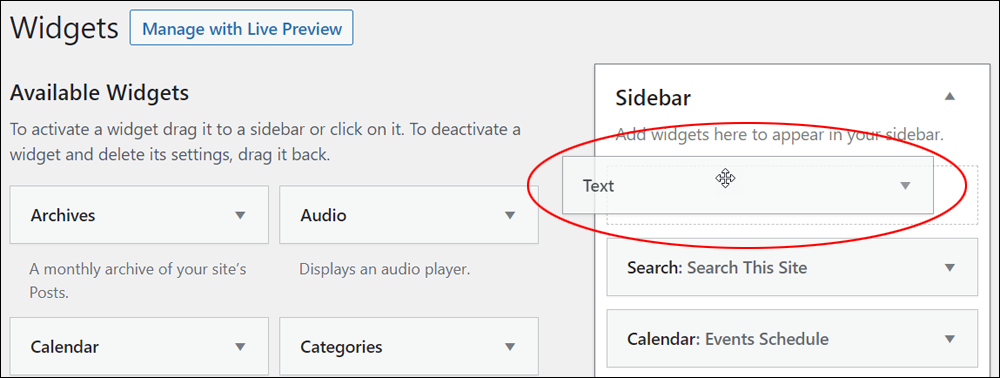
To access the Widgets screen, go to Appearance > Widgets.
This will bring up the Widgets screen on your browser.

If your site uses the block-based Widgets editor, your screen will look like the screenshot below.
Let’s start adding some widgets.
Add Text
You can add text to a sidebar, header, or footer area using the Text widget.
Select the Text widget from the Available Widgets section and either drag and drop it into a widget area or click to select and add it to a location.
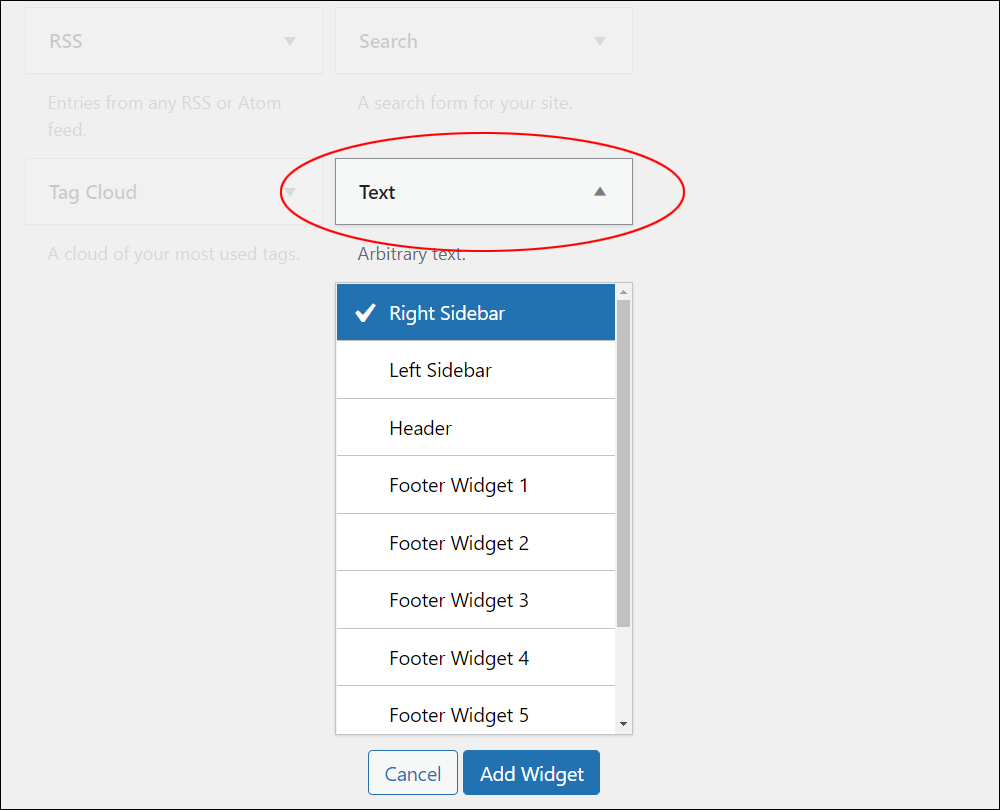
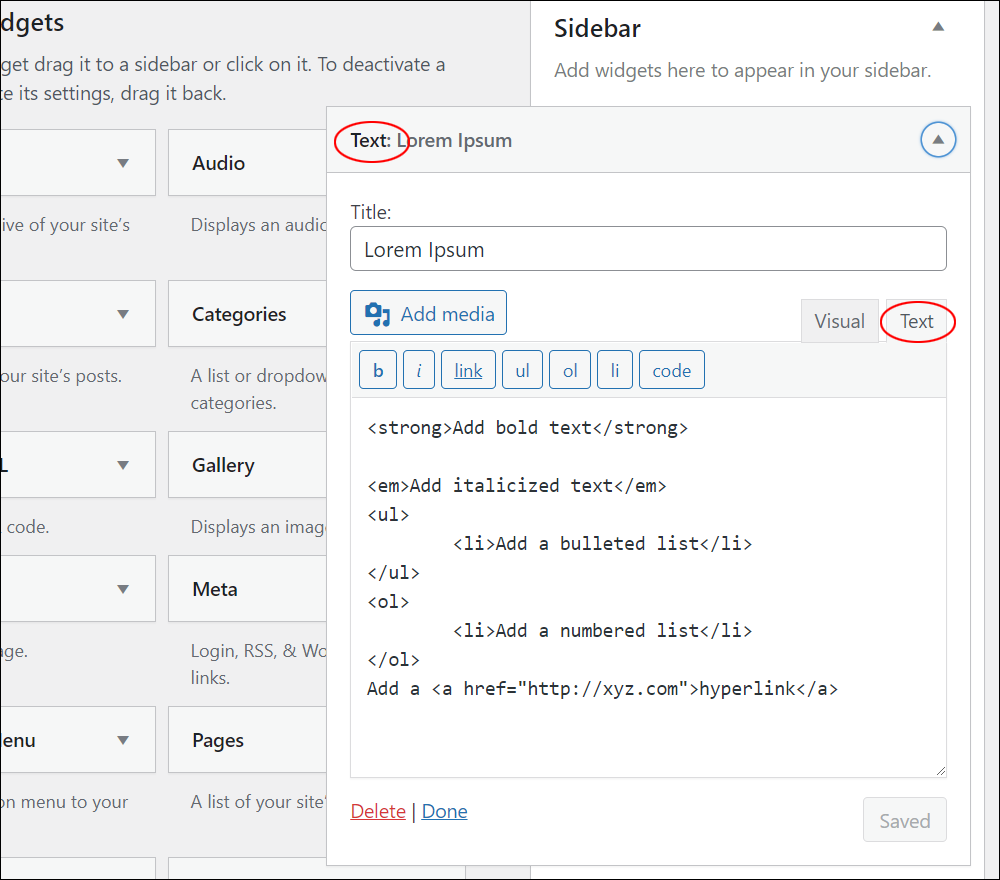
The text widget has rich text editing capabilities.
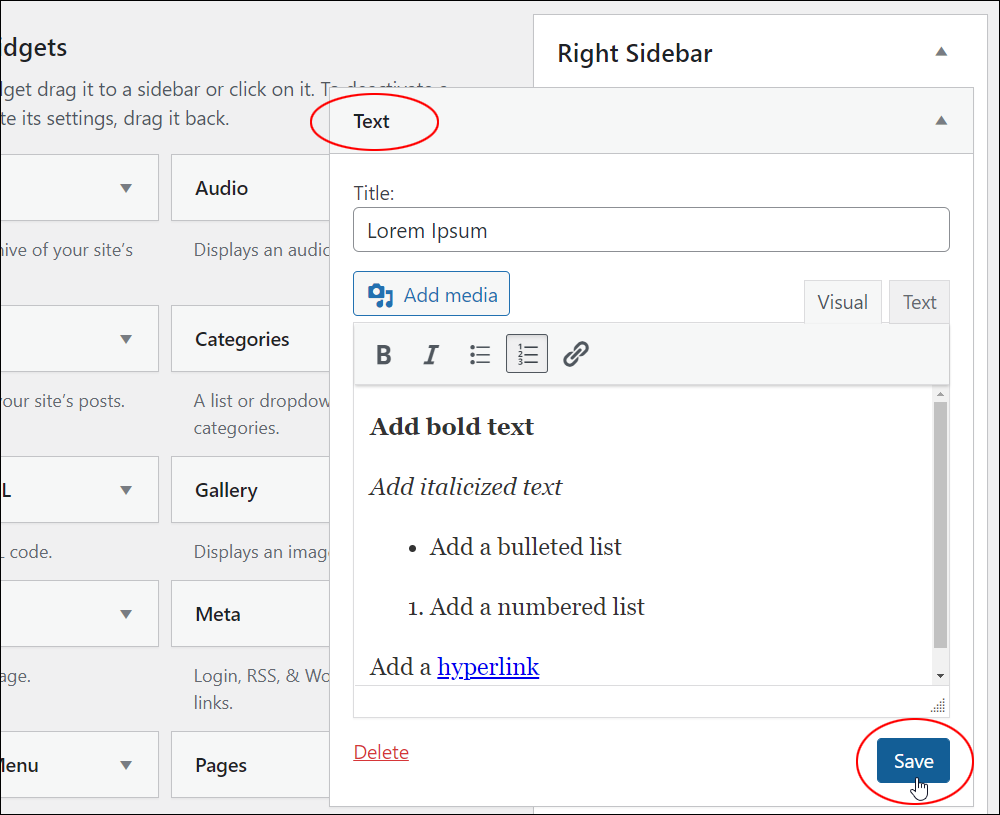
You can quickly and easily format text using bold and italics, create bullet or numbered lists and insert links into your text.
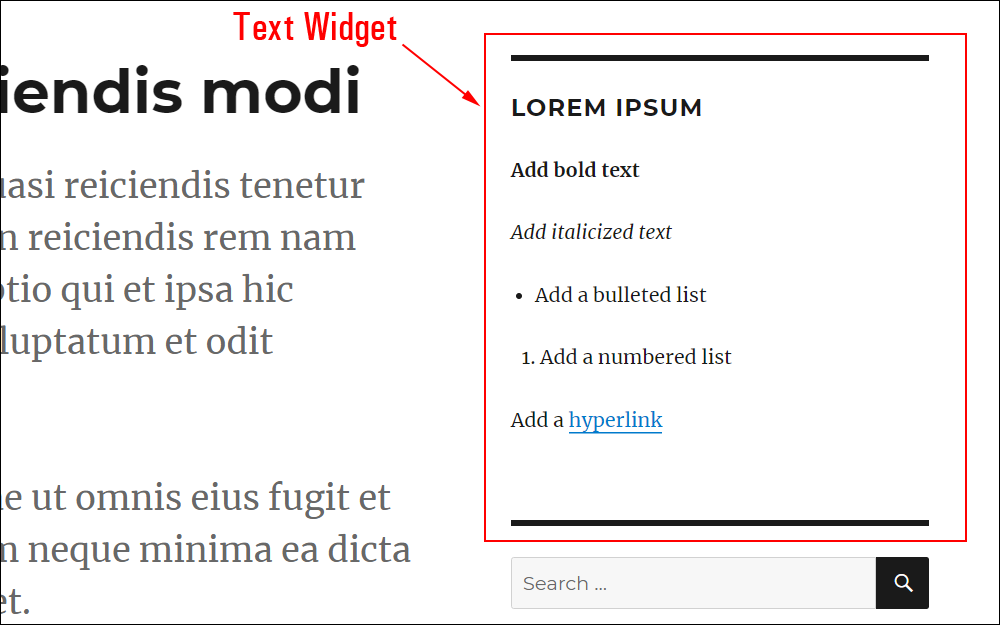
You can add just about anything you want using a text widget, especially when using the Text tab or the Insert Media button.
For example, you can add:
- Single lines, sentences, paragraphs, or snippets of text
- Comments, notices, quotes, event announcements
- Email and contact details
- Lists
- Tips
- Images, videos, and other media
- Forms
- Messages
- And more!
![]()
If adding scripts or HTML-formatted content, we recommend using the Custom HTML widget instead.
If you are using the block-based Widgets editor, there are several blocks you can choose from, including:
- Paragraph block
- List block
- Media & Text block
- Quote block
- Heading block
- Custom HTML block
- Verse block

Add A Clickable Image
Let’s add a clickable image so visitors can contact you for help and support.
Make sure you have:
- Created or sourced your image.
- Uploaded this image to your site’s server or cloud storage location.
- Created a destination page to link the image to (e.g. a ‘Contact Us’ page)
If you need help with these steps, see the tutorials below:
- Using Images In WordPress
- How To Add And Format Images In WordPress
- Where To Find Free And Royalty-Free Images
- Using The Media Library
- How To Create A Page In WordPress
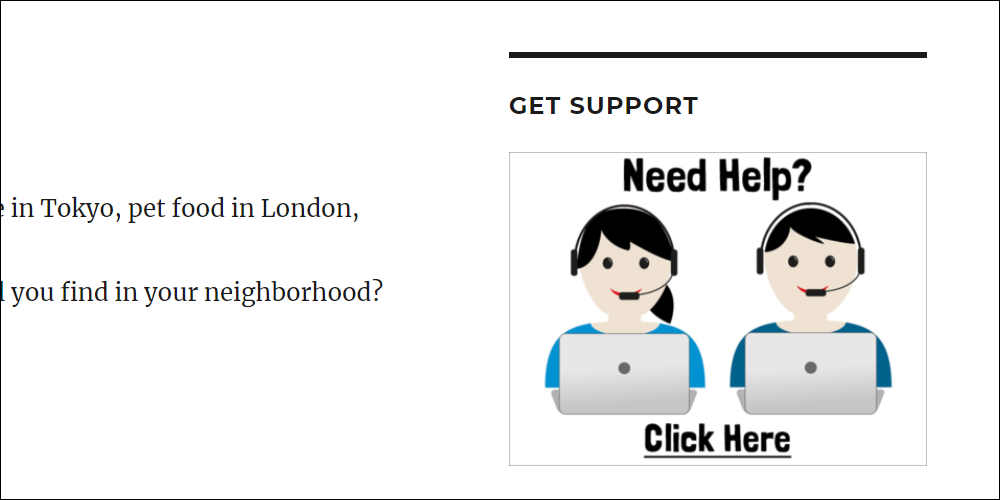
Here’s the image we will use for this example…

We’ll set up the clickable image to display at the top of the sidebar like in the screenshot shown below.

Step 1 – Upload your image.
Upload the image to your server and write down the URL pointing to your server’s image location.
For example:
http://www.yourdomain.com/images/support.png
You will need this information in Step 3.
Step 2 – Add your destination page.
For visitors to go to your contact page when they click on the image, you should already have created a contact page, or an existing destination page (e.g. a helpdesk).
We will link your image to this URL in Step 3.

Step 3 – Link your image to your destination page.
If you’re not a technically minded person, don’t worry…this sounds more technical than it really is.
In simple terms, we need to add an instruction for our site to link our image with our destination URL (e.g. Contact page).
There are a couple of ways to do this:
- Use an Image widget (easiest method)
- Use a Text widget (you just need to add the linking instructions in HTML format. Note: you could also use the Custom HTML widget.)
Let’s go through both methods.
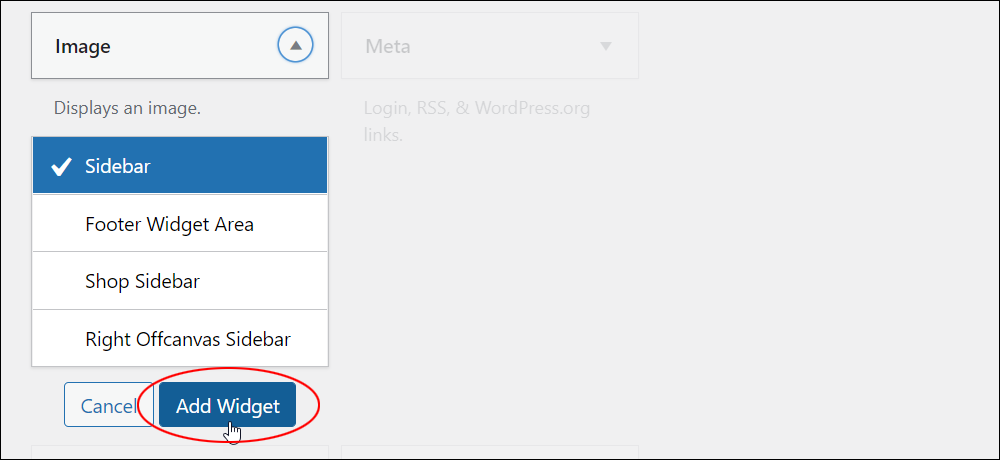
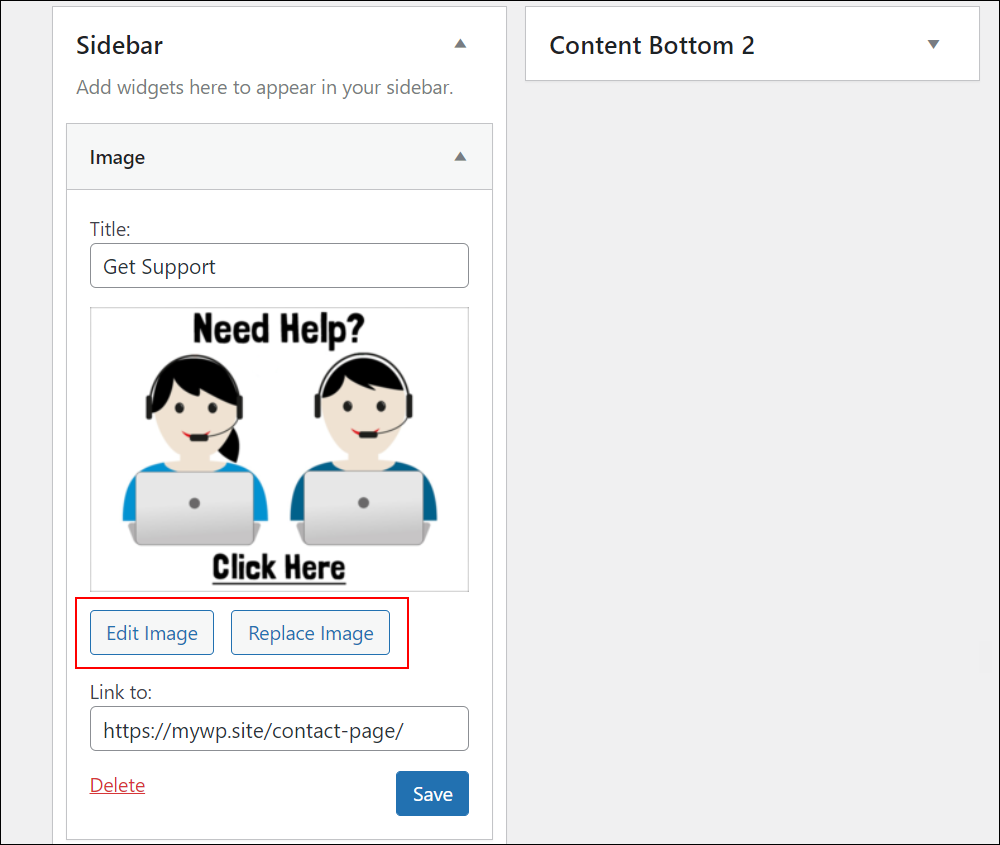
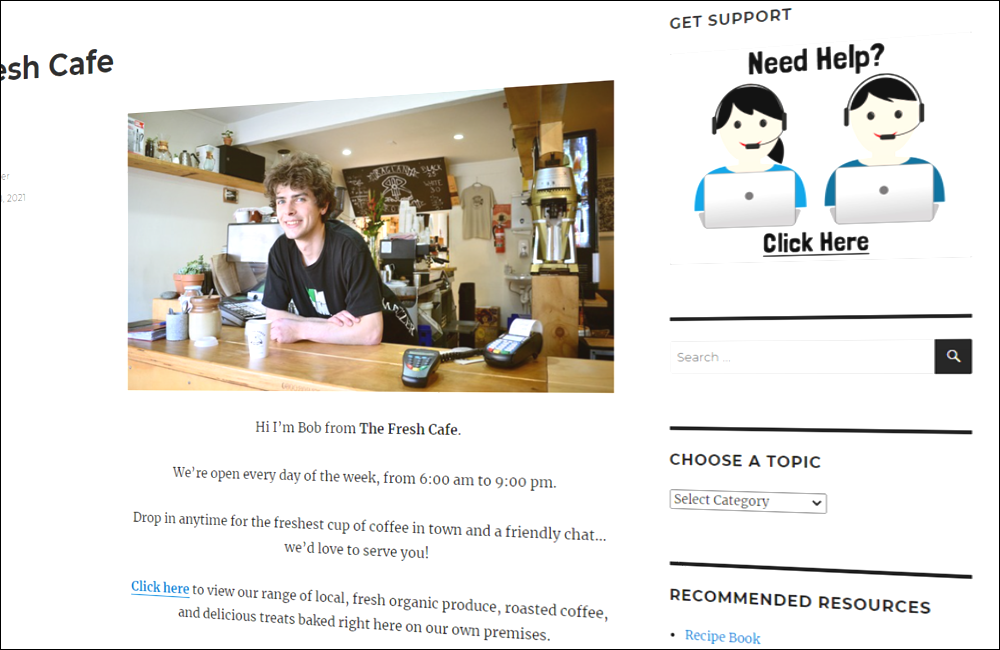
Use An Image Widget
In the Widgets screen, select and add an image widget to the sidebar area.
After adding the Image widget to your sidebar area, expand the widget and click on the Add Image link.
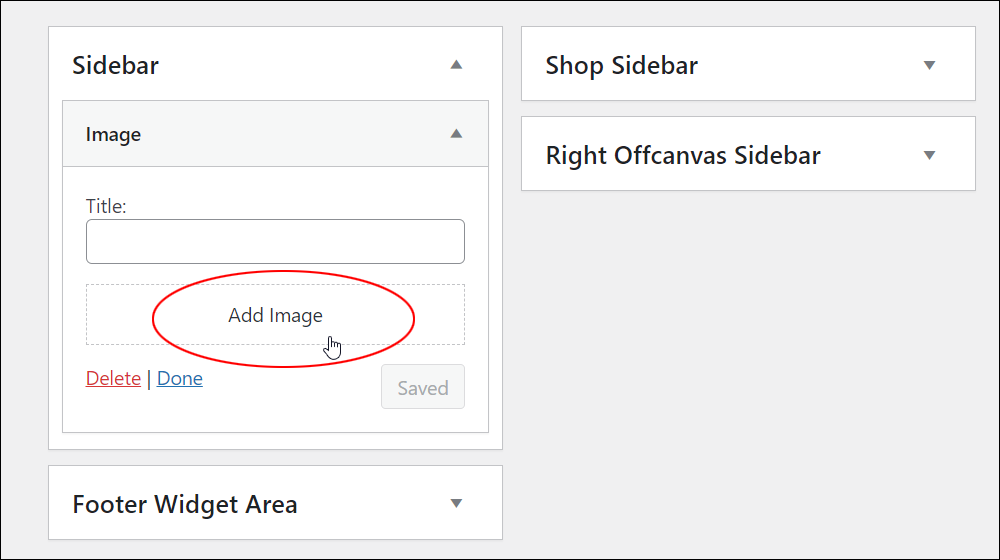
Select the image from your Media Library (either upload it or use the Insert from URL feature) and click on the Add to Widget button.

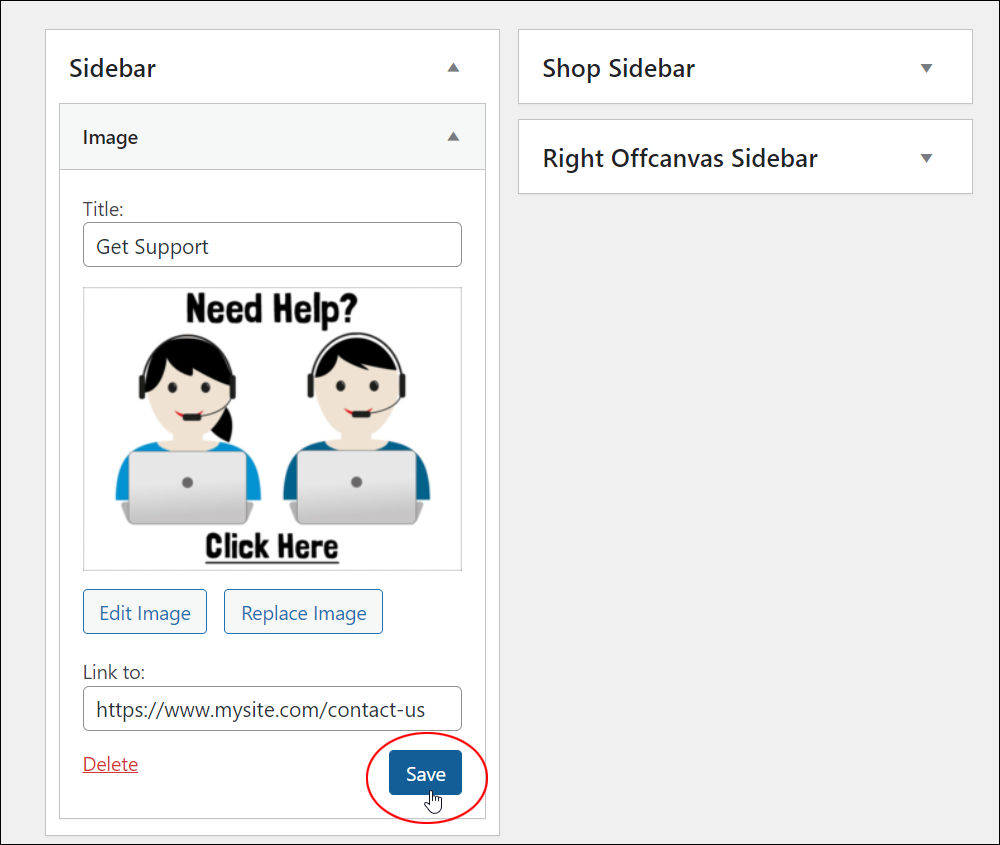
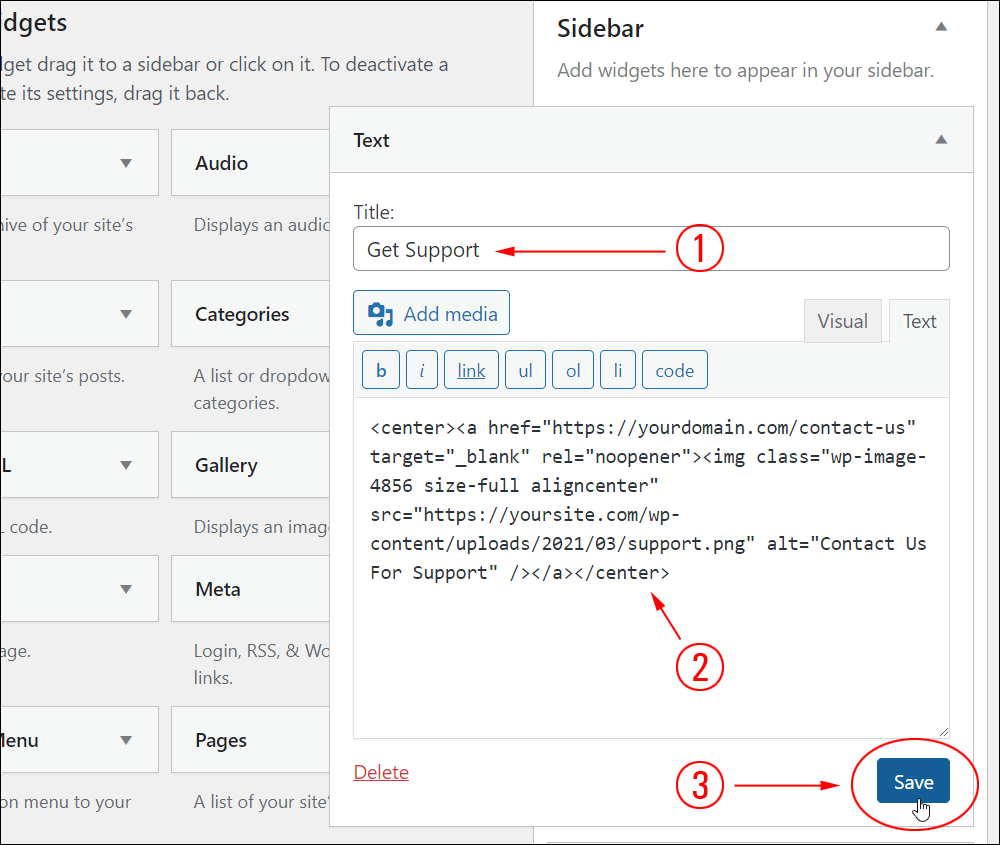
Complete the following steps:
- Add a title to your widget (e.g. “Get Support”),
- Insert the URL to your contact page (see Step #2)
- Click the Save button when done.
Finally, preview and test the clickable image on your site to make sure it works and sends visitors to the correct destination URL.
If you want to link your image to an external URL or replace your clickable image, use the ‘Edit Image’ or ‘Replace Image’ buttons.
To learn more about using these image functions, see this tutorial: How To Add And Format Images In WordPress
If you are using the block-based Widgets editor, see this tutorial: Image block
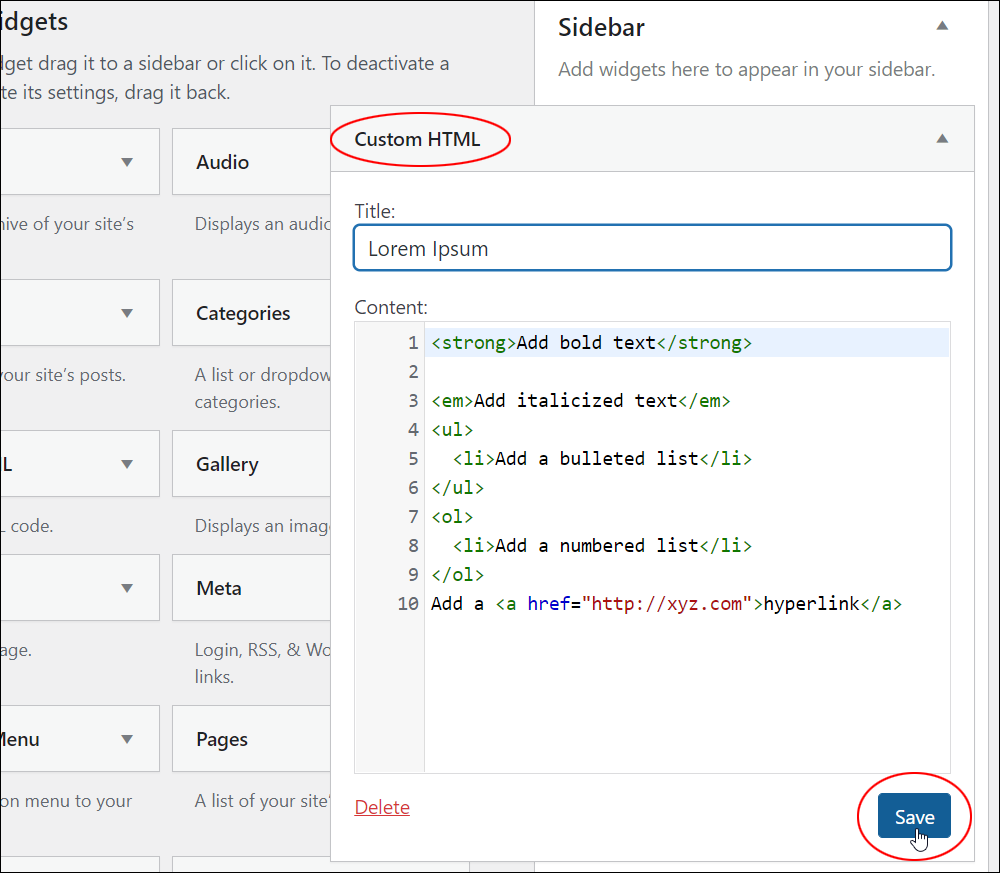
Use A Text Widget
As stated earlier, we recommend using the Custom HTML widget for adding HTML code.
For this example, however, we’ll stick with the Text widget as it will help you understand the basic concept.
Also, if you plan to add a clickable image using a text widget, we recommend writing the instruction code for adding a clickable image in a plain text file.
We’ll then copy and paste the code into the text widget.
Your code should look something like this…

Notes:
- Replace
https://yourdomain.com/contact-usin the above code with the URL of your contact page location. - Replace the above image URL with the URL of your server’s image location.
- Test your clickable image URLs (e.g. your contact page) to make sure you have the correct URLs, or your clickable image won’t work.
The image below shows the sections that need to be replaced with your contact page and image URL details.
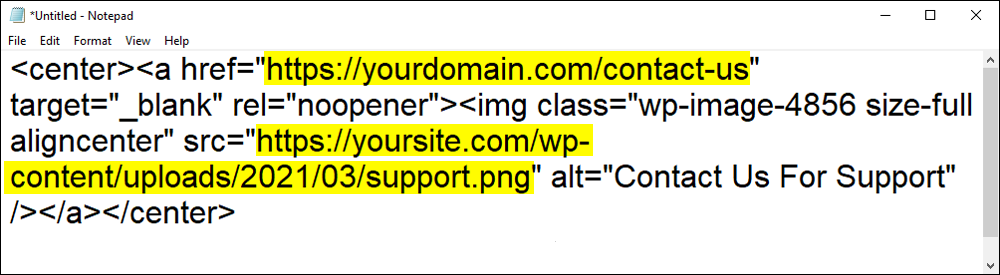
Replace the above URLs and copy all this code to your clipboard.
If you need help understanding HTML code, see this tutorial: A Basic Guide to HTML
Also, see the “Tips” section of this tutorial for additional information and shortcuts to creating HTML code you can add to widgets.
With the code copied to your clipboard, go back to your Widgets screen.
Let’s add a Text widget to the sidebar location where you want your clickable image to appear.
In the Available Widgets area, select the Text widget.
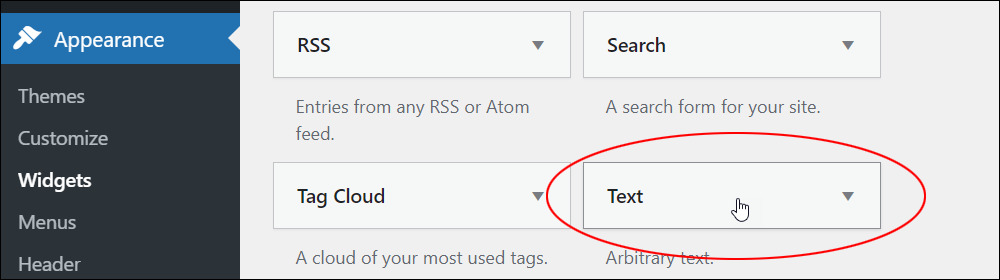
Select Sidebar and click the ‘Add Widget’ button or drag the widget to the Active Widgets section and release it at the top of the Sidebar widget area.
Next, let’s configure the text widget’s settings.
Click on the Text widget title bar to expand the widget. We’ll paste the code with the graphic image and link to your contact page from your clipboard into the text widget’s content area.
Make sure you have the Text tab selected.
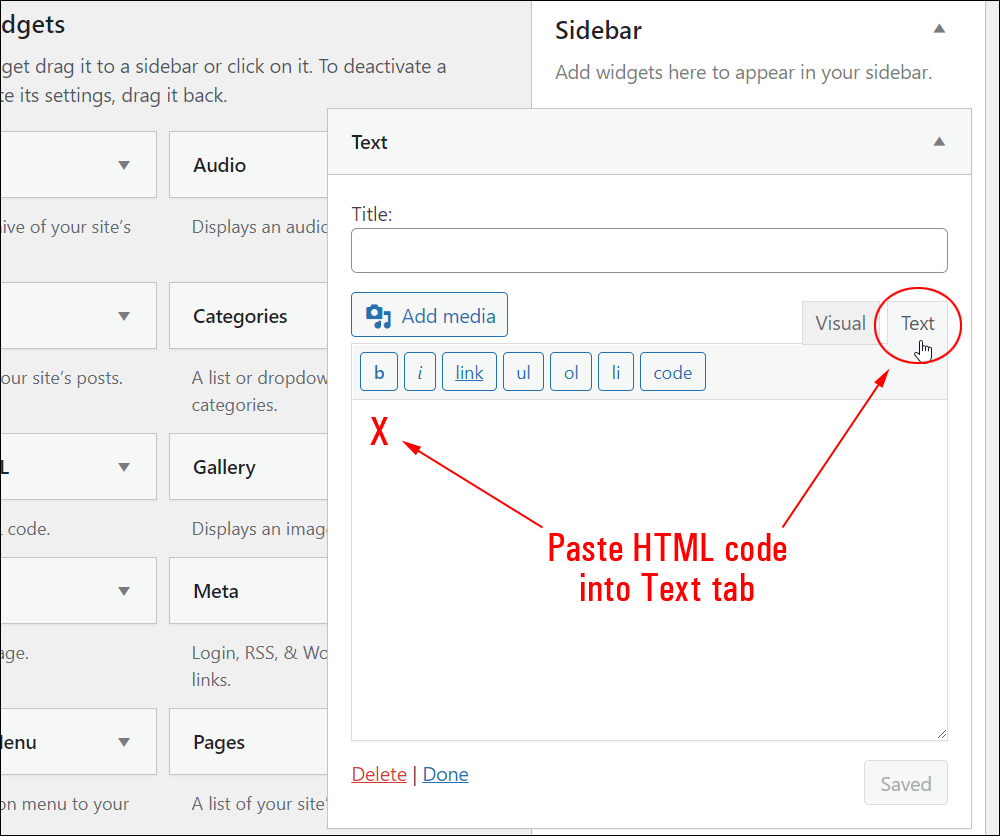
Do the following:
- Add a title to your widget if you want (e.g. “Need Help?”, “Get Support”, etc.) – optional.
- Paste the code with your links into the Text tab’s content area.
- Click the Save button when done.
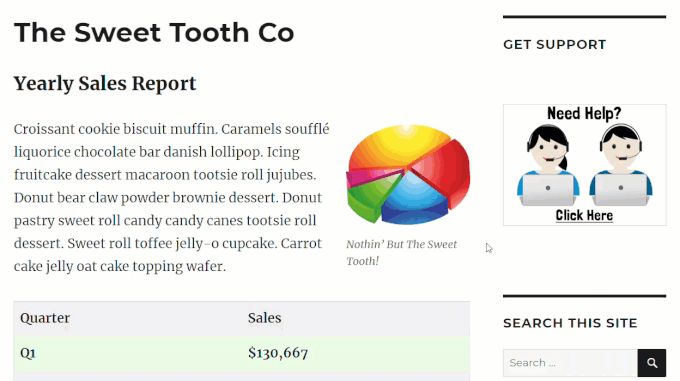
The last step is to visit your site, refresh your browser, and make sure everything’s working ok.
If all links have been added correctly, clicking on the image in your sidebar should take you to the correct destination.
![]()
Useful Tips:
Adding target="_blank" to the destination URL code opens the destination page in a new window when visitors click on the image (so they don’t leave the page they’re currently visiting).
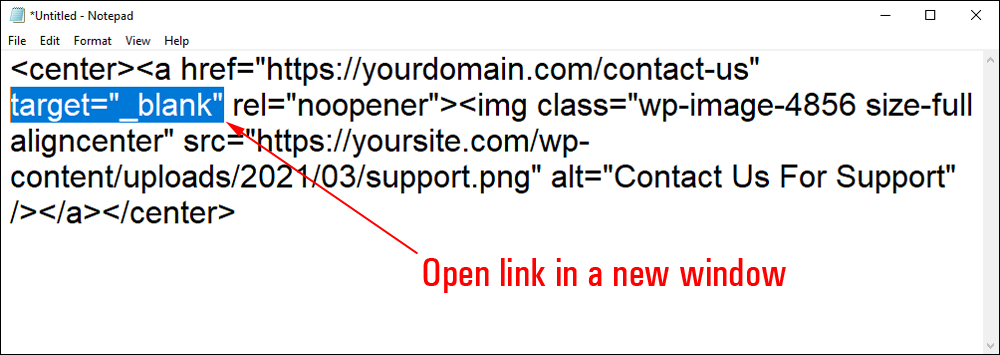
Remove this code if you don’t want the link to open in a new window (i.e. visitors will leave the page they’re on and go to the destination page.)
Additional Tips:
- If you don’t want your clickable image to be centered in your sidebar, delete the
<center>and</center>tags from the beginning and end of the line of code. The image will align to its default settings (normally left-aligned). - You can link the image to any destination URL you like (e.g. any external or external link, helpdesk or contact form page, support forum, FAQ section, etc.)
- You can also change the destination link anytime by replacing the link in the text widget’s content.
Now that you know how to set up a text widget containing a clickable support button, let’s configure a widget to display your Post Categories.
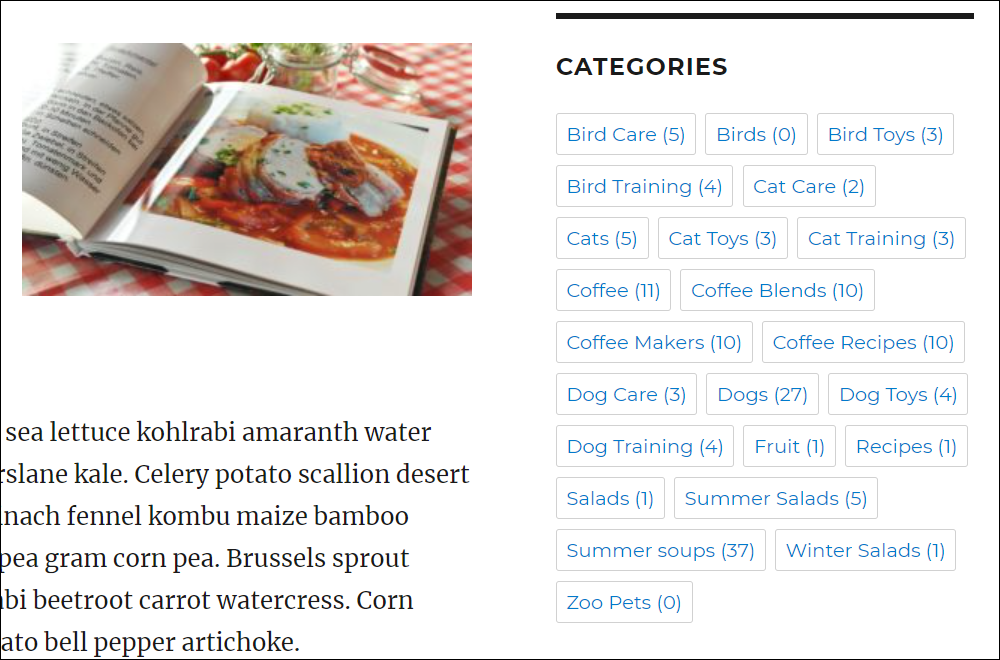
Add A Post Categories Widget
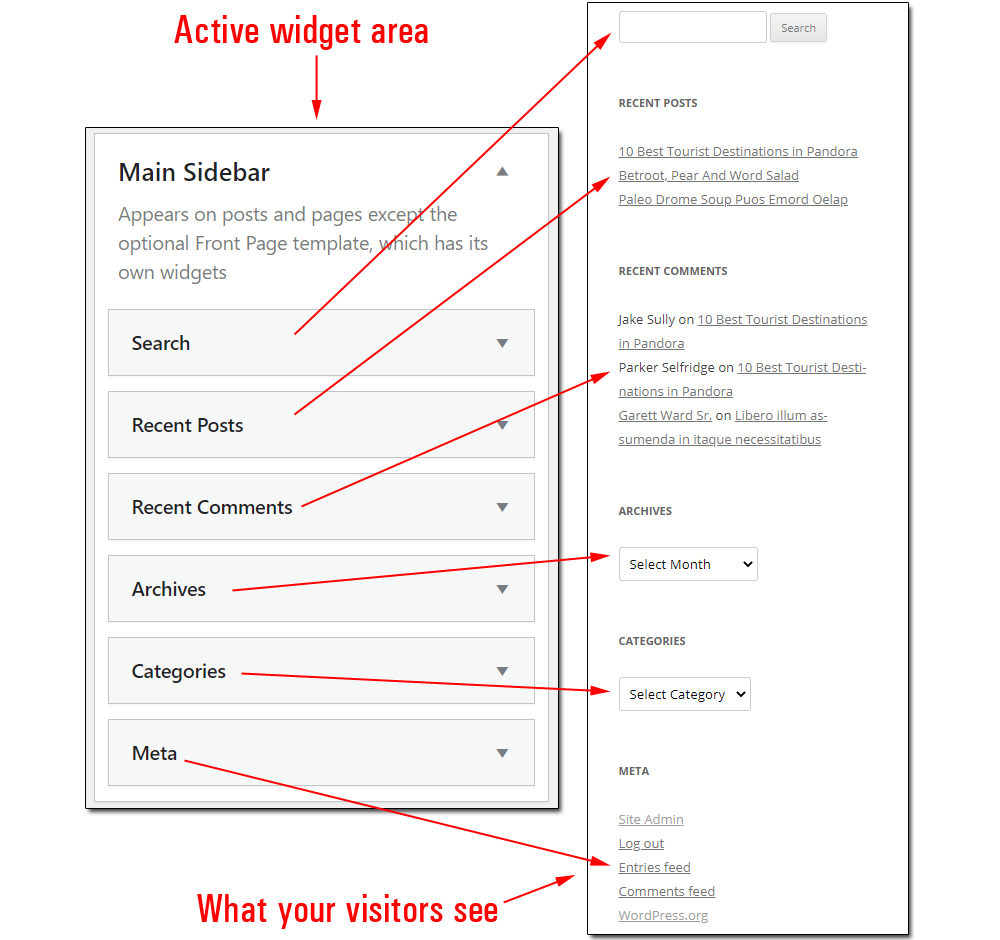
The Categories widget displays on your sidebar by default.
If the Categories widget has already been added to your widget area (normally the sidebar), all you need to do is position it where you want it to display using drag and drop or by clicking on the widget’s ‘move’ links.
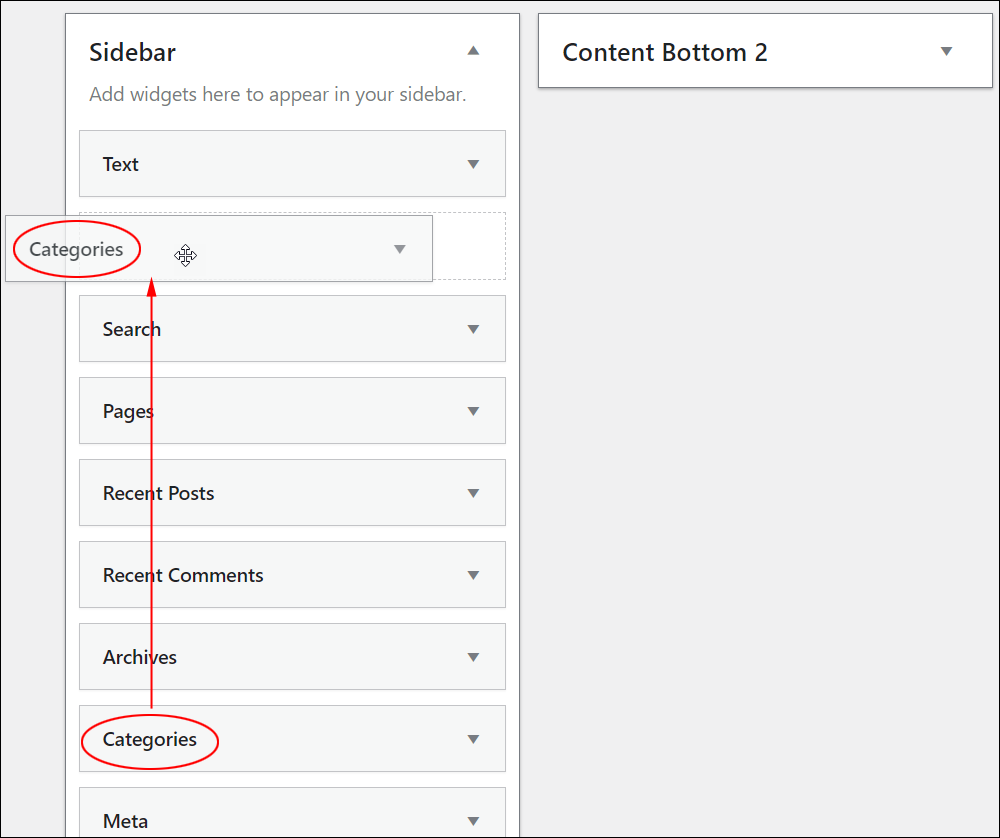
If you can’t see the Categories widget on your active widgets area, use drag and drop or select and click on the ‘Add Widget’ button to add it to your sidebar (or footer, header, etc.) from your Available widgets section.
![]()
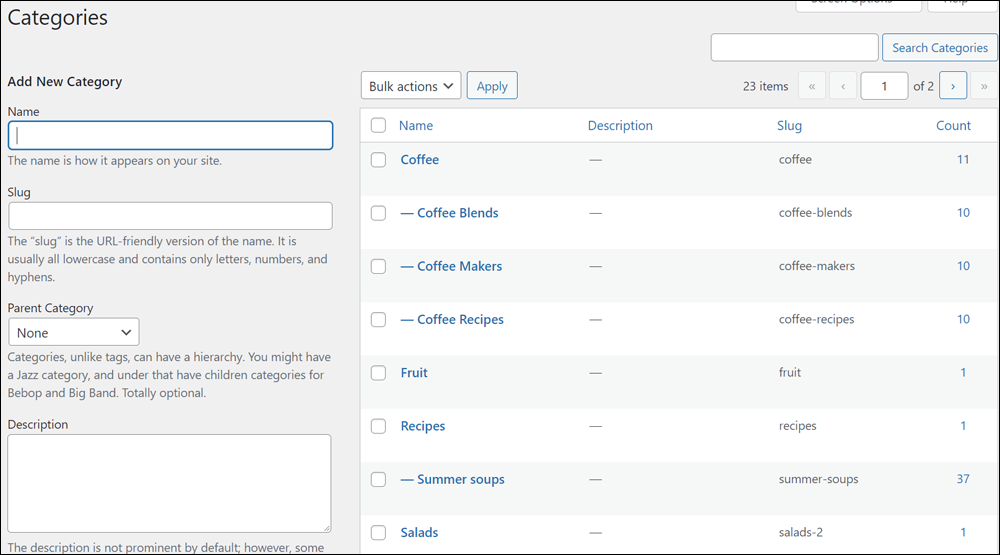
Set up your Post Categories before adding the Categories widget to display a list of categories on your site using the widget.
If you need help setting up post categories, see this tutorial: How To Use Post Categories In WordPress
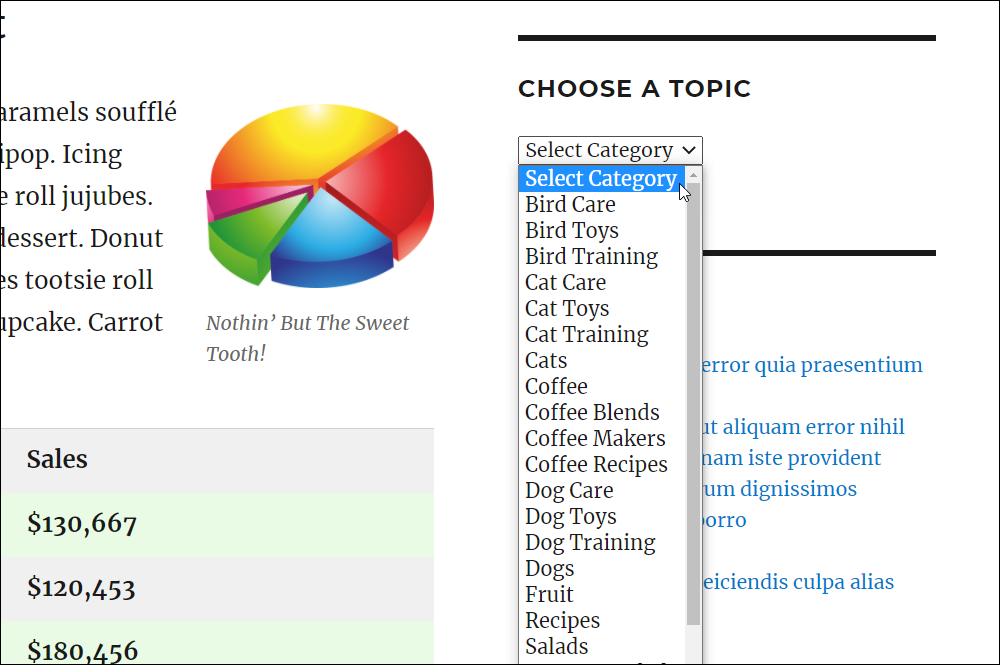
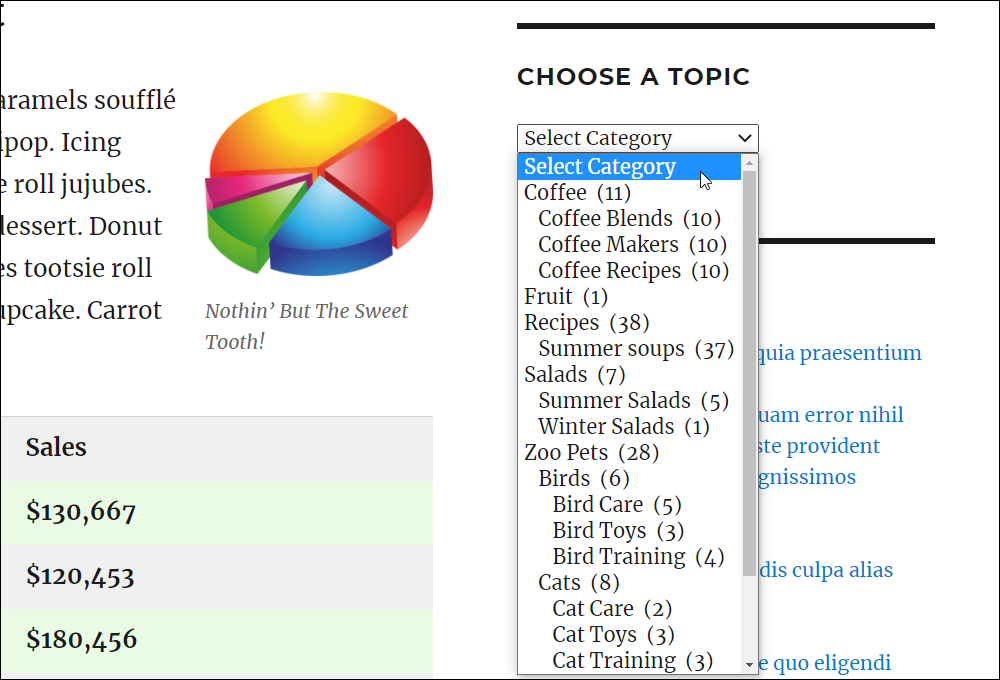
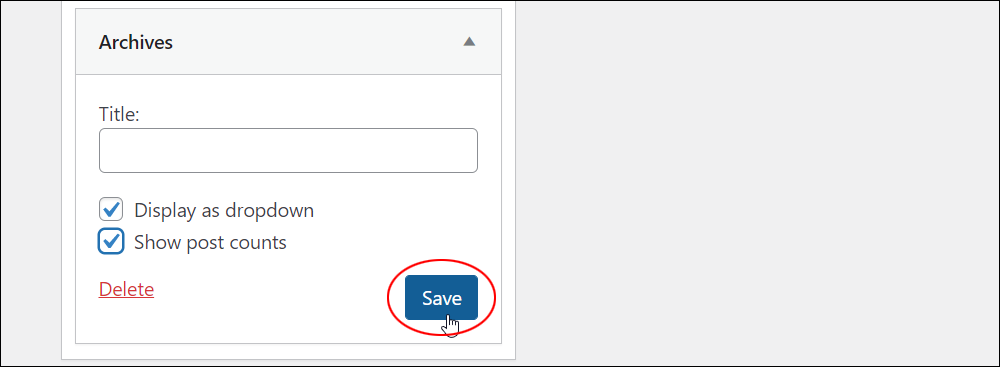
Configure your Categories widget as follows:
- In Title: leave as is or change the title to something more relevant for your visitors, e.g. “Choose A Topic” (1)
- If you plan to add many categories, check Display as dropdown (this will display all your categories in a drop-down menu, significantly reducing the footprint of your categories widget on your sidebar. If you plan to publish posts under a few categories only, then leave the Display as dropdown box unchecked. (2)
- Leave all other options unchecked or see the additional notes on configuring the Categories widget below.
- Click Save to update your settings. (3)

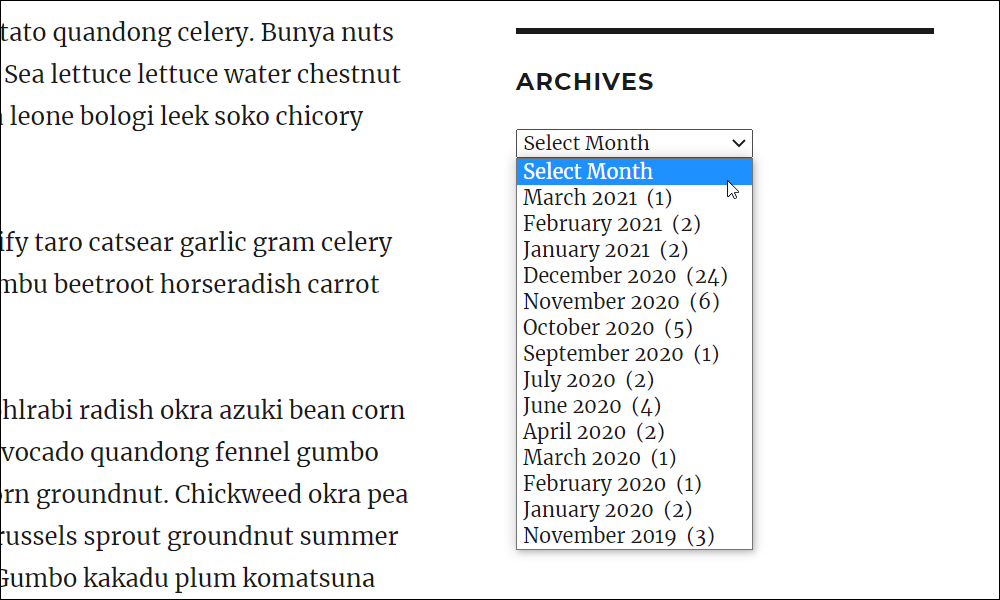
Next, click Visit Site on your admin toolbar or refresh your browser to see how the Categories widget displays to your visitors.
![]()
Category Widget Tips:
- Make sure you change the default Uncategorized post category to something that will be more relevant to your site’s users and visitors.
- If you use nested categories on your site, you may want to check the Show hierarchy option, otherwise, leave this option as is.
- To display the number of posts published in each category, tick the Show post counts check box.
If using the block-based Widgets editor, see this tutorial: Categories block
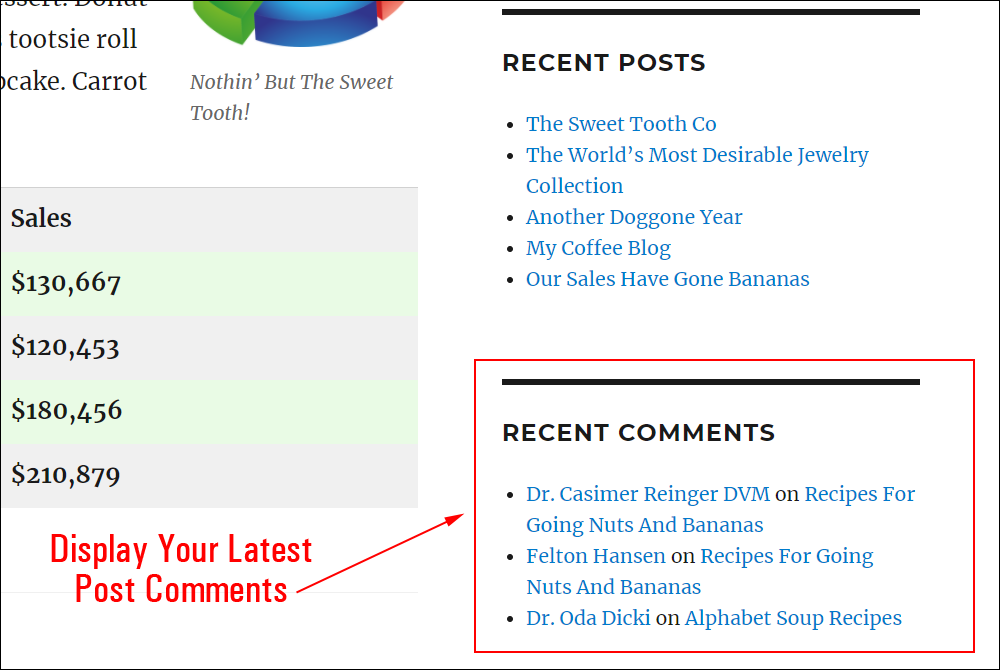
Add A Recent Posts Widget
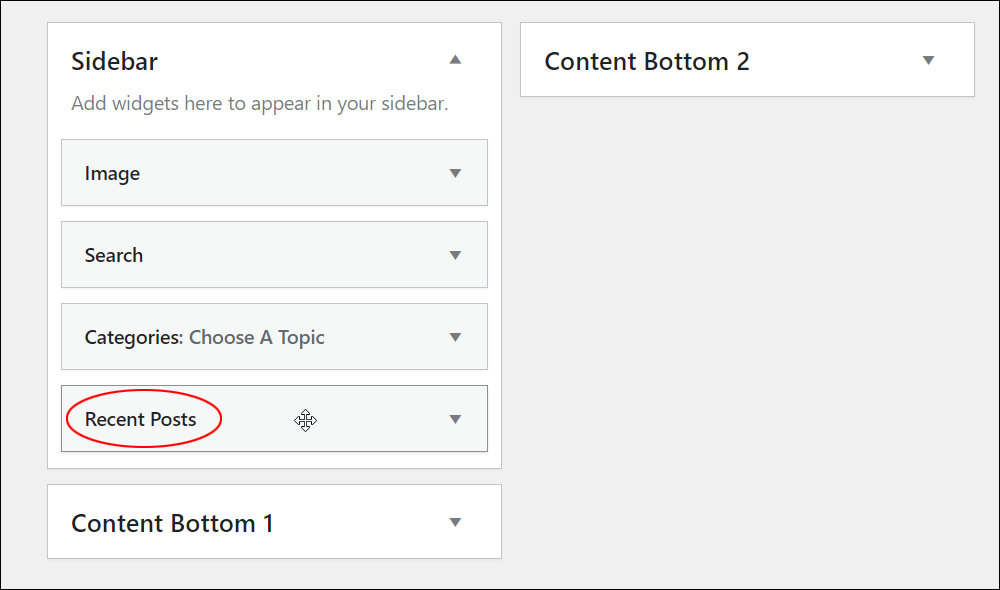
The Recent Posts widget normally displays on your sidebar by default. All you need to do is position and configure your widget.
If you can’t see the Recent Posts widget on your active widgets area, use drag and drop or select and click on the ‘Add Widget’ button to add it to your sidebar (or footer, header, etc.) from your Available widgets section.
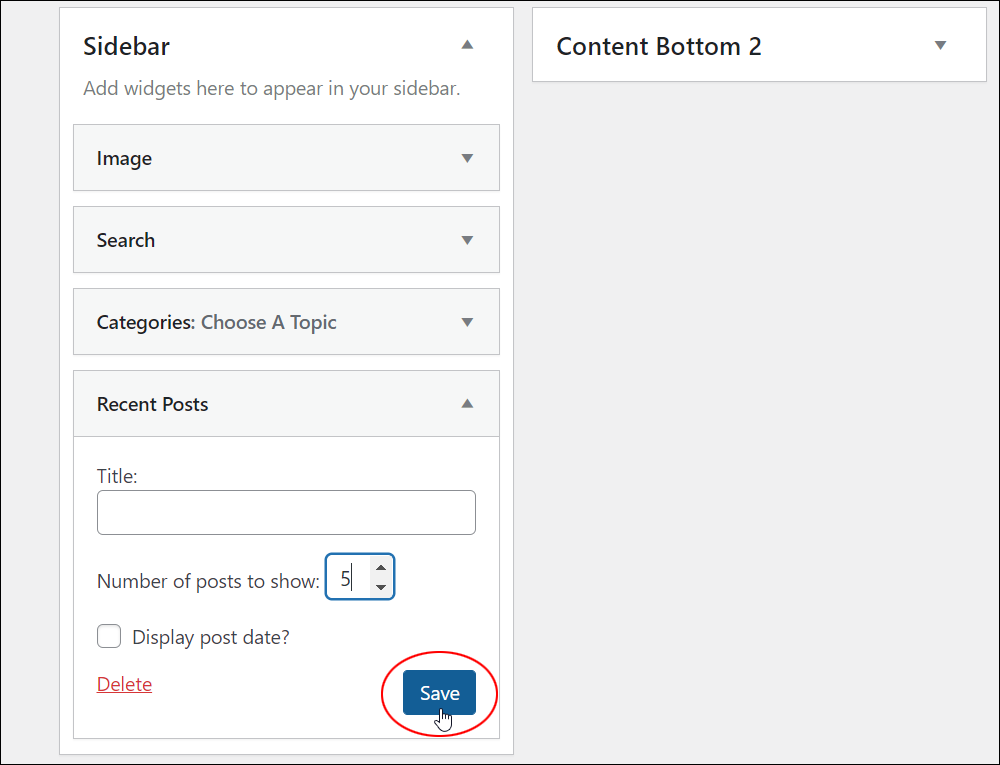
Click on the Recent Posts widget title bar to expand the widget and configure its settings.
There is not much to configure here. You can add a title if you like, select the number of posts to display and opt to display post dates.
The default Number of posts to show for this widget is “5”. You can leave this as is or adjust the number (between 1 and unlimited).
Click the Save button to update your settings.
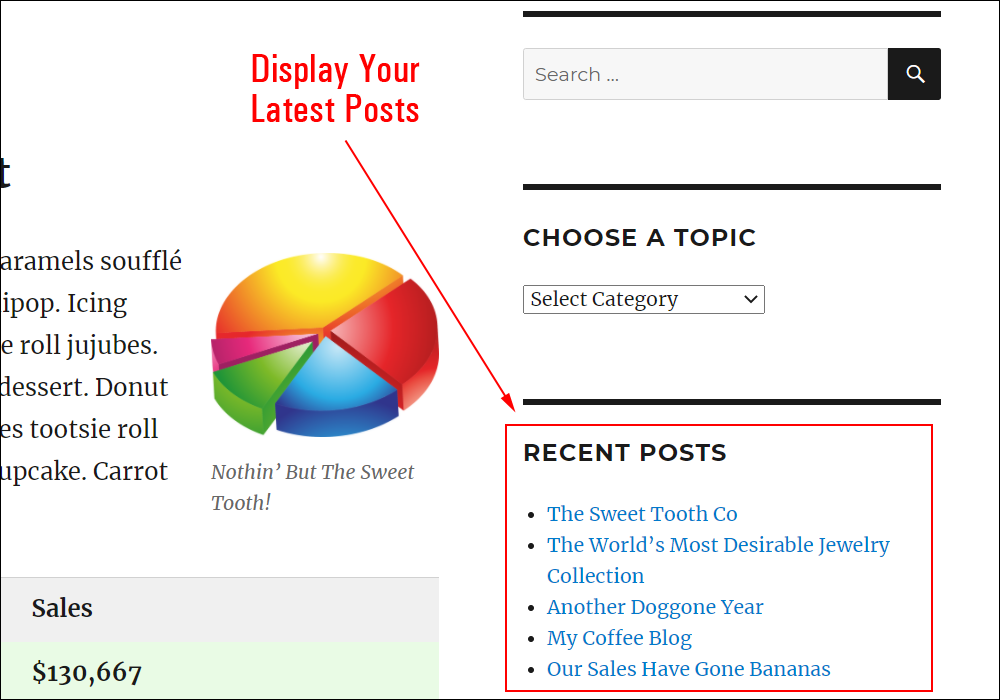
Your latest posts will display to visitors on the sidebar.
If using the block-based Widgets editor, see this tutorial: Latest Posts block
Add A Recent Comments Widget
If you allow visitors to leave comments on your posts, then you may want to display the latest comments on your site to visitors using the Recent Comments widget.
The only settings to configure in this widget is the Number of comments to show (default = 3). You can also give it an optional title.
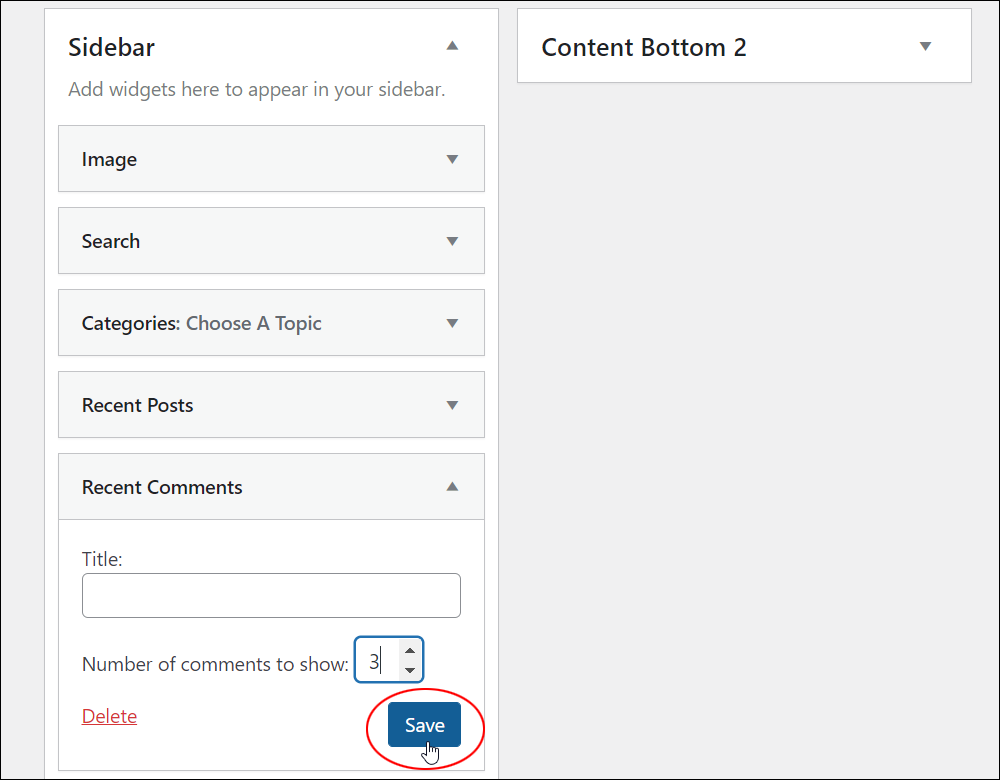
Your latest post comments will then display to your site’s visitors.
If using the block-based Widgets editor, see this tutorial: Latest Comments block
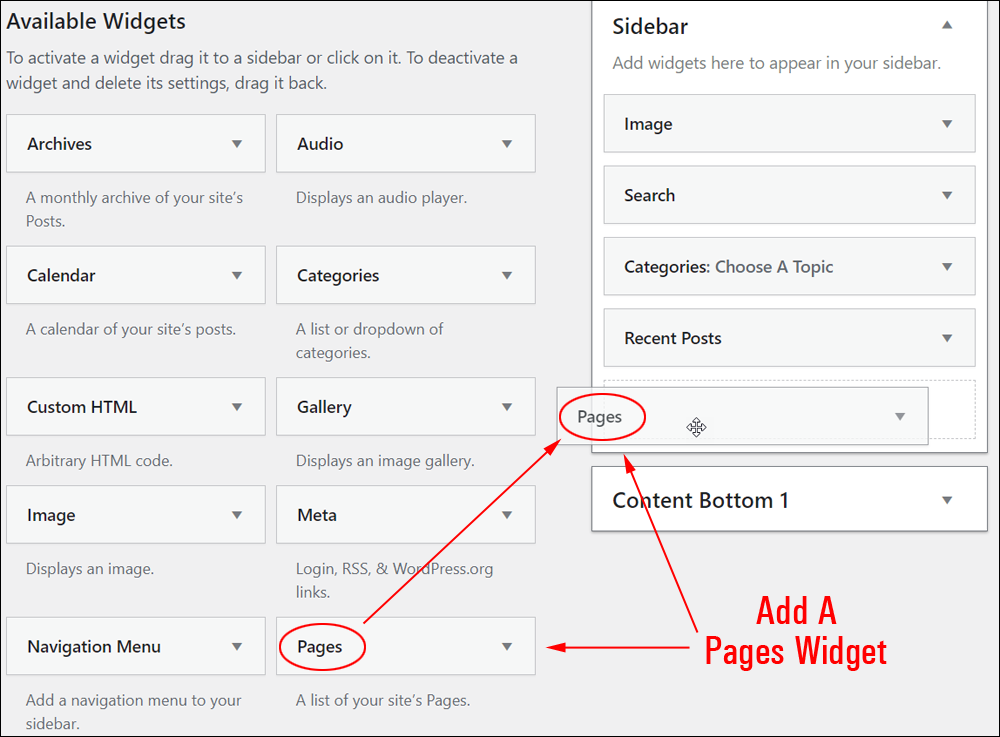
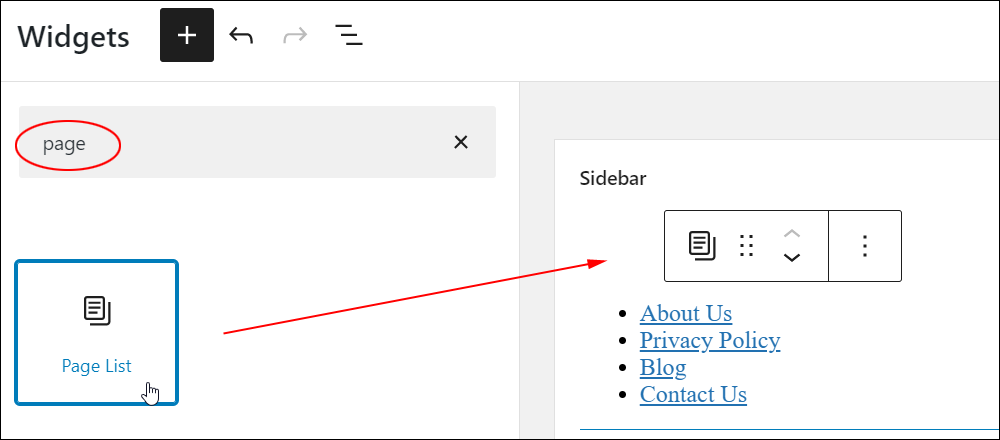
Add Page Links
Let’s add a widget to display your site’s main pages on your sidebar.
Select and drag a Pages widget from the Available Widgets section to your sidebar widget.
The Pages widget lets you configure the following settings:
- Title: Add a title to display above your links (e.g. “Explore This Site“) (1)
- Sort by: Sort how your pages will display: by title (i.e. alphabetically), by page order, or by page ID. (2)
- Exclude: Hide selected pages on your sidebar (3).
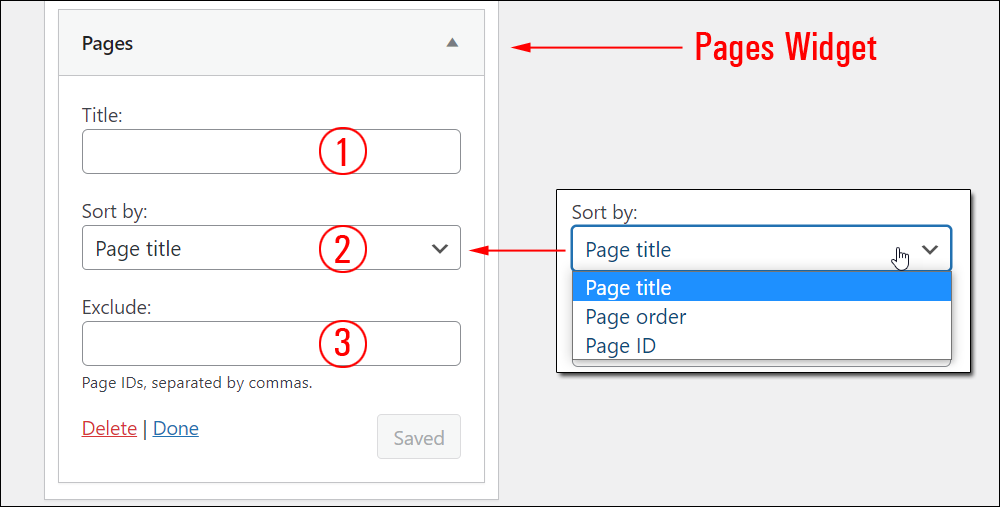
Pages display by title in alphabetical order by default. To display pages using another option, choose a different method from the Sort by: drop-down menu.
To exclude pages from displaying to visitors on your sidebar, enter the Page IDs of all the pages you would like to exclude into the Exclude field, separated by commas.
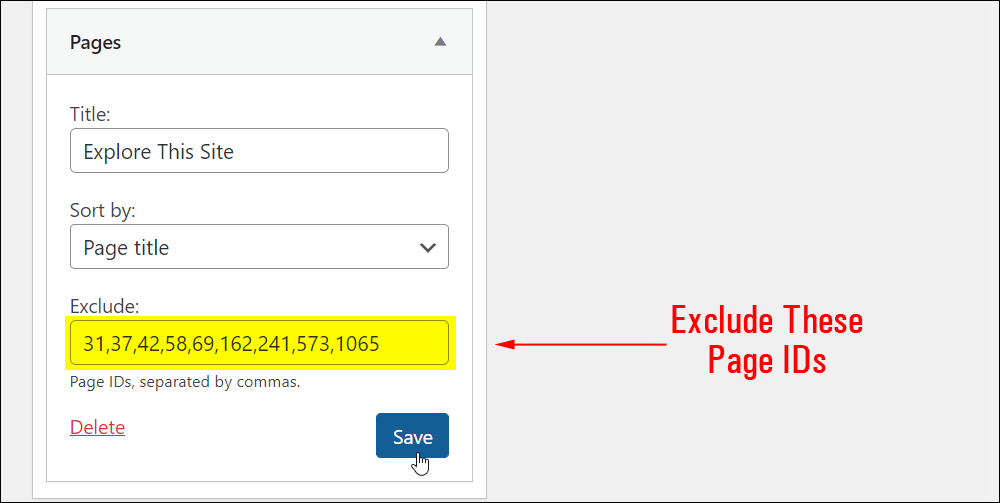
If you need help finding WordPress post or page IDs, see this tutorial: How To Find Post Or Page IDs In WordPress
Click the Save button when finished.
Links to your site’s main pages will now display to visitors on your sidebar.

![]()
You can add multiple Pages widgets to your widgetized areas. This is useful if you want to display different groups of pages on your site (e.g. “Products”, “Legal Pages” etc.)
If using the block-based Widgets editor, use the Page List block.
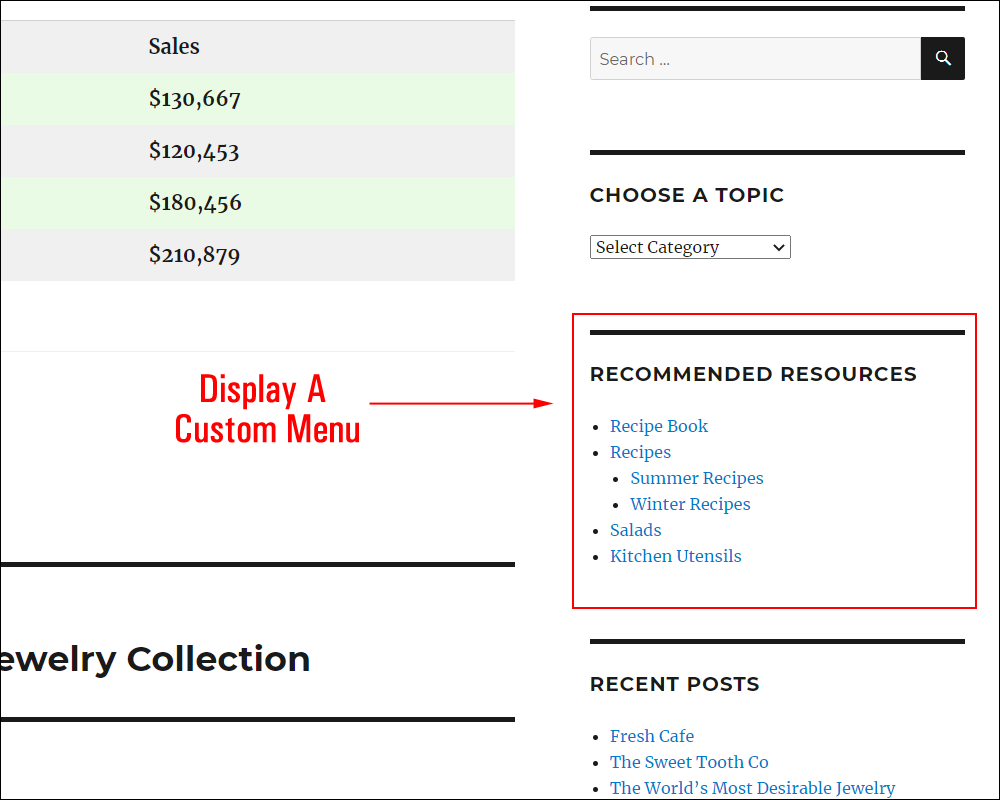
Add A Custom Menu
Let’s add a widget to your sidebar that will display a custom menu with links to useful resources.
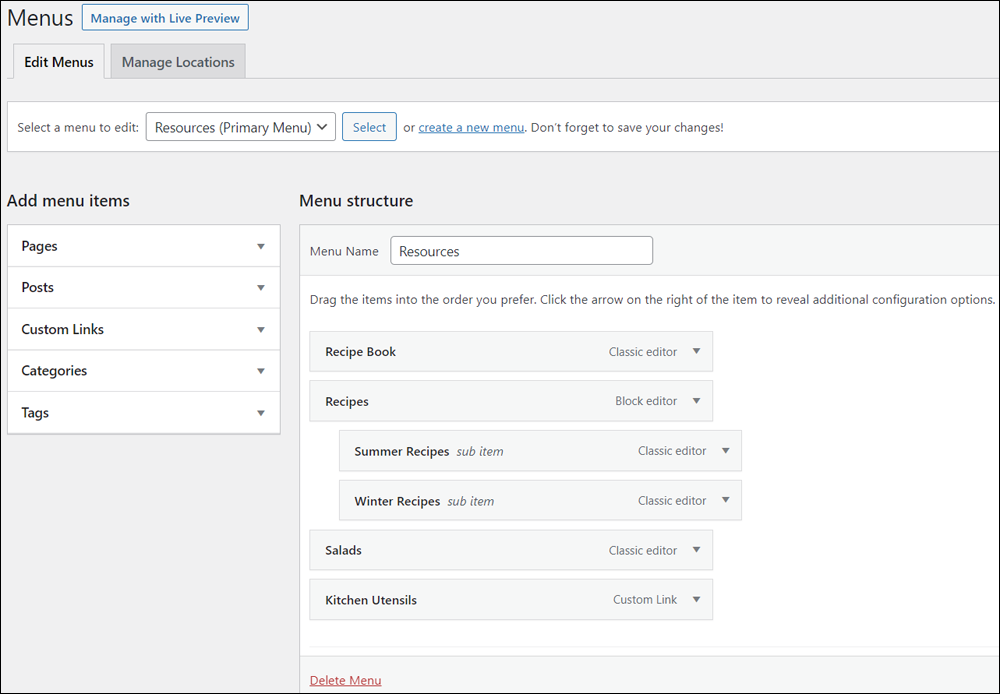
Before adding a custom menu widget, make sure that you have already set up and configured a menu in the Menus section.
If you need help creating menus, see this tutorial: How To Use Menus in WordPress
Add a Navigation Menu widget to the sidebar widget area using drag and drop or by selecting the widget in the Available Widgets area and clicking the ‘Add Widget’ button.
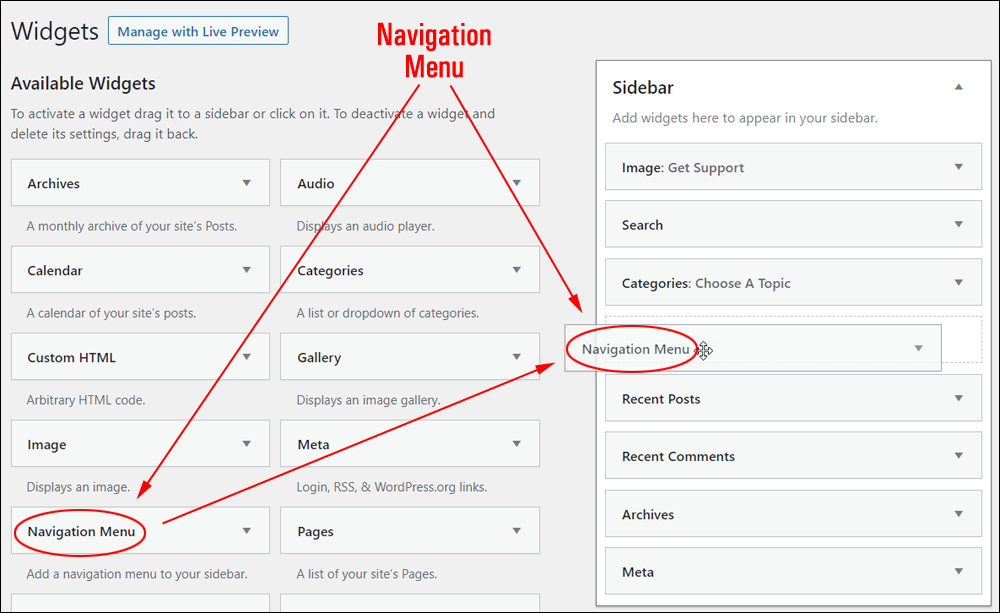
In the widget settings, select the menu you would like to display in the sidebar from the Select Menu: drop-down.
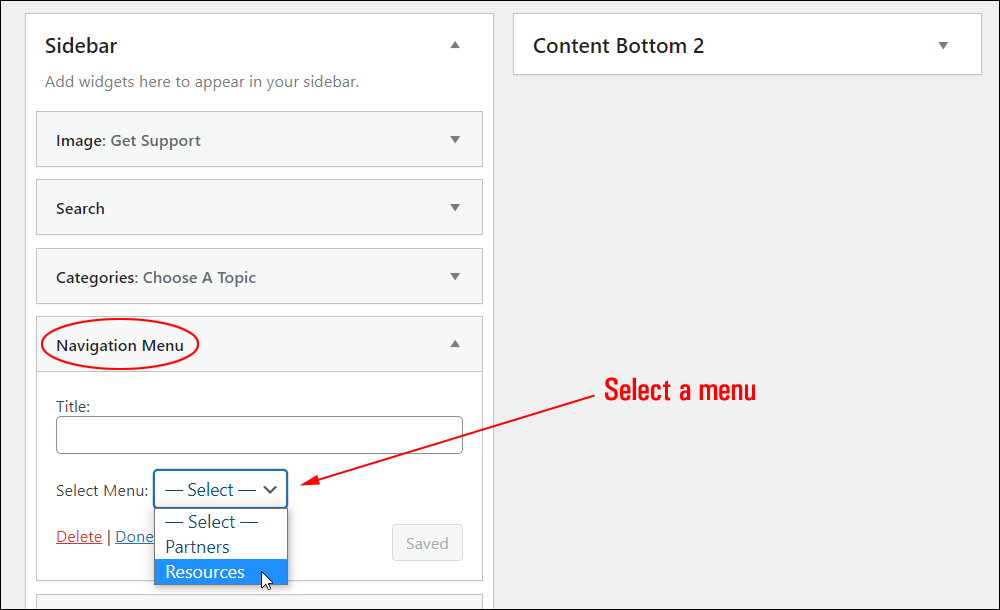
Give the menu widget a title and click the Save button to update your settings.

The menu widget will now display to visitors on your sidebar.
If using the block-based Widgets editor, select one of the Navigation blocks to add a menu with links.

Add A Video
The WordPress Video Widget lets you add video files to your sidebar from your Media Library, YouTube, Vimeo, or an external storage location.
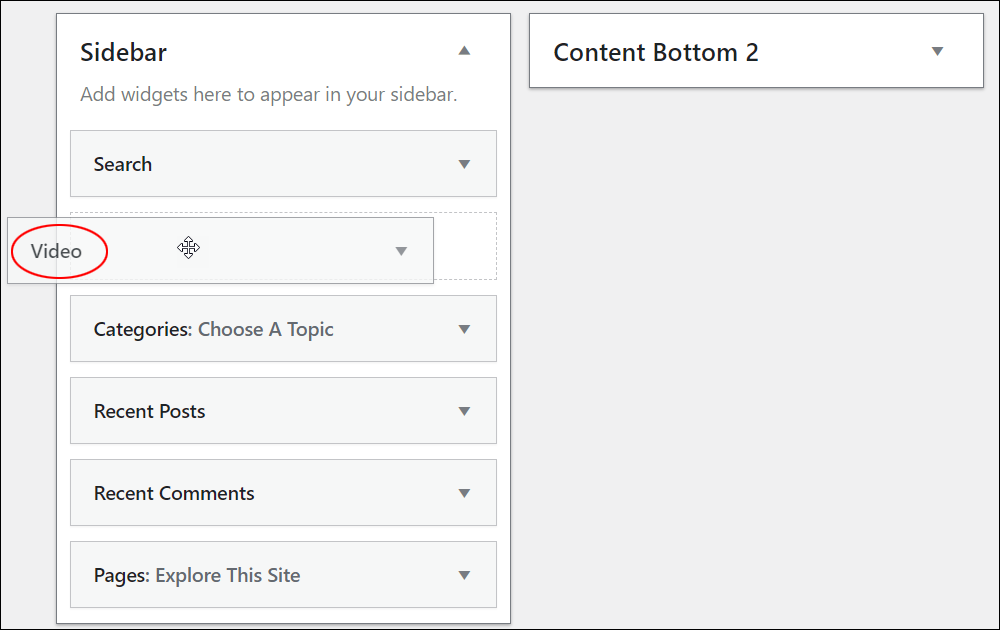
To add a video to the sidebar, drag a Video widget to your active widgets area or select the widget in the Available Widgets section and click the ‘Add Widget’ button.
Click the ‘Add Video’ button.
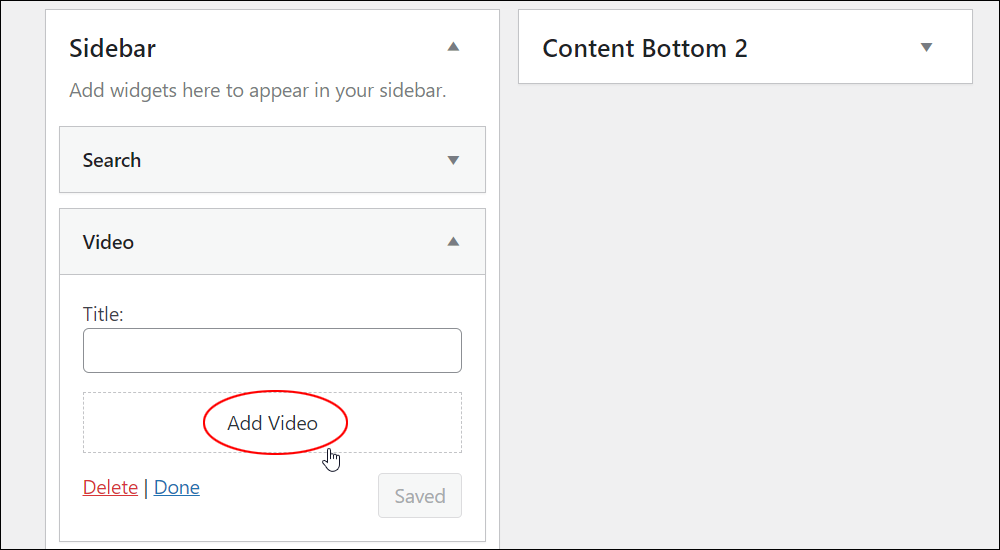
Select a video from your media library or add an external video URL and click the ‘Add to Widget’ button.
If you need help adding videos to WordPress, see this tutorial: How To Add Videos In WordPress
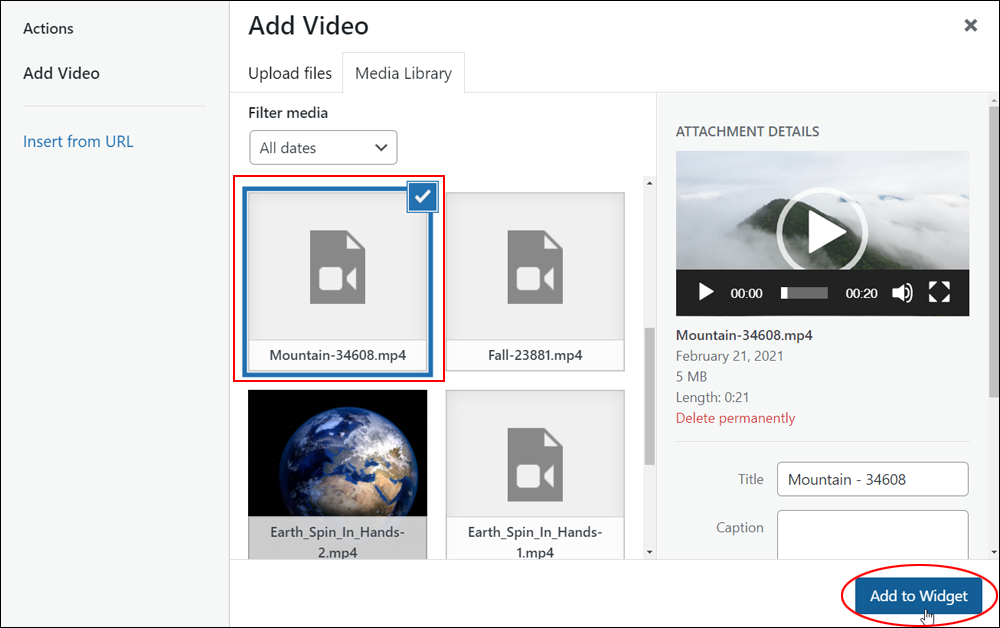
In the Video widget settings area, you can do the following:
- Title: – Add a title to the widget (optional)
- Edit Video – Edit your video’s details.
- Replace Video – Display a different video on your widget.
Click ‘Save’ when done.
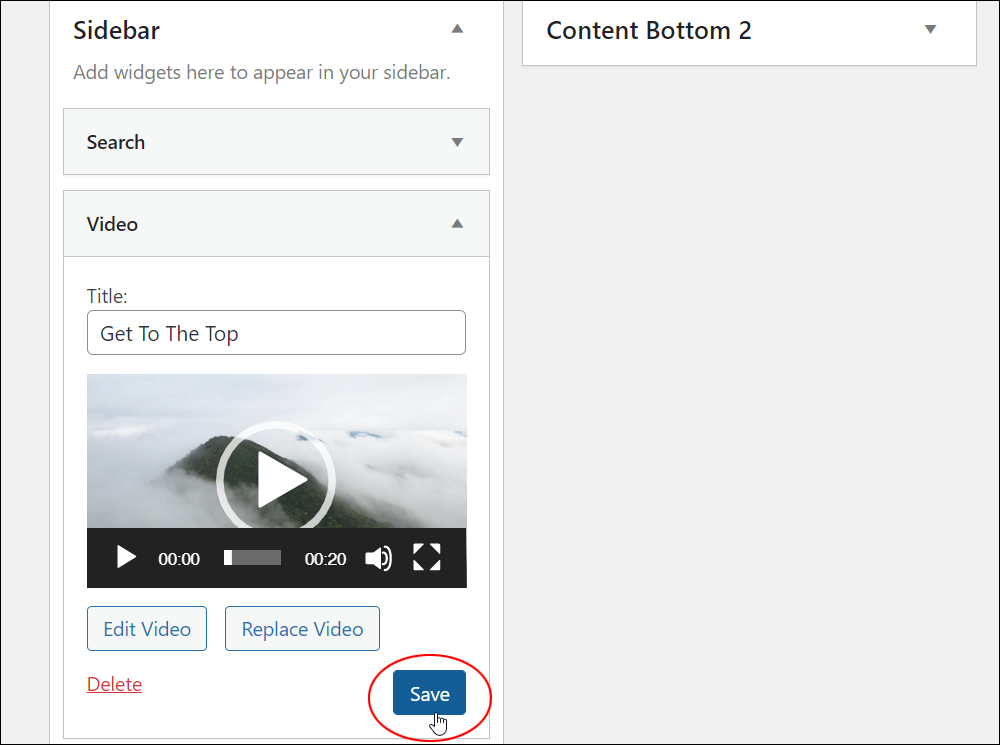
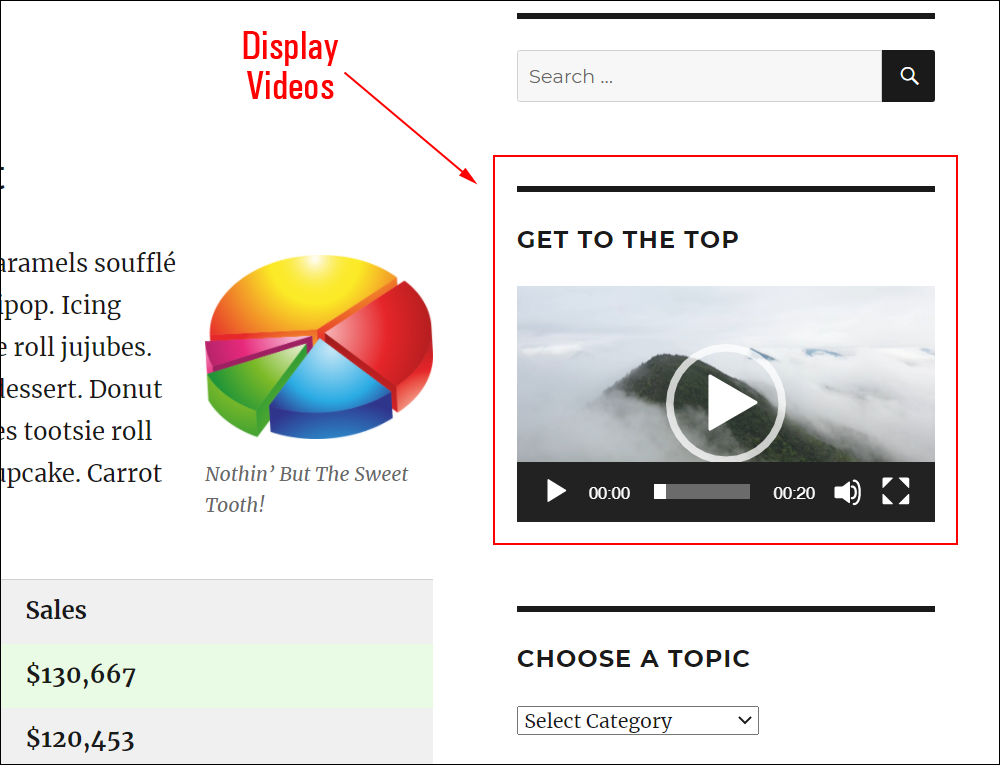
The video will display on your site.
If using the block-based Widgets editor, see this tutorial: Video block
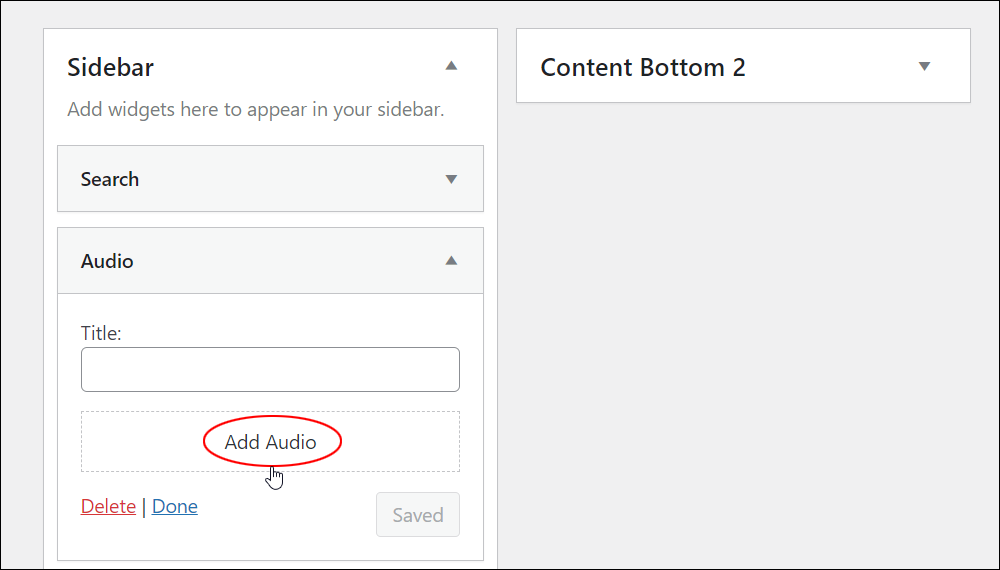
Add An Audio File
The WordPress Audio Widget lets you add audio files like podcasts, music, or a personal greeting to your sidebar from your media library or an external storage location.
To add an audio file to your sidebar, drag an Audio widget to your active widgets area or select the widget in the Available Widgets section and click the ‘Add Widget’ button.
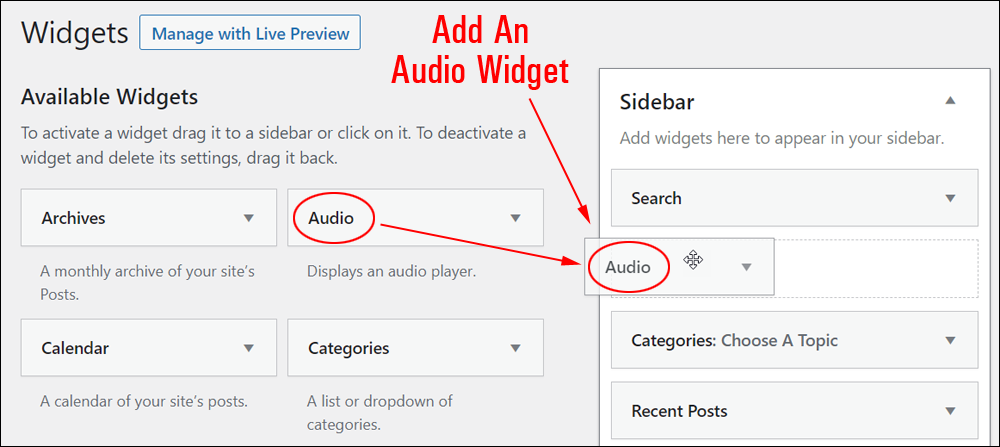
Click the ‘Add Audio’ button.
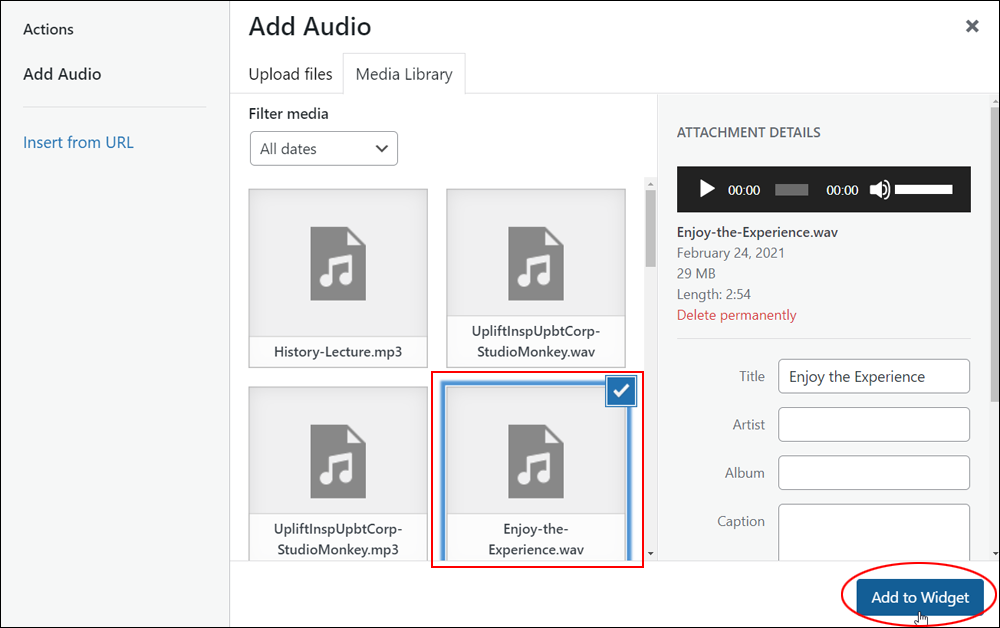
Select an audio file from your media library or insert the URL of an audio file stored in an external location.
If you need help adding videos to WordPress, see this tutorial: How To Add Audio Files In WordPress
In the Audio widget settings area, you can do the following:
- Title: – Add a title to the widget (optional)
- Edit Audio – Edit your audio file’s details.
- Replace Audio – Display a different audio on your widget.
Click ‘Save’ when done.
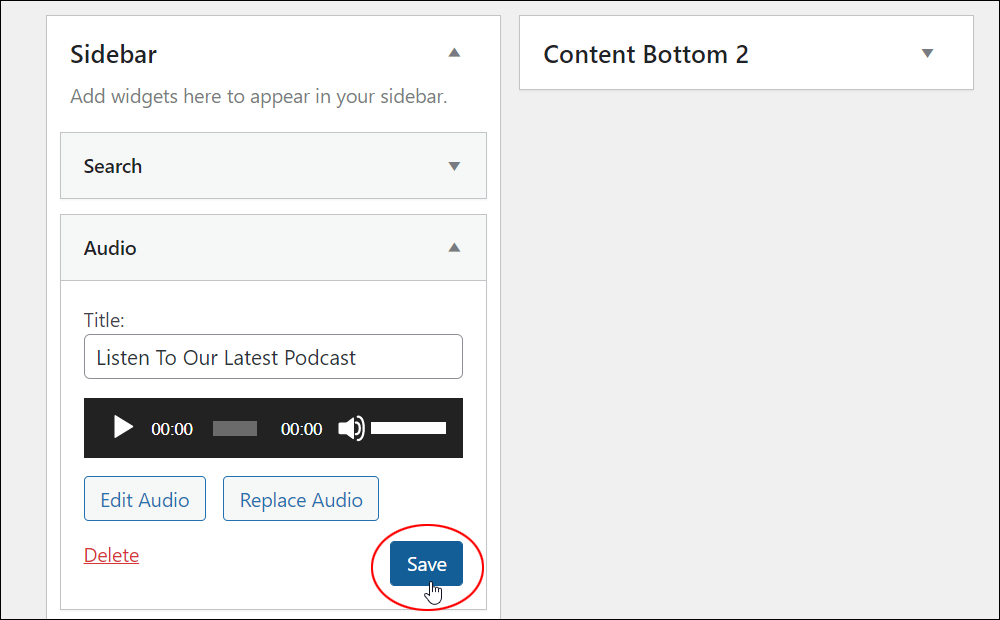
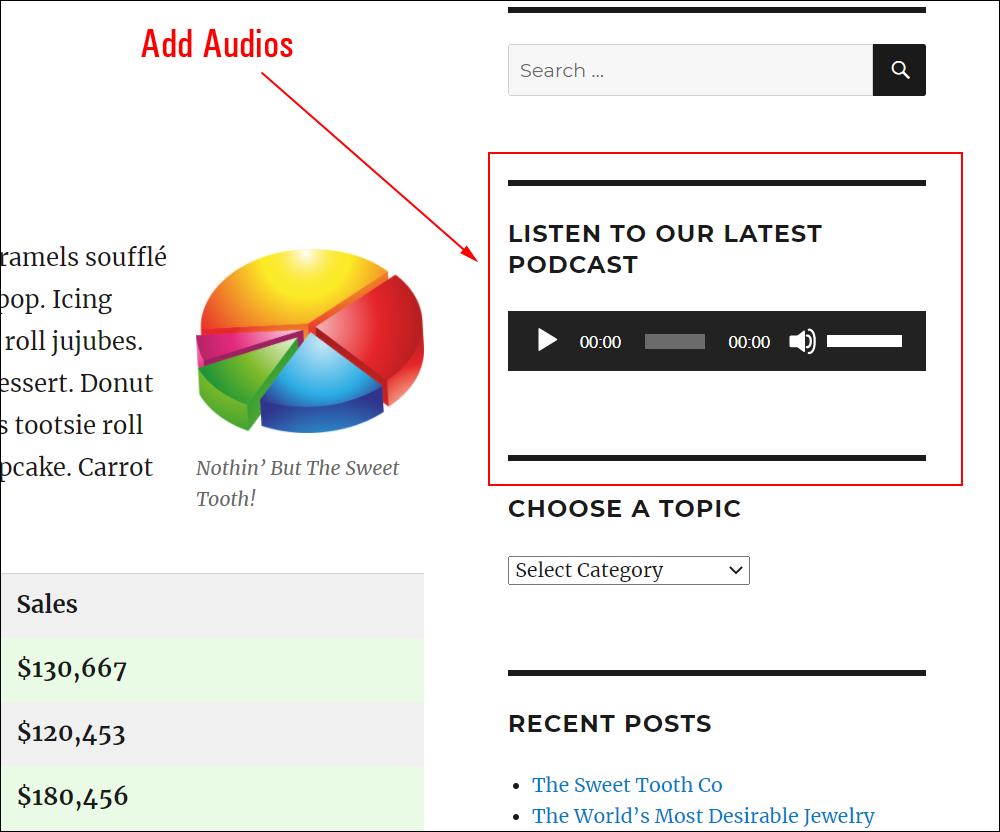
The audio file will display on your site.
If using the block-based Widgets editor, see this tutorial: Audio block
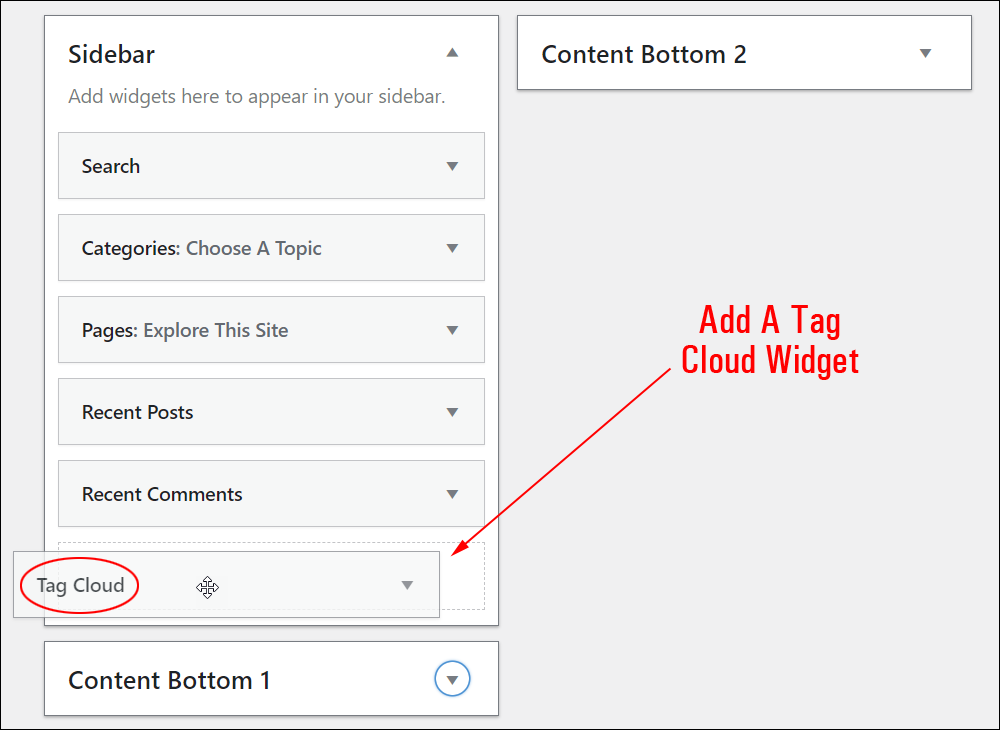
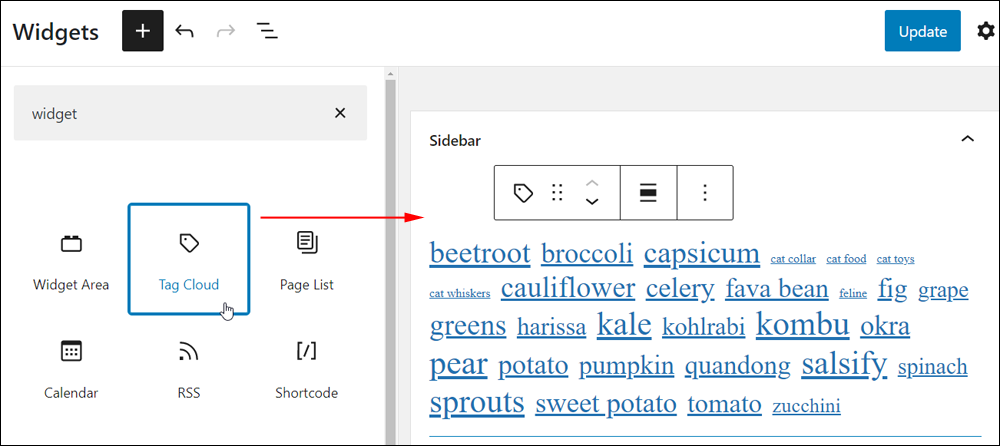
Add A Tag Cloud
Let’s add a widget to your sidebar that will display a tag cloud with clickable tags.
To add a Tag Cloud widget, select it from the Available Widgets section and drag it to your sidebar widget area.
![]()
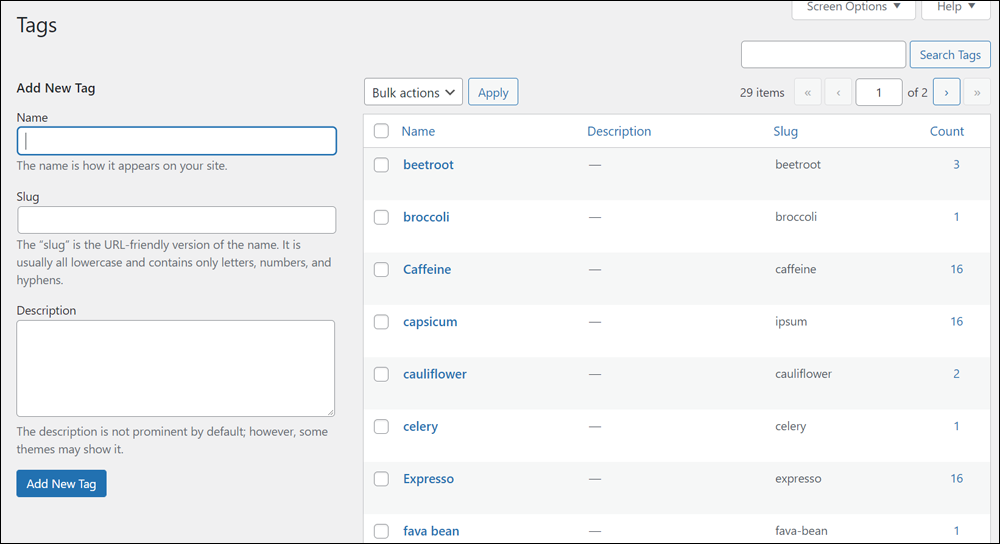
You can manage all your site’s tags in the Tags screen.
If you need help using post tags, see this tutorial: How To Use Post Tags In WordPress
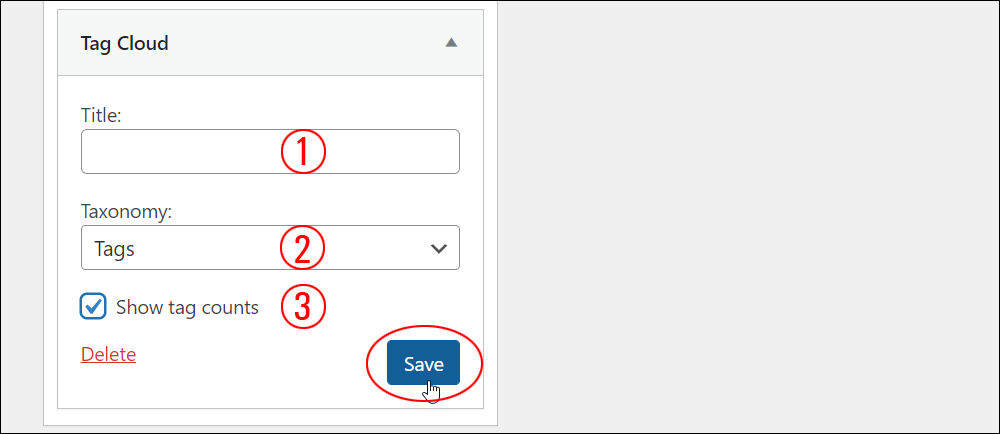
After adding the Tag Cloud widget to an active widget area, you can do the following:
- Title: – Add a title (optional)
- Taxonomy: – Select an option to display in the tag cloud (e.g. display tags or categories).
- Show tag counts – Check this box to display the tag (or category) count in the Tag Cloud.
Click Save when done to update your settings.
Your Tag cloud will now display on your sidebar.
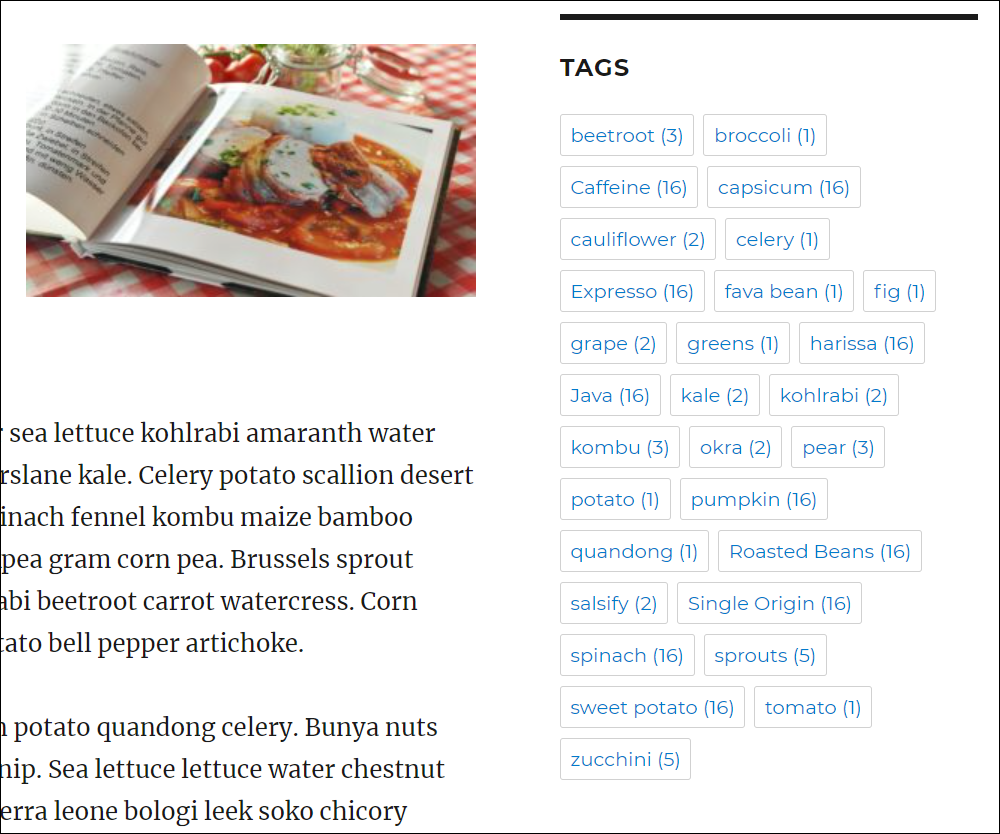
If you have configured the Tag Cloud widget to display Categories instead of Tags, then you will see a list of clickable categories instead.
If using the block-based Widgets editor, use the Tag Cloud block.
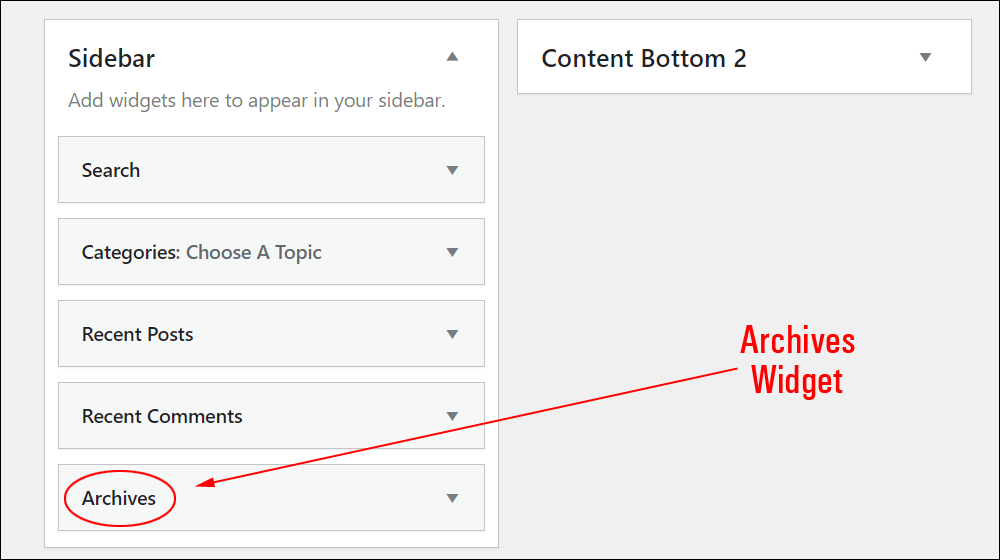
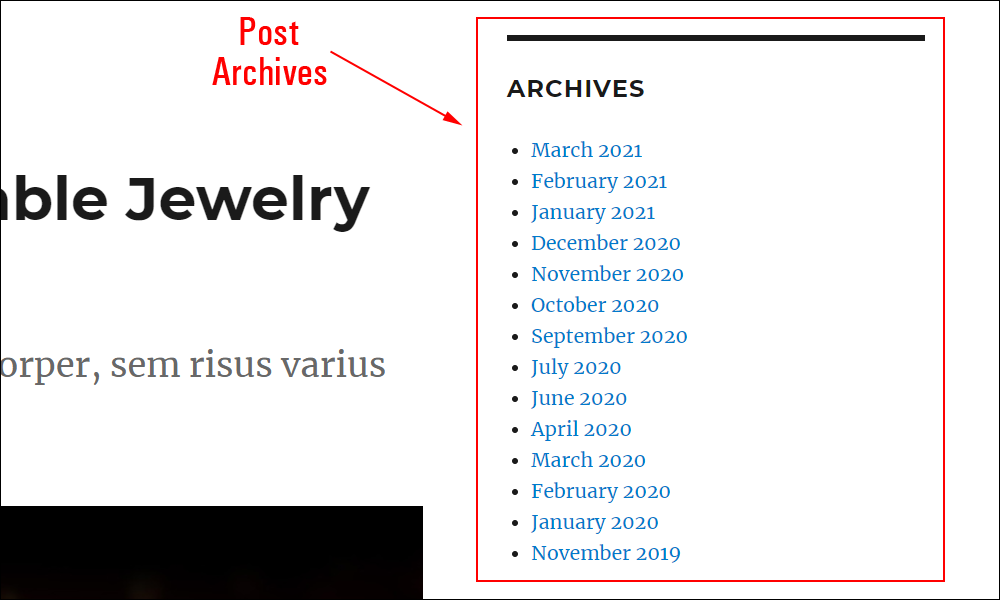
Add Post Archives
Let’s configure the default Archives widget.
As you publish new posts, older posts get pushed further down the chronological list and become less visible to your site visitors.
Your posts are still there and published on your site, they’re just not as visible.
The Archives Widget gives your site visitors access to all your previously published posts.
Clicking on a Post Archives link will take users to an Archive Page listing all the posts published on your site for that month.
This widget is simple to configure.
You can add a title and choose to display items as a dropdown menu and display post counts (display the number of posts published each month).
Click the Save button when done to update your settings.
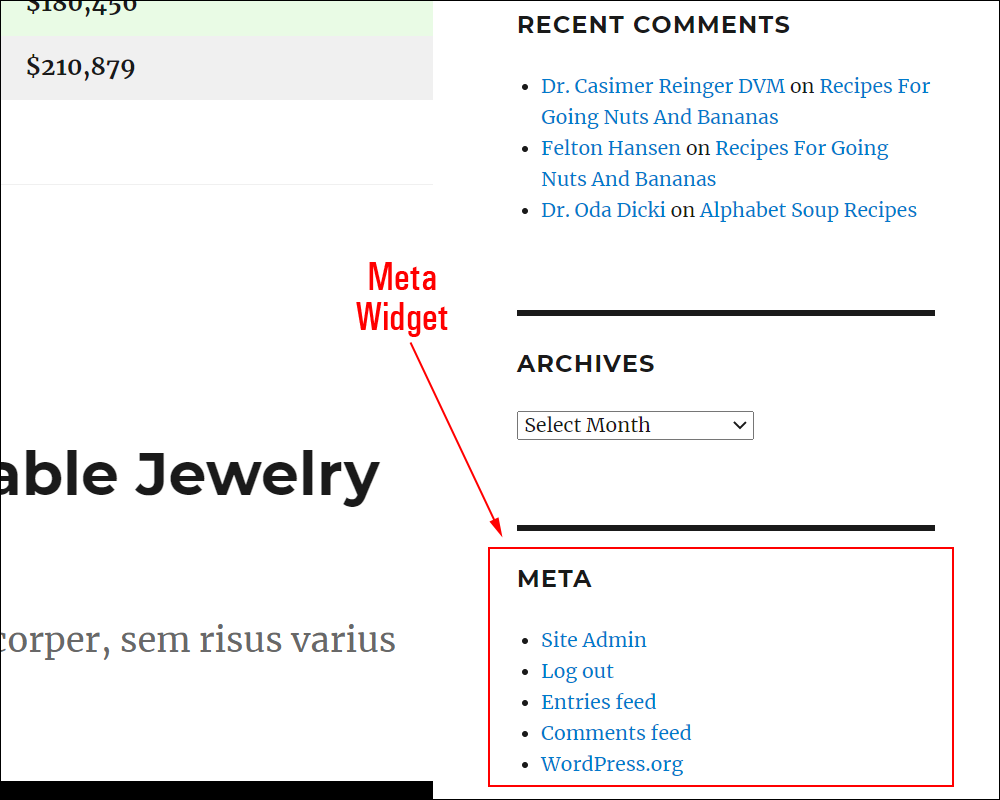
The screenshot below shows a published Archives widget set up to display posts as a dropdown menu with post counts enabled.
If using the block-based Widgets editor, see this tutorial: Archives block
Meta Widget
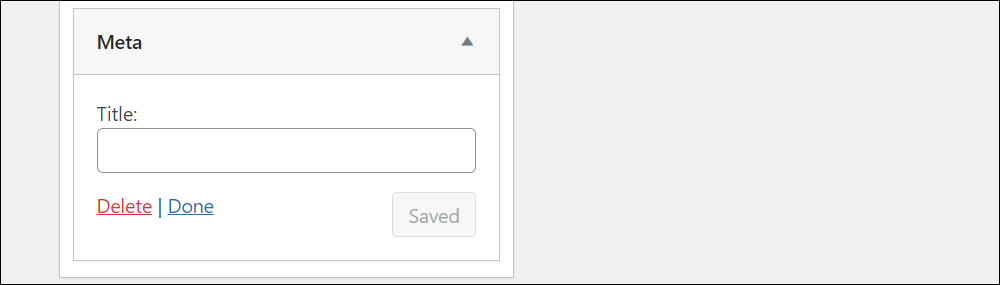
To complete this tutorial, let’s talk about the Meta widget.
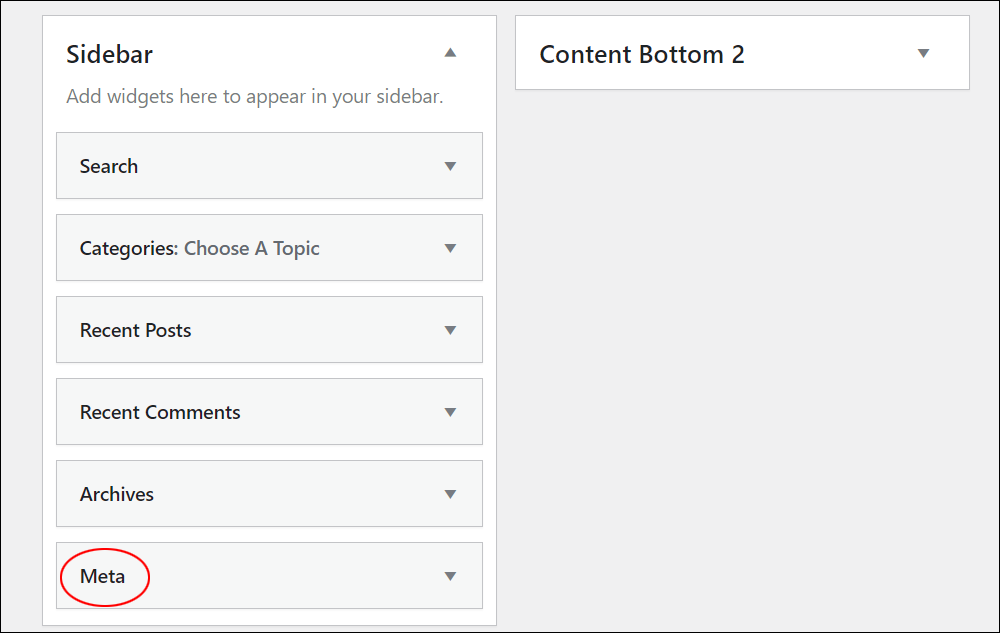
The Meta widget is a default widget used mostly for administration purposes.
Essentially, this widget displays a link to log into your site, links to your site’s RSS feeds, and a link to WordPress.org.
There’s nothing to configure here. You can add an optional title to the widget or click the Delete link to remove the widget from your sidebar.
Alternatively, if you want an easy way to log in without making it prominent on your sidebar, drag the widget to another widgetized area like your footer.
Create Your Own Custom Widgets Without Coding – Simple Cheat
Most of the widgets you will use will either be installed by default when you create a new WordPress site or be automatically added to your Available Widgets area when you install new plugins on your site.
If you want to create your own custom sidebar widgets containing images, text, links, scripts, etc. without touching any code, here is a really easy way to create a custom widget using the WordPress Classic editor:
First, create a new Post and add the content that you would like to display on your sidebar (or footer, header, etc.) to the post’s content area.
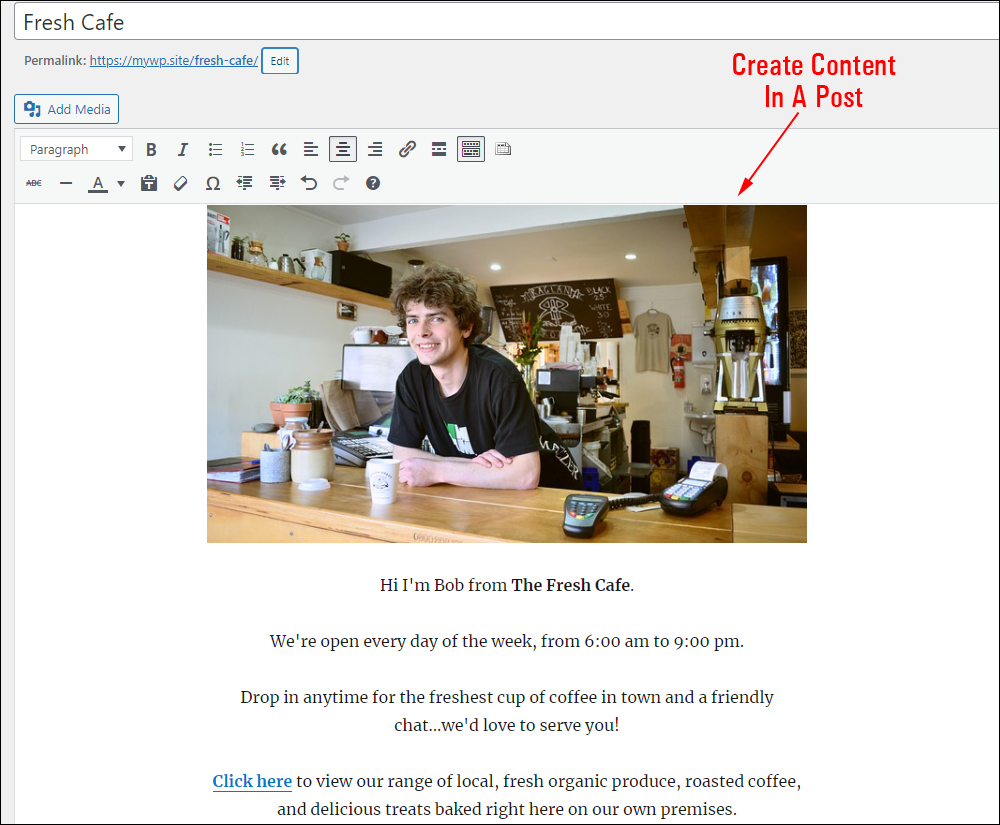
Note: Keep in mind that you don’t have a lot of room to add content on your sidebar, so try and keep your information concise.
Also, don’t worry about saving or publishing your Post – all we want is to copy the HTML code of the content we’ll be creating so we can paste it into our custom widget later.
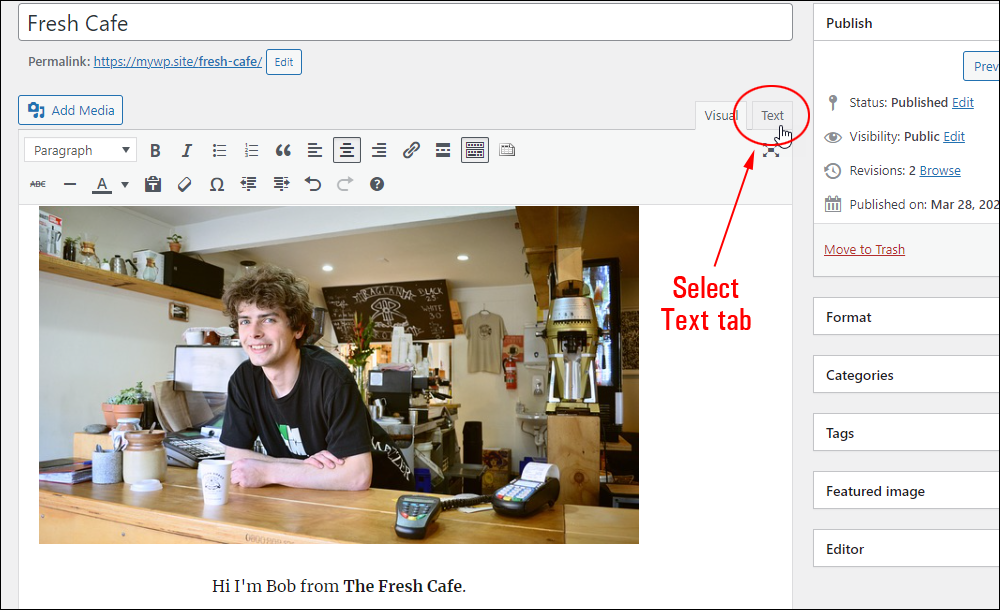
After creating your content in the post editor, switch to the Text tab.
Select everything inside the text editor area and copy it to your clipboard.
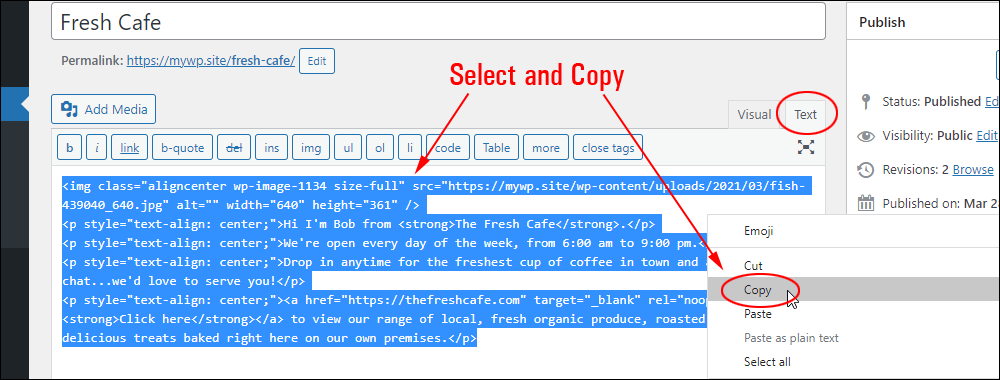
Next, go to your Widgets Screen and add a new Text widget to your sidebar, then paste the content from your clipboard into the content area, and click Save.
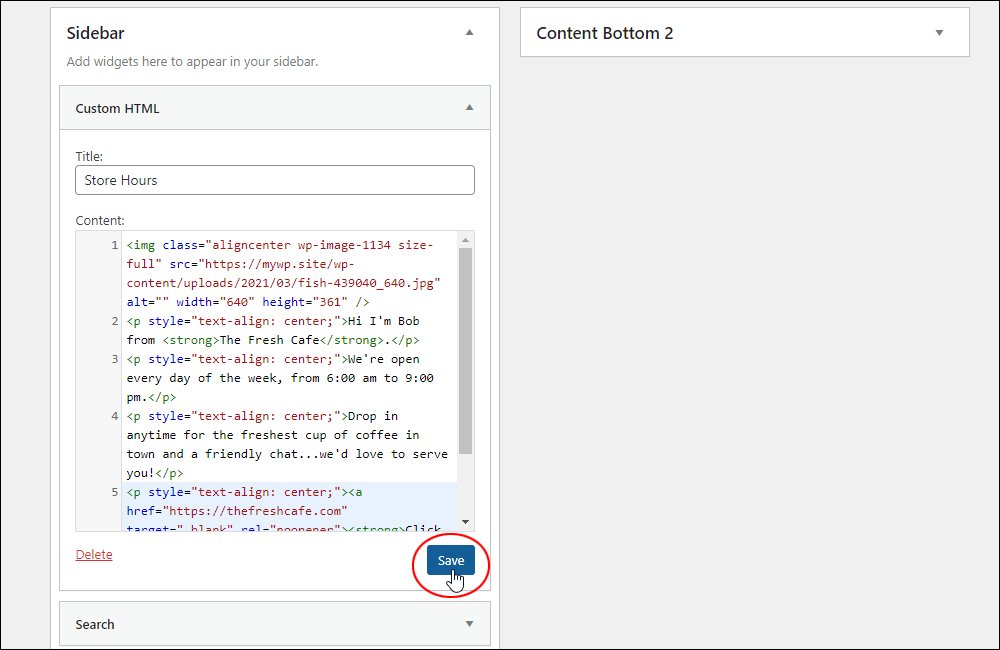
Your custom widget will be added to your sidebar.
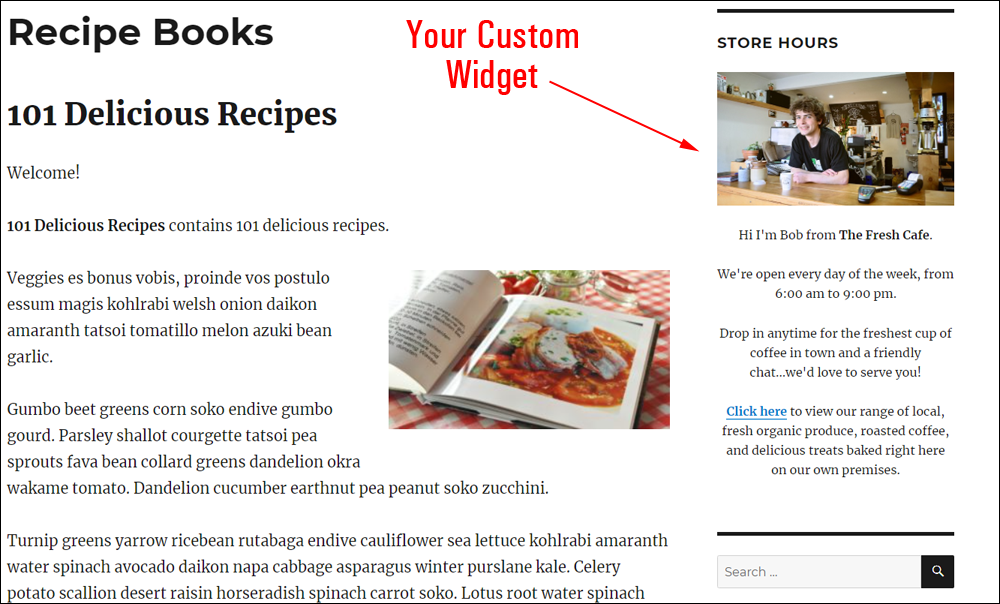
Congratulations! Now you know how to use and configure a number of commonly used widgets.
***
This is the end of part 2 of this tutorial series on using Widgets.
Now that you know how to configure some commonly used widgets on your site, let’s add some more advanced widgets to your site.
To view the next tutorial on our series on using WordPress widgets, click here: How To Use WordPress Widgets – Part 3
***

Updated: July 5th, 2024