How To Create Pages In WordPress
In this tutorial, you will learn how to create a page in WordPress.
Pages are a useful way of presenting information on your website that is unlikely to change.
Examples of pages used in WordPress include:
- An About Us page
- Legal information pages (e.g. Terms and Conditions, Privacy Statements, Disclaimers)
- Products and services pages
Creating pages in WordPress is like creating Posts. Screens can be customized in the same way using drag and drop, expanding and collapsing sections, and enabling/disabling options in the Screen Options tab.
Like Posts, Pages use the same content editors and offer features like distraction-free writing mode, and autosave and post-revisions.
In short, the Page editor works in mostly the same way as the Post editor, but there are some Page-specific features, such as those found in the Page Attributes box, which we will cover in this tutorial.
Notes:
- Before completing this tutorial, make sure you understand the difference between Posts and Pages in WordPress.
- We also suggest reviewing this tutorial, as creating posts and pages follows a similar process: How To Create A Post In WordPress
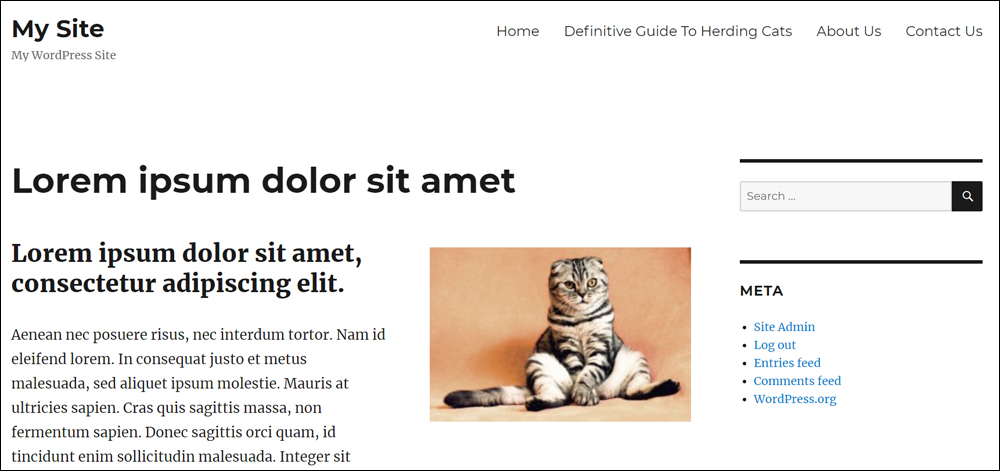
- The screenshots in this tutorial show you how to create pages in WordPress using the WordPress Classic Editor.
- You can also create pages in WordPress using the WordPress Block Editor.
![]()
Tip: To learn how to convert a page to a post in WordPress, see this tutorial: How To Convert WordPress Posts Into WordPress Pages And Vice Versa
What Content Can You Add To WordPress Pages?
With WordPress, you can easily add the following content to your Pages:
1 – Text
You can add plain, formatted, and/or hyperlinked text-based content to pages in a variety of fonts and styles.
Your content can be formatted visually or using HTML formatting tags.
Depending on how your site’s settings and plugins are configured, you can also add meta information to pages like titles, keywords, and descriptions for search engines, create custom excerpts, and more.
2 – Media
You can easily add and embed media into your WordPress content such as images (including photos, logos, graphics, and banners), videos, audio files, downloadable files (e.g. PDF documents), etc.
3 – Code and Scripts
Adding scripts to pages can be useful. For example, third-party service scripts that allow you to manage and control content and its formatting from external or remote locations like advertising banners or subscription forms.
WordPress lets you insert shortcodes directly into pages, display code using formatting tags, and add scripts like JavaScript using various plugins.
Note: Content can also be inserted directly into template files that control Pages in WordPress, but this requires knowing how to edit code like PHP or using advanced plugins to modify the behavior of template files.
How To Create A New Page In WordPress
To create a new page in WordPress, log into your WordPress site, then use one of the following methods:
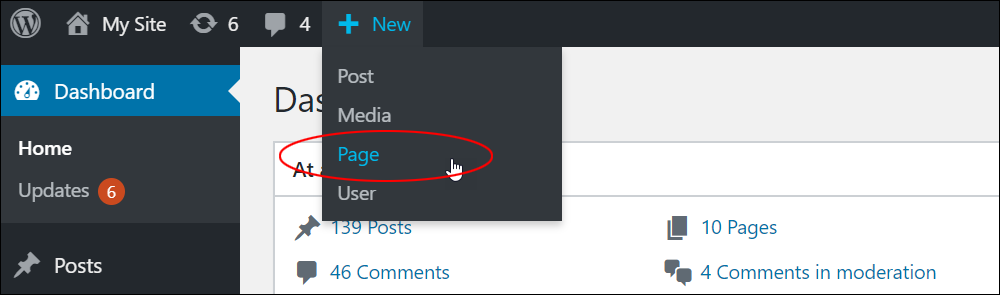
1) Select New > Page from your Admin Toolbar…
or…
2) Go to your WordPress Dashboard menu and select Pages > Add New…

The Add New Page screen will open in your web browser.
Add your page title and begin typing (or paste in) your content into the editor.
WordPress Page Features
The Add New Page section contains various sections and features that let you control the settings of your pages.
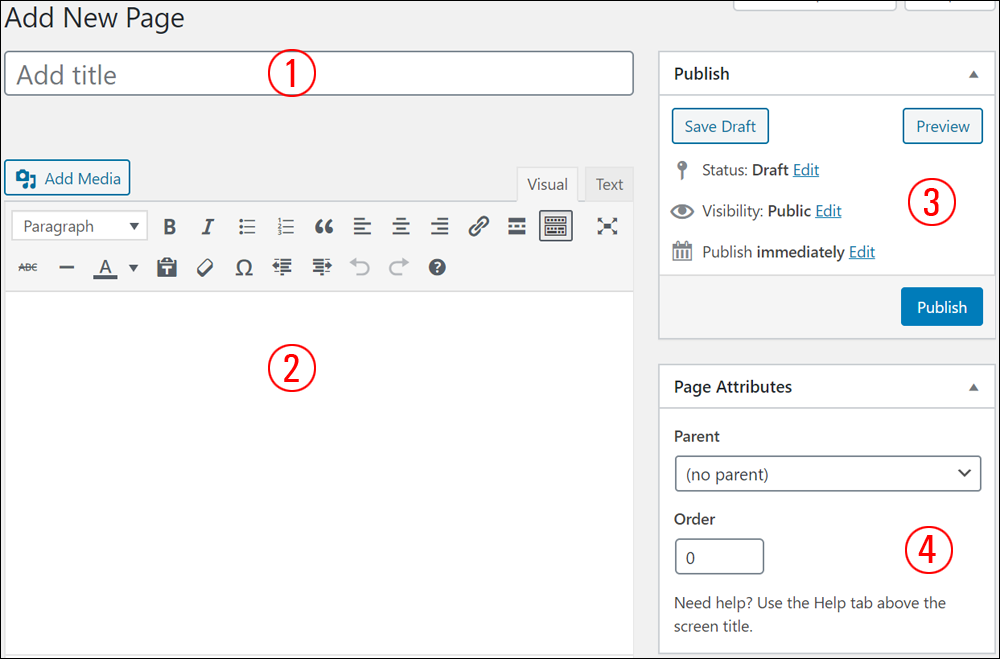
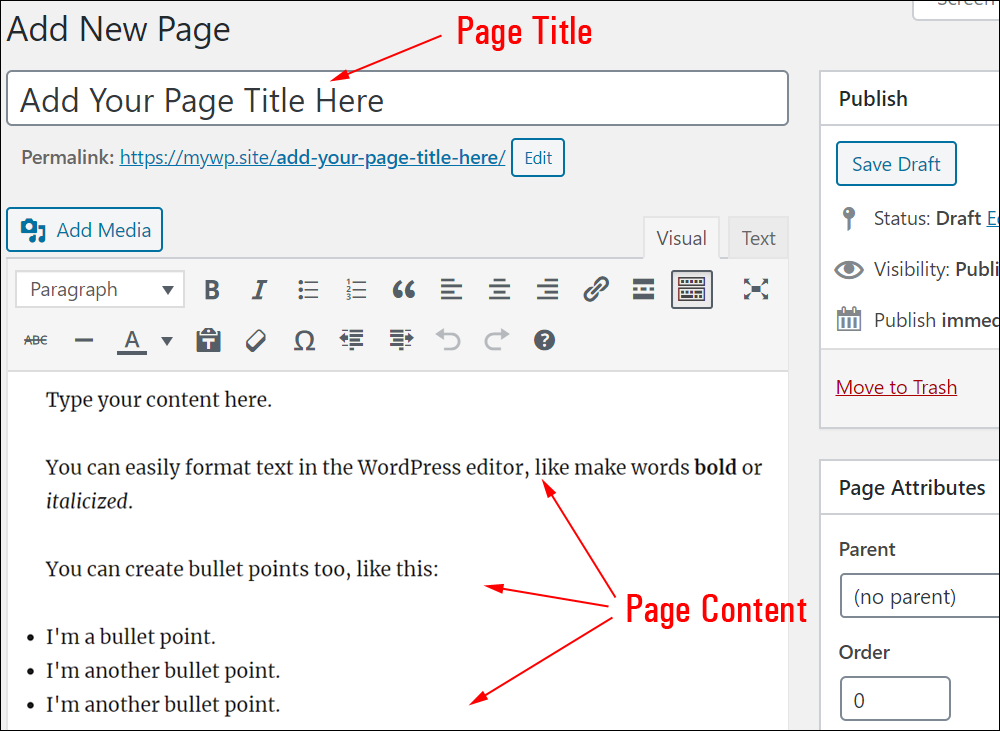
1 – Page Title
The page title section lets you enter the title of your page.
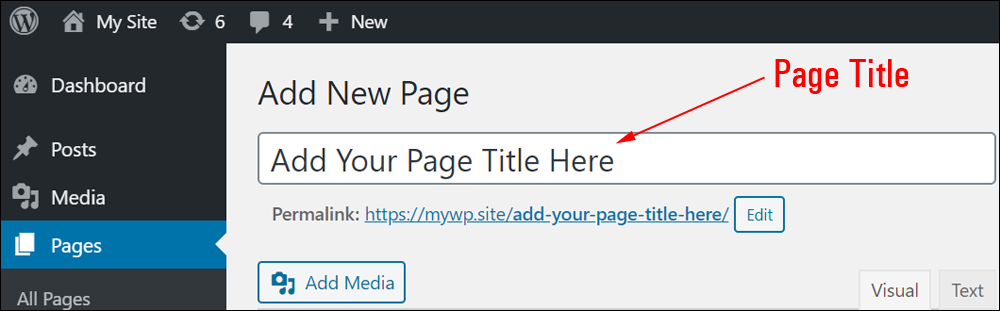
Please note the following:
- You can use phrases, words, and characters for your page title.
- You can also use symbols like commas, apostrophes, quotes, and hyphens in your page title. Your page title will display these symbols, but WordPress will automatically remove them in the page slug to create a valid, user-friendly URL for your page.
2 – Page Content Editor
Type, paste in, and format your page content into this area.

See the previous section for the kinds of content you can add to WordPress pages.
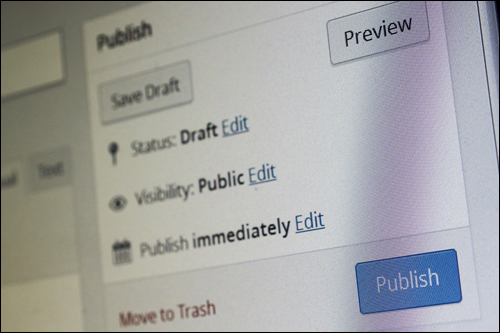
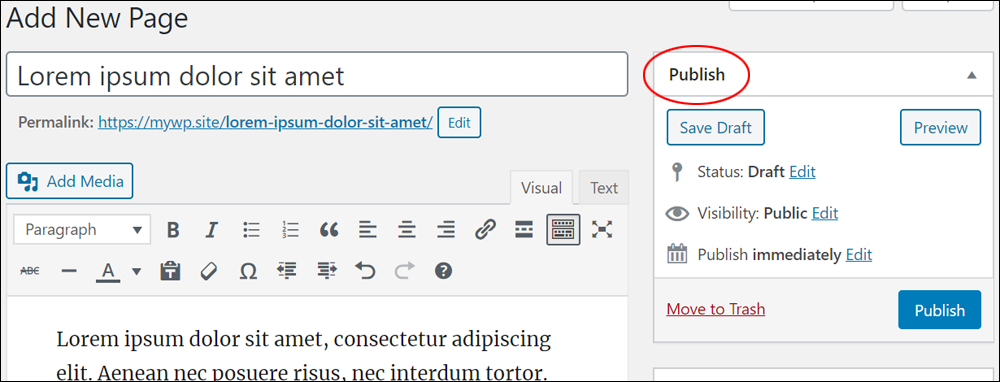
3 – Publish Box
The Publish box contains all the options and settings you need to control the publishing status of your page.

Page Status
The default page statuses in WordPress are:
- Published: Pages are live on your site. Note: whether visitors can access or view your published page depends on where the page is published and its Page Visibility settings (see below).
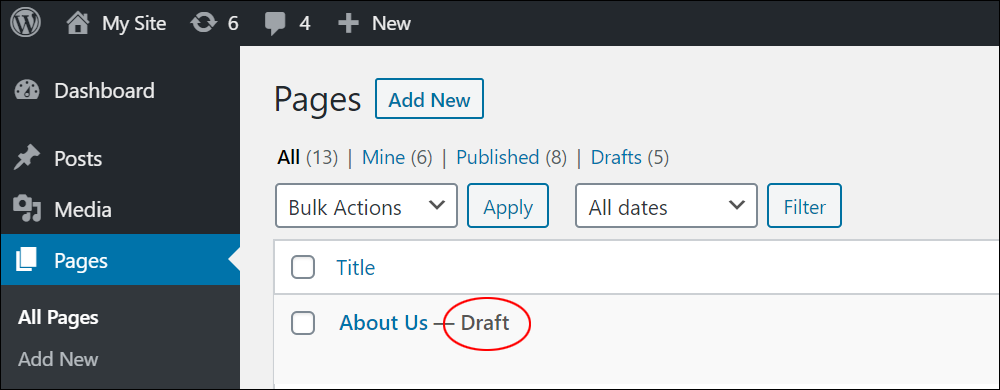
- Draft: Set this page status if your page is not yet ready to publish. Pages set to Draft status can only be viewed by users with the right permission settings. These include the page author, editors, and site administrator.
- Pending Review: This status is similar to Draft but before the page can be published, it needs to be reviewed and approved by someone with page editing permissions (i.e. a user assigned the role of editor or administrator).
The Publish section also includes a Preview button that lets you view any changes you make to your content.
Page Visibility
WordPress lets you specify the following visibility settings for your pages:
- Public: Your page is visible to all website visitors.
- Password Protected: Your page content can only be viewed by someone with the correct password.
- Private: Your page is only visible to logged-in users with editor or administrative privileges. Note that Private pages are not visible in feeds or in any search. Additionally, a page can be private without being password protected.
Additional settings in the Publish box let you do things like:
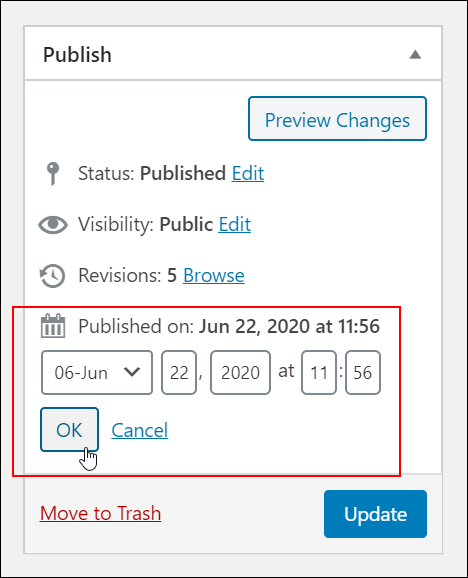
- Change the page’s publishing date and time. You can change the date and time of pages that have already been published and set past and future dates and times. Setting a future date/time for your page changes its status to Scheduled (see our tutorial on how to schedule pages in WordPress),
- Delete your page by moving it to the trash.
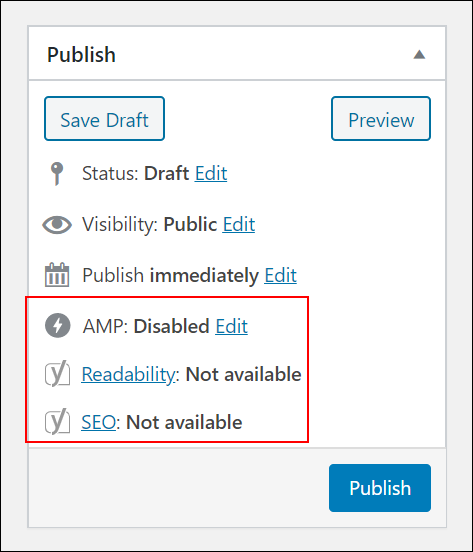
![]()
Installing certain plugins on your site can add new options and settings to your Publish box.
If your page status is set to Draft, a Save Draft button will display in your Publish box.
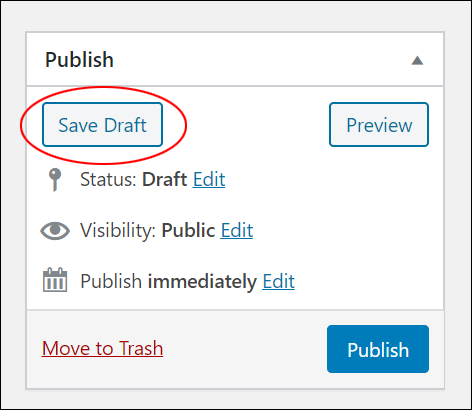
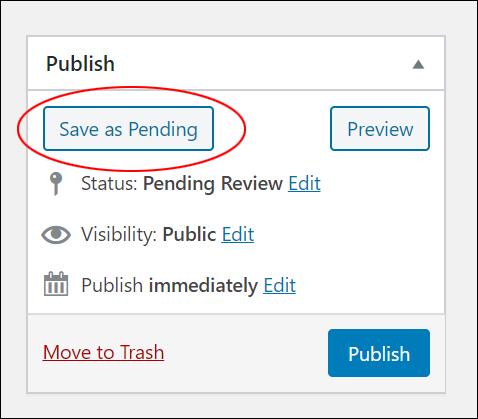
If your page status is set to Pending Review, the button will change to Save as Pending.
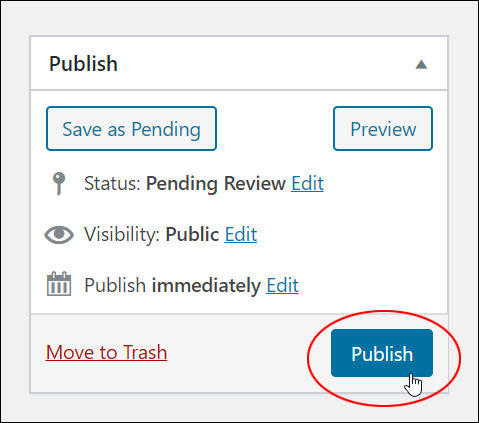
When you’re ready to publish your page and make it go live, click the Publish button.
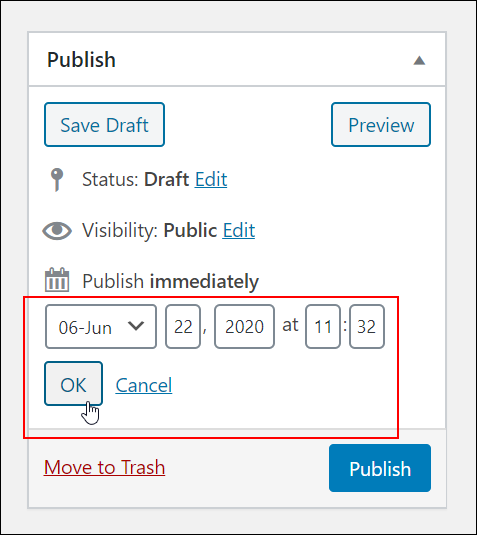
You can edit the publishing date and time of your page by clicking the Edit link above the Publish button and changing its settings.
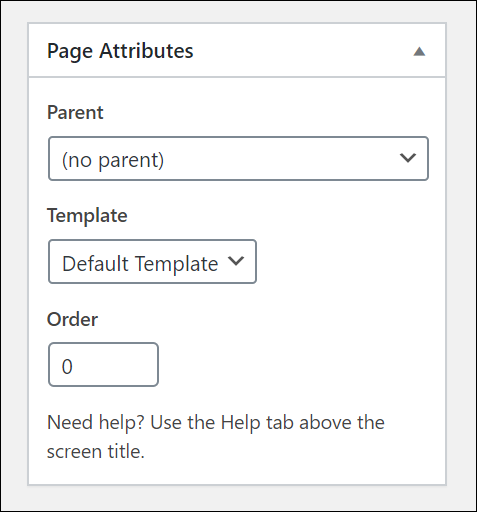
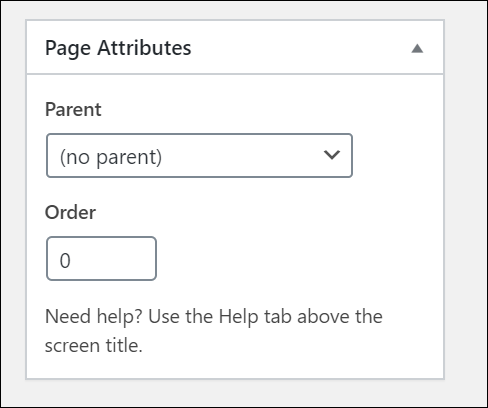
4 – Page Attributes
The Page Attributes box lets you set page parents and templates, and change the order your pages display in places like the Table of Pages, menus, lists, etc.
Parent
Use this option to nest pages in hierarchical order.
A Parent page sits at the top level of the hierarchy with child pages nested within.
You can create unlimited hierarchical (nested) pages in WordPress by saving and publishing pages under parent pages.
For example, let’s say that your website is all about ‘cooking’ and you want to create a section to display other recipe pages on your site.
You could have a top-level page for your main recipes section, then add nested pages (i.e. subpages) for each of the main types of recipes featured on your site, e.g.:
- Recipes
- Vegetarian Recipes
- Chicken Recipes
- Desserts
- etc.
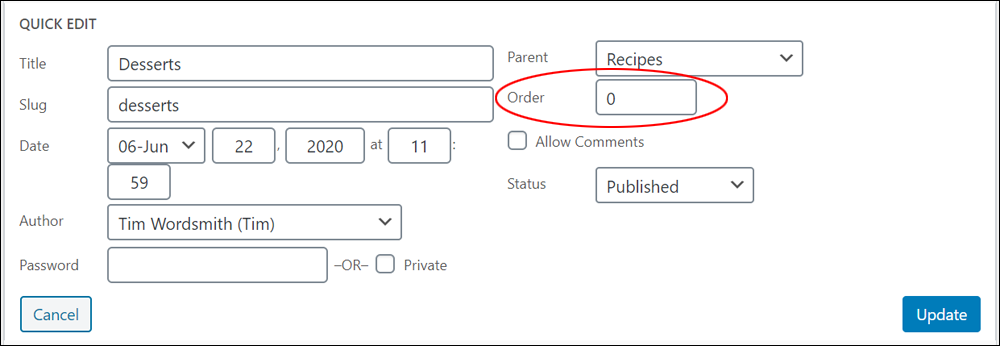
In this example, you would create your ‘Desserts’ page, then select the Recipes page as its parent page from the Parent drop-down menu as shown below…
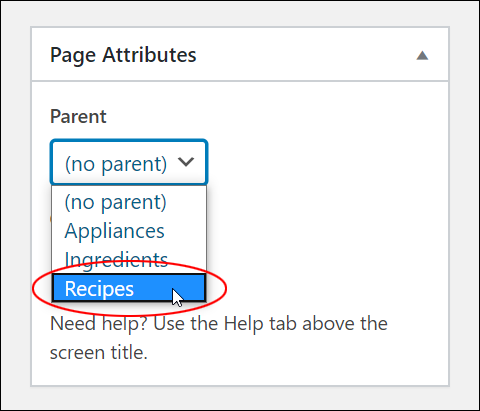
Your new page will be nested under your selected parent page. This hierarchy displays in your page URL and other areas of your site (e.g. site breadcrumbs).
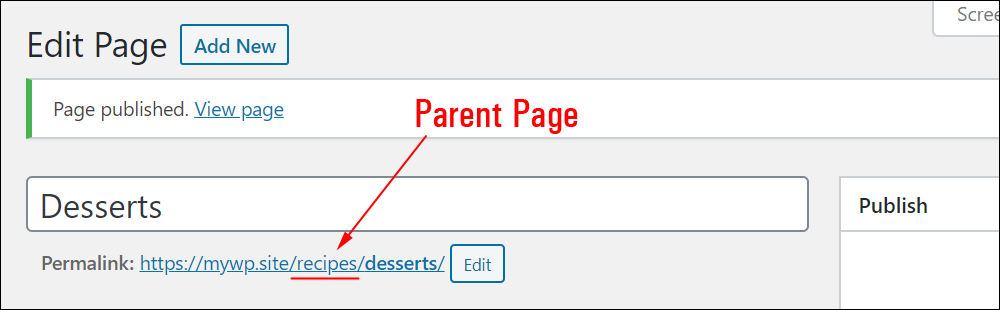
Note: Depending on how your site’s URL settings are configured…
- A Page URL will display which page(s) your page has been published under (i.e. where your page is in a nested page hierarchy).
- A Post URL will display which category your post has been published under.
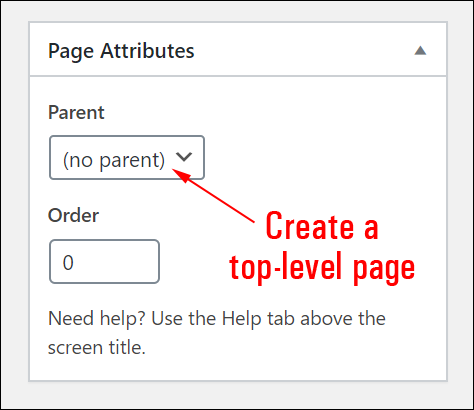
To set any page on your site as a main page (i.e. a top-level page), make sure that the default (no parent) option is selected in the Parent drop-down menu.
Template
Some WordPress themes provide different page templates for your site.
Templates let you easily create pages with additional page elements or custom layouts.
The Template dropdown menu lets you select different layouts for the different types of pages you are adding to your site.
For example, you may want your Contact Us page to have a different look than your product pages. you may also want to set up different layouts for your blog page, a landing page, membership pages, etc.
Depending on the WordPress theme installed on your site, you may see no Template option displayed in the Page Attributes box…
…or a dropdown menu that lets you select from none (i.e. the theme only offers a default template for all pages) to various page templates, such as sales letters, blog pages, membership pages, thank you and download pages, video pages, opt-in form/squeeze pages, support/knowledgebase/helpdesk pages, etc.
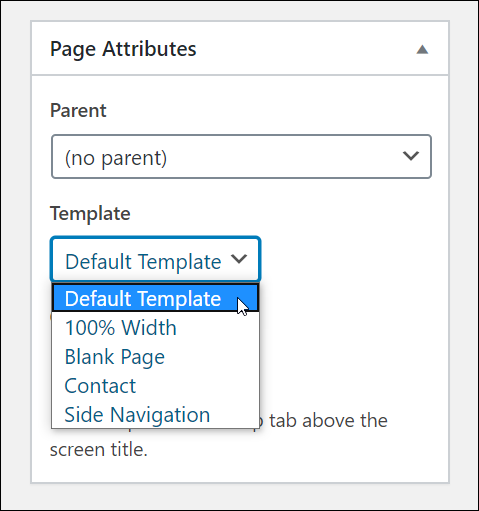
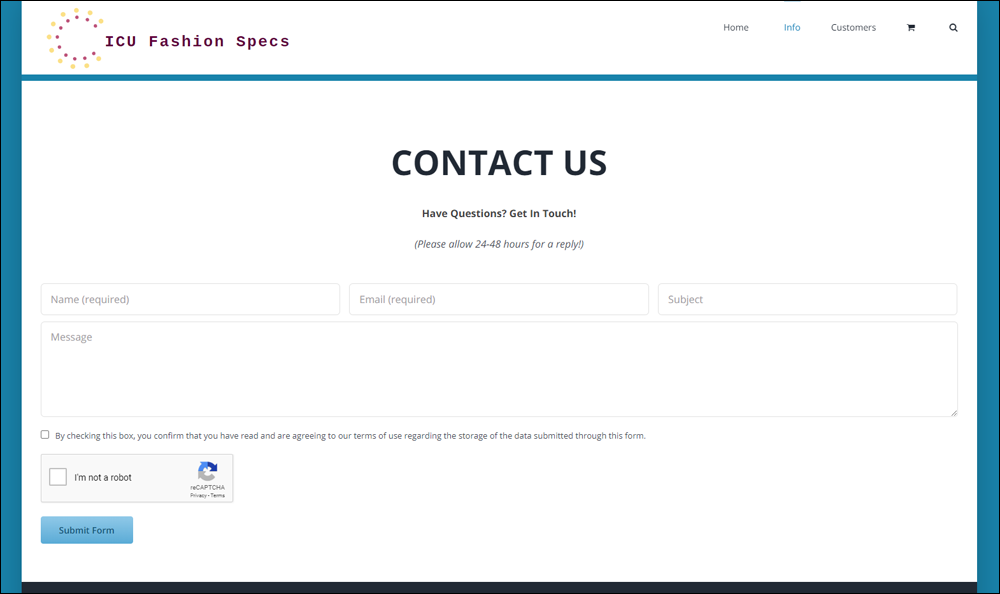
Selecting different templates from the Template drop-down menu will change the layout of your page.
For example, here is a page created using the Contact template in the Avada theme.
Note: Templates can also be customized and modified by editing the template code.
Order
Changing the order of your pages affects how they display in different sections of your site, like your Table of Pages, menus, site maps, etc.
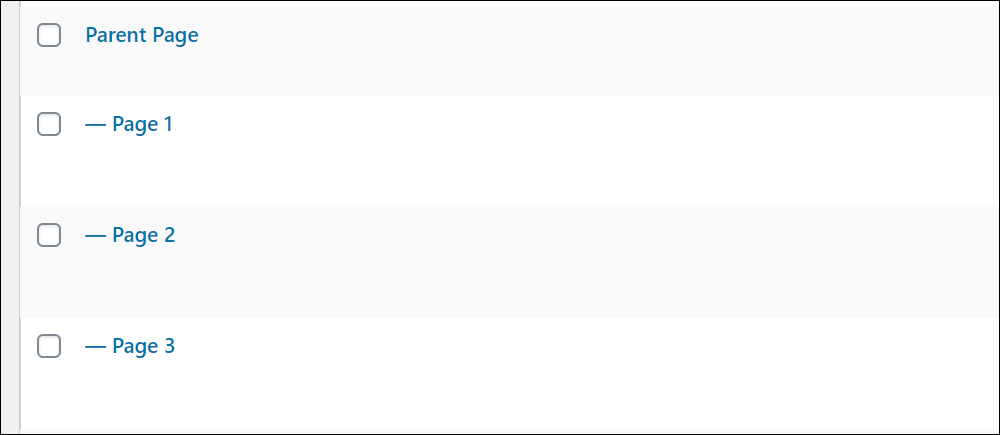
For example, in the screenshot below, the child pages are listed in order below a parent page in the Table of Pages not because they are labelled Pages 1, 2, and 3, but based on their page creation date.
Let’s change the order of these child pages…
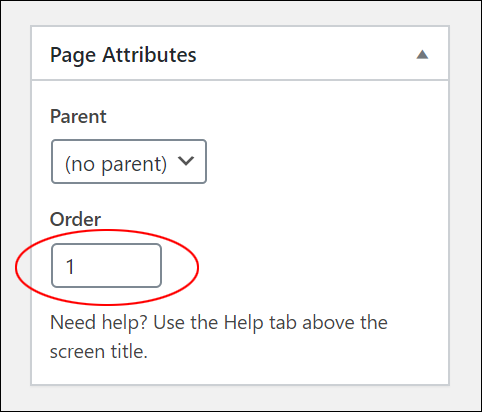
To change the order of your pages, enter a number in the Order field of the Page Attributes box.
You can change the order of your pages by typing in numbers in ascending or descending order. The lower the number, the higher it displays on a list or menu. The default order number is “0” (top of the list)
For example, let’s say that we want our ‘Page 2’ child page to display at the top of our list.
Since the other child pages are also numbered “0” by default, enter the number “1” in the Order field for “Page 2” and click the Update button.
Repeat this process to set the order of your other child pages. In our example, let’s change the order of these child pages from:
Parent Page
- Page 1
- Page 2
- Page 3
To…
Parent Page
- Page 2 (Order field = 1)
- Page 3 (Order field = 2)
- Page 1 (Order field = 3)
Change the values in the order field as per the above example and update your pages.
After refreshing your Table of Pages screen (Pages > All Pages), your new page order should look like this:
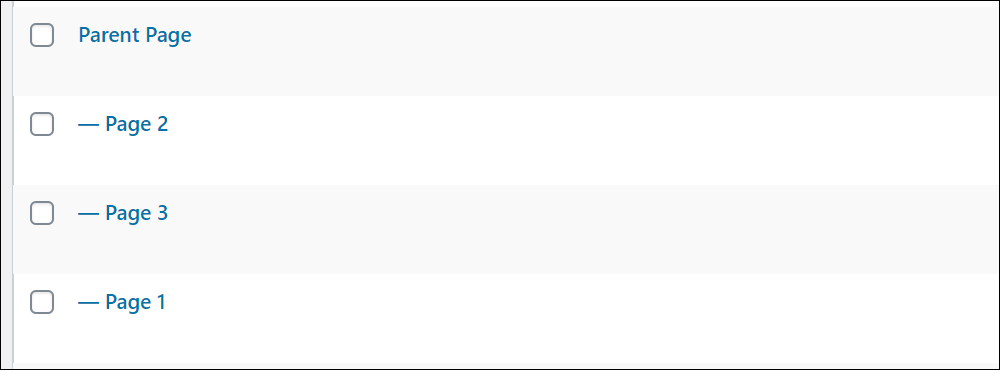
Unless modified by other criteria, the order of these pages will remain as shown above across your site’s menus, tables, lists, etc.
![]()
Useful Tips
Tip #1 – You can also change the order of pages using the Quick Edit feature of WordPress.
To do this, select Pages > All Pages in your dashboard menu, then find the Page you want to reorder, click on the Quick Edit link below the page title, and enter a number into the Order field. Remember to click Update to save your new settings.
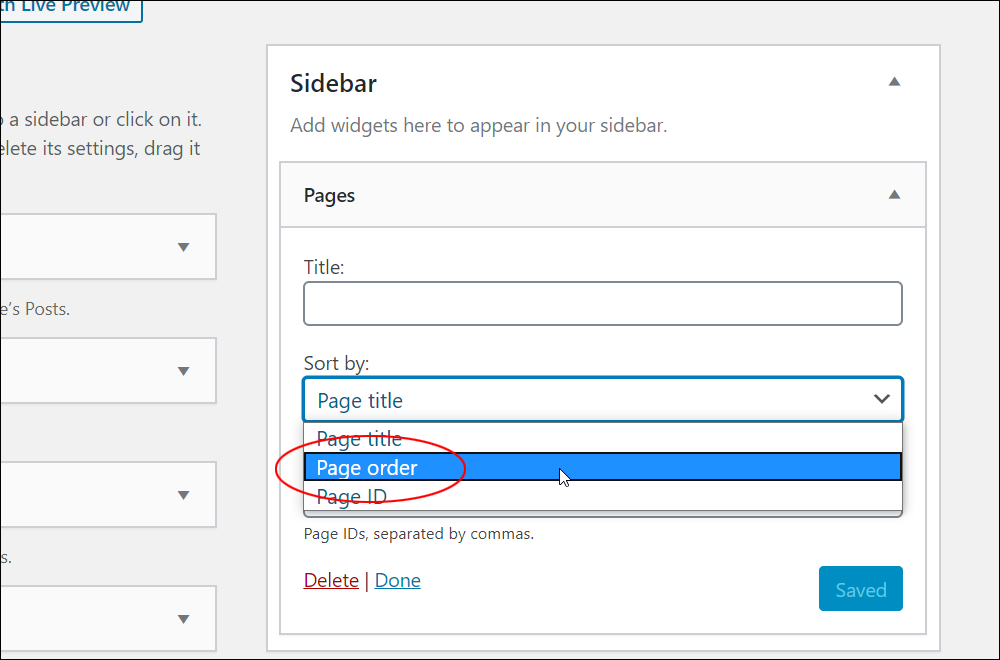
Tip #2 – If you’re using the Pages Widget, set the Sort by: option to “Page order” and click the Save button.
Tip #3 – A plugin like Post Types Order lets you easily reorder pages, posts, categories, tags, etc.
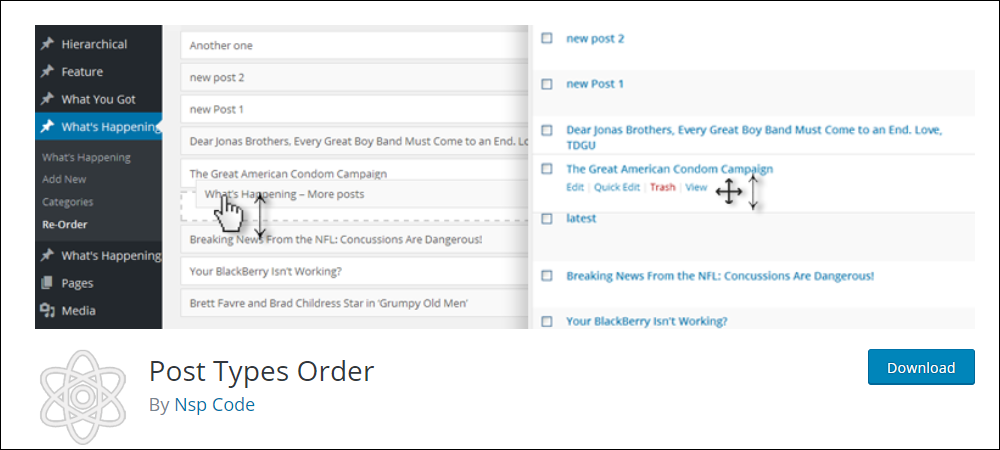
Consider using a plugin like the one above if you have or plan to add many pages to your site, create nested page sections, etc.
Additional Page Features
By default, WordPress hides some features or sections of the Add Page and Edit Page screens. To enable and display these features on your Page screens, click on the Screen Options tab and tick their checkboxes.
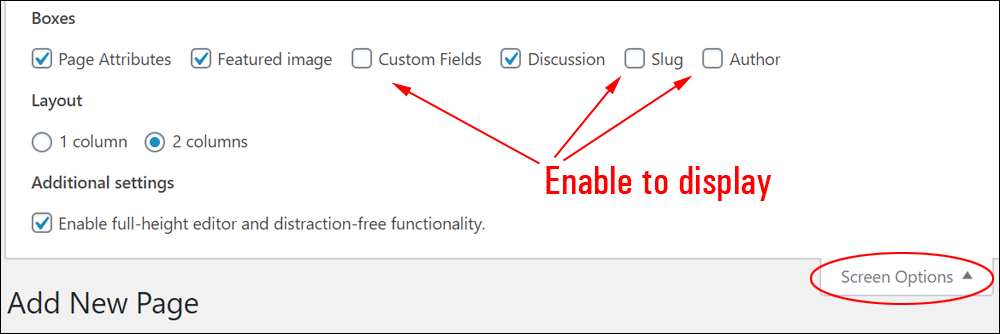
Let’s go briefly through some of these options:
Featured Image
If your WordPress theme allows you to display image thumbnails, then the Featured Image box will be visible on the “Edit Page” screen (make sure this feature has been enabled inside the Screen Options tab).
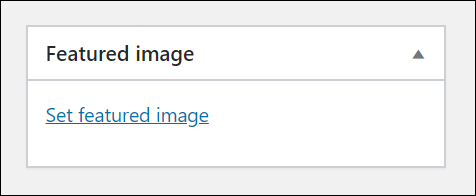
For a step-by-step tutorial on using feature images, go here: How To Use Featured Images In WordPress.
Custom Fields
Custom Fields let you add extra information (known as metadata) to your pages.
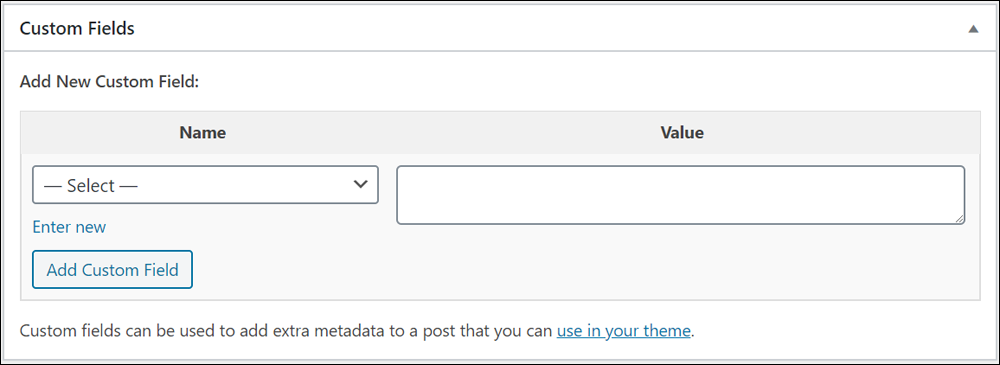
Custom fields are useful for sites featuring similar items with different information required for each item, like product pages, book/movie reviews, video courses, form templates, etc.
For example:
- Book Review
- Book Title
- Book Author
- Genre
- Book Publisher
- Video Course
- Video Title
- Video Category
- Number of Lessons
- Course Duration
- Course ID
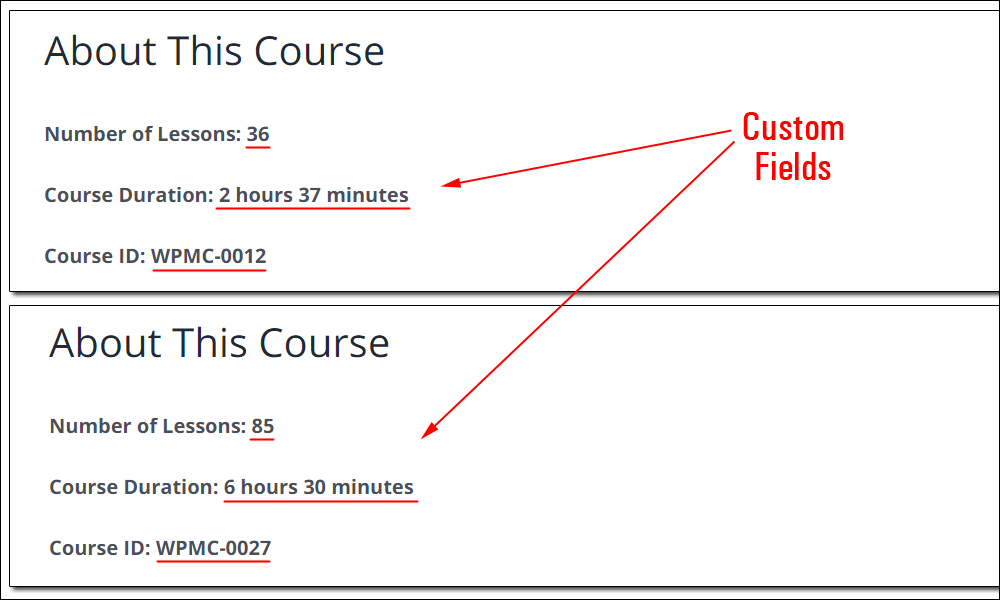
Instead of adding the above information directly into the content of every page for every item, you can create a page template with placeholders where this information should display in your content instead. Information about each item would then be entered into the custom fields, and this information will be automatically inserted into the content in the right location.
![]()
Using custom fields to display information on your pages normally requires adding code to your theme templates. If you want to avoid editing your theme templates, consider installing a custom fields plugin instead.
Discussion
The Discussion box lets you turn your page discussion options on/off for user interactivity (commenting) and notifications about your pages on other sites (trackbacks and pingbacks) on a page-by-page (or post-by-post) basis.

Notes:
- Check the boxes to Allow Comments and Allow trackbacks and pingbacks on your pages.
- Uncheck Allow Comments and no visitors will be able to post comments on that page.
- Uncheck Allow trackbacks and pingbacks and no one will be able to post pingbacks or trackbacks to that page.
- If you are editing a previously published page, the Discussion module will also show any comments that users or visitors have added to the page.
To configure your WordPress site’s Discussion Settings from your dashboard menu, go to Settings > Discussion.
Slug
This section lets you edit the page slug (also known as your Permalink URL).

The page slug is a user-friendly URL address, normally created from the page title.

The page slug is affected by your Permalink settings (see below).
Permalink

Permalink stands for “permanent link.” When you create a new page, WordPress adds its URL to the database.
If you change the page slug or the location of your page (e.g. by placing it under a parent page) later, the Permalink feature allows WordPress to find the new page destination and automatically point all links on other pages to your new page URL.
Notes:
- WordPress automatically generates permalinks for your page based on our page title and displays it below the title field as soon as you save or publish your page.
- WordPress automatically removes punctuation such as commas, quotes, apostrophes, and invalid URL characters from your page URL and substitutes spaces with dashes to separate each word.
You can manually change your permalink URL by editing your page slug.
To edit your page slug, click on the Permalink > Edit button next to the slug field.
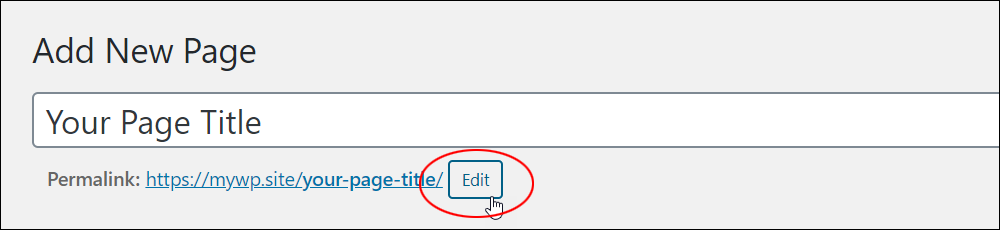
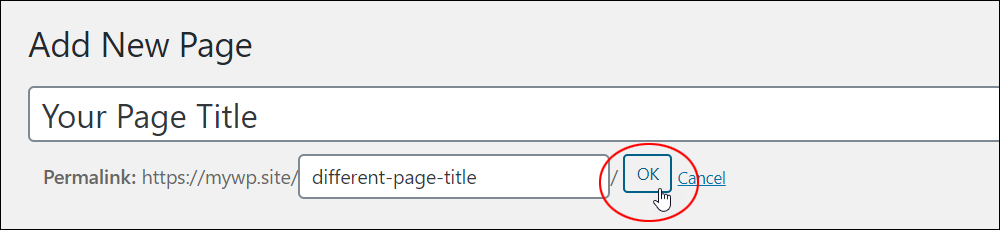
Type in a new slug and click OK.
Your page slug will be updated.
Notes:
- Type in a new page slug or edit an existing one and click OK to change the page URL, or
- Delete the page slug and click OK to automatically convert your page title into a properly formatted page URL.
To learn more about using permalinks, see this tutorial: How To Link Content In WordPress
Author
The Author box displays a list of all your site’s authors and lets you change the author attribute by selecting a new page author from the drop-down menu.

Note: This section only displays on your page if there are multiple authors on your site.
See our tutorial on How To Manage WordPress Users for more details on setting user roles.
Adding Content To Your Page
After creating a new page, the next step is to add content to it.
Here is some helpful advice from WordPress on best practices for posting content and additional tips:
- Practice Accessibility: Stay compliant with web standards for accessibility and help your users by including ALT and TITLE descriptions on links and images (e.g.
<a title="Descriptive Title Goes Here" href="http://yourdomain.com/">Hyperlinked Text</a>. - Use Paragraphs: Make your content more readable by breaking up your writing into paragraphs. Tip: If you use double spaces between your paragraphs, WordPress will automatically detect these and insert
<p>HTML paragraph tags into your writing. - Use Headings: If you plan to write a long page, then use headings to break up your page sections. In HTML, headings are set using tags like
h1,h2,h3,h4, and so on. You can also add headings by highlighting content in the body of your page, and then selecting one of the heading options from the Format Style drop-down menu in the Classic Editor. - Use HTML: You don’t have to use HTML to create richly formatted pages. WordPress can automatically format your content using the menu buttons in the Visual Editor. Having a basic knowledge and understanding of HTML, however, will allow you to control different styling elements in your content (e.g. boxes and headings).
- Spell Check and Proof: Check your spelling and proof everything before publishing your content. There are a number of spell check Plugins available for WordPress. You can also write your content in a text editor that has spell checking, then copy and paste your content into WordPress after checking all the spelling and proofing your content thoroughly.
- Check before you post: What you publish can be seen by other people and logged by search engines, making it harder to take things back. You can always update and change your content later, but some things can’t be unseen and may be captured by screenshots. Take a moment to think about what you are posting and carefully review your page content to make sure that you’re not publishing confidential information, unlicensed content, slanderous or libelous content, etc. Take any and all appropriate and necessary measures and precautions to protect your privacy and the privacy of others.
- Consider your audience: Consider who will read your pages and make sure your content is appropriate for your intended audience.
- Make use of comments: Comments allow visitors to interact with your site and not only share ideas, opinions, and suggestions but also to ask insightful questions and provide valuable feedback. You do have control over your site’s comments and you can delete any comments that you don’t want to publish on your site, so consider this when deciding whether to allow people to comment on your site. Also, make sure that visitors can contact you privately if they need to (e.g. use a contact form).
- Worry about the design of your site/pages later: How your site looks is important, but it’s not essential to getting your point across. In fact, because WordPress is so flexible when it comes to web design, you can start by publishing content to grow your readership using a less than perfect theme or page layout, and then change your entire site’s look in just a few clicks by upgrading your theme. Focus on providing great content of value to attract readers, then improve the look of your site based on user feedback and data from testing.
- Use pictures and videos: Images and videos help make your posts and pages colorful and interesting and help readers engage better with your content. See our tutorials on adding images and adding videos to your posts and pages for more details in this area.
- Save your pages: Save your pages frequently to prevent losing your work to accidents or computer errors. You can do this without publishing your content as explained in the section below.
Saving Your WordPress Pages
By default, WordPress keeps a log of all your post and page revisions and autosaves your content at regular intervals.
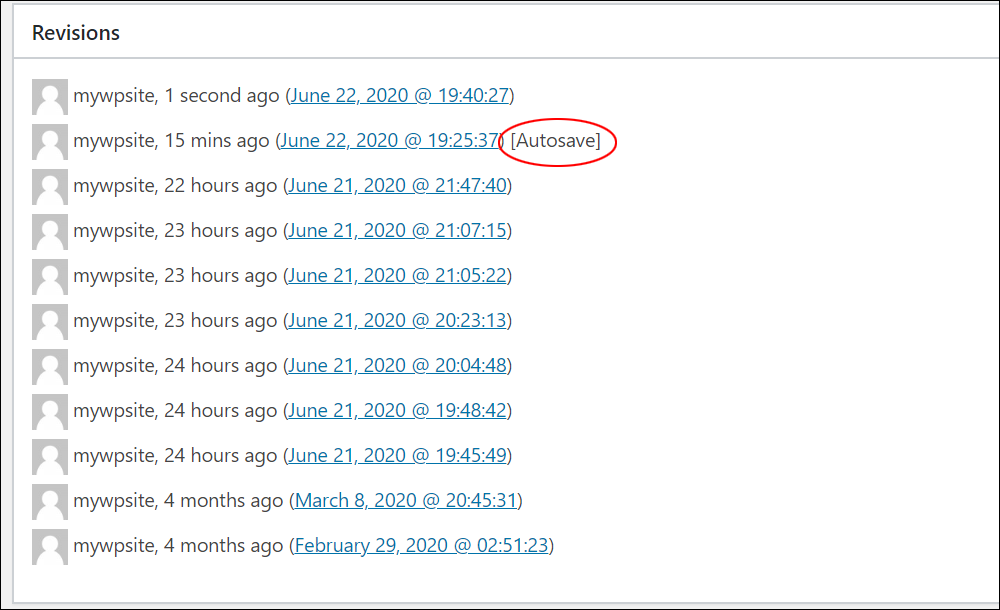
This helps to prevent you from losing your content if something unexpectedly goes wrong with your computer or if you click something that accidentally closes your page, browser window, or application while working.
WordPress also records your first autosave as the page creation date and time. You can change this information by editing the Published on: settings.
Until your content is published, your page will not be visible online. Instead, it will be saved as a draft.
You can save your Page as a draft or publish it using the Save and Publish buttons in the Publish box.
To save your page as a Draft, go to the Publish box and click on the Edit link.

Select Draft from the drop-down menu and click OK.
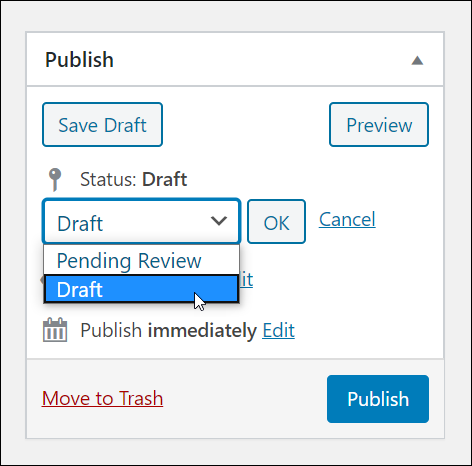
After selecting Draft in the Status: field, click on the Save Draft button.
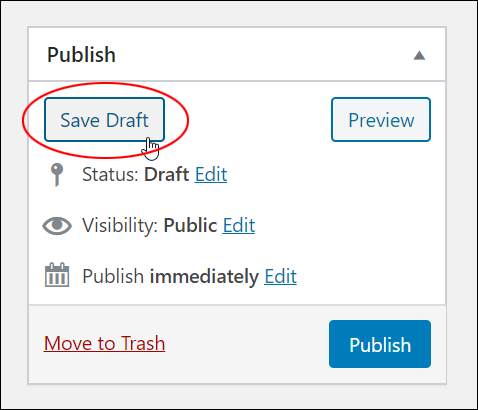
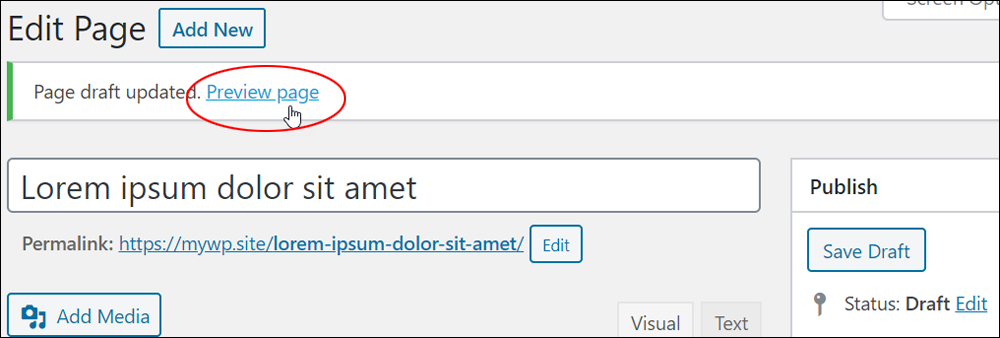
Note: Once your Page is saved, the screen changes from ‘Add New Page’ to ‘Edit Page.’
Your page will be saved and updated as a draft page. Click on Preview page to view your saved content.
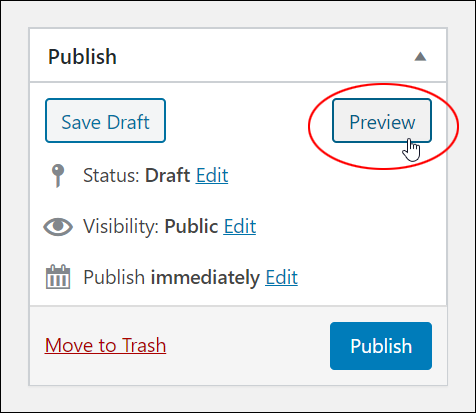
You can also preview your page in a new browser window without saving or publishing it first by clicking on the Preview button in the Publish box.
When you are ready to publish your page, click on the Publish button.

After publishing your new page, click View page to open and display your published page in a new browser.
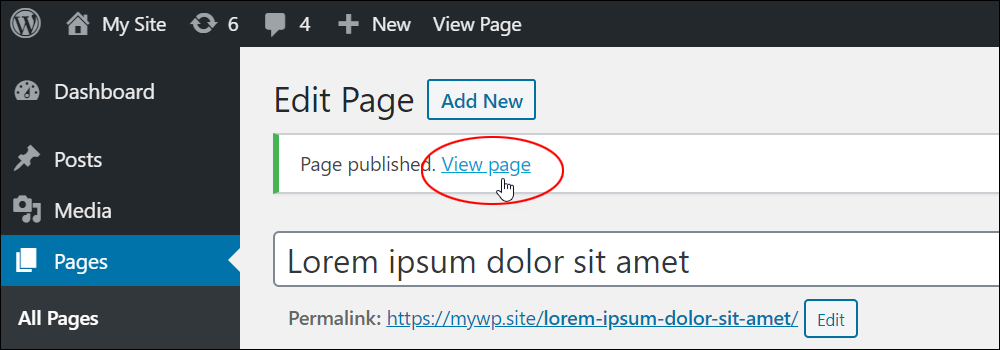
The page will load in your browser.
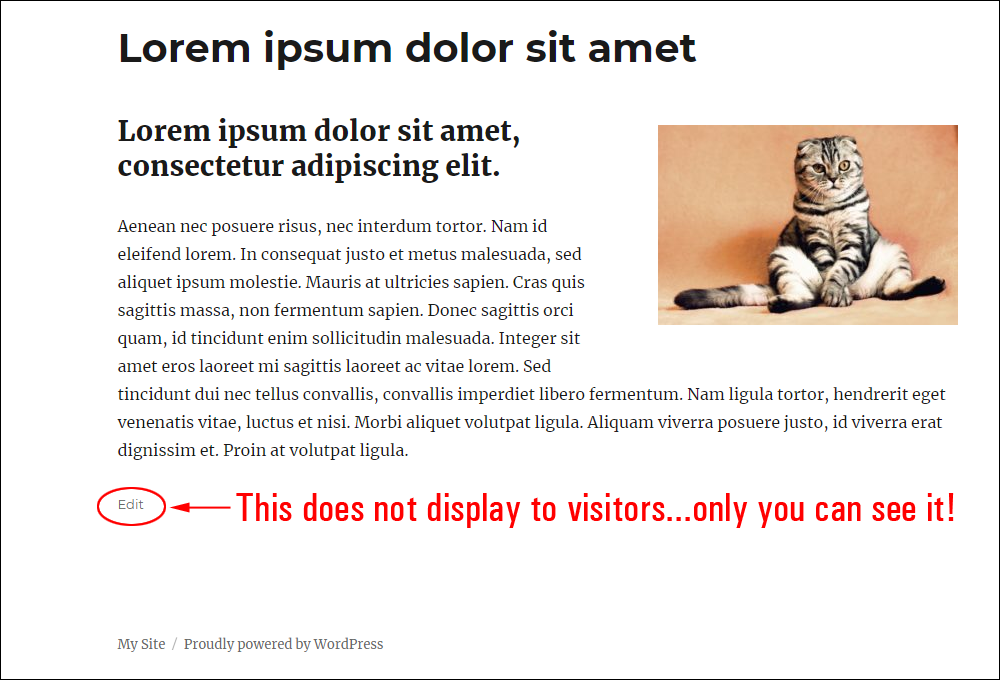
You can see the page exactly as your visitors will see it, with additional features for logged-in users with page editing permissions.
Review your page to make sure that all your content has been added, formatted, and is displaying correctly. If not, go back and edit your page, then republish.
Note: After a page has been published, the Publish button changes to Update.

You can always change the status of your Page back from Published to Draft or Pending Review by clicking on the Edit link in the Status field and selecting an option from the Status drop-down menu.
Congratulations! Now you know how to create and publish a new page in WordPress.

Now that you know how to create a page in WordPress, the next step is to learn how to make changes and delete your pages, as explained in this tutorial: How To Edit And Delete Pages In WordPress
***

Updated: July 5th, 2024