Using Images In WordPress
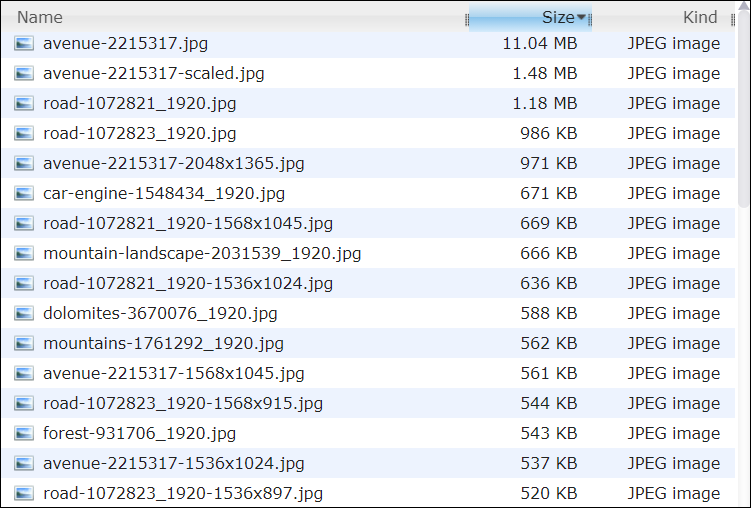
If your website uses loads of images, your site may have to store hundreds or even thousands of images.
Uploading loads of images to your server can lead to an excessively large image folder.
This can cause your site to exceed its hosting quota, create problems with data backups, slow down page loading times, and other issues.
Knowing how to use images correctly in WordPress can help you avoid many problems.
This tutorial covers:
- How to create and save images correctly in WordPress.
- How to reduce your image file size without compromising image quality
- How to optimize the size of your image files to help improve your site’s page loading speed.
Avoid Using Large Image Files On Your Website
Images uploaded to the WordPress Media Library are stored on your web hosting server.
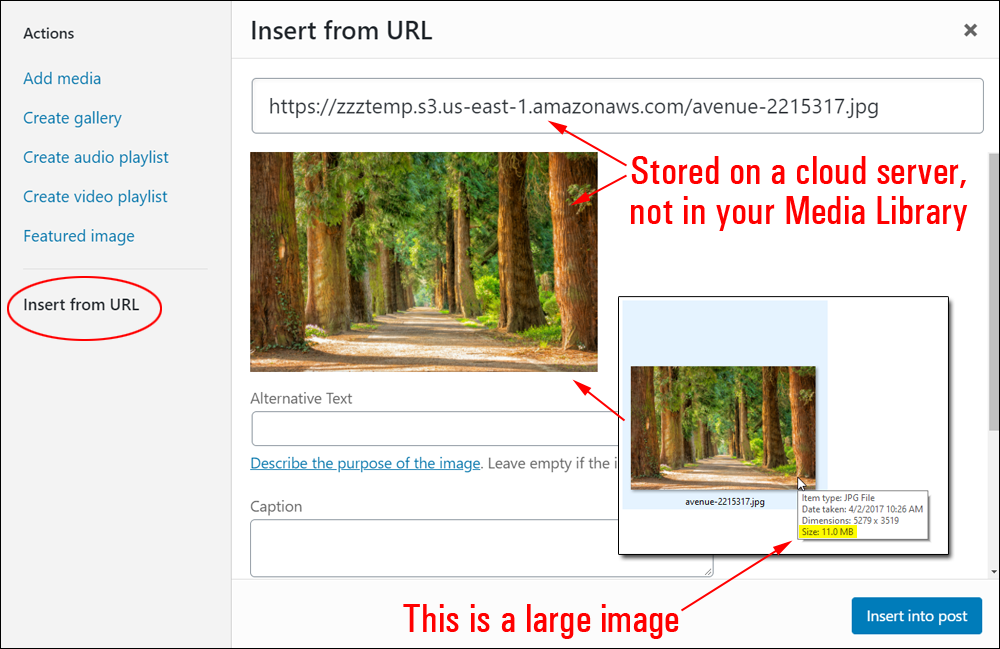
If you must use large media files or plan to add lots of images to your website, we recommend using a cloud storage service (e.g. Amazon S3, Dropbox, etc.) instead of uploading and storing these in your WordPress Media Library.
Note: If you store images on the cloud, use the Add Media tool’s ‘Insert from URL’ feature to add the image to your content.
To learn how to use the Add Media ‘Insert from URL’ tool, see this tutorial: How To Add Images To WordPress
Some situations, however, may not be avoidable.
For example, if you run an eCommerce store on WordPress using a platform like WooCommerce, you may have to upload all your product images to your site using the WordPress media library.
In this case, make sure that you are not uploading images that are larger than necessary.
Let’s see why this is a problem…
Media File Management
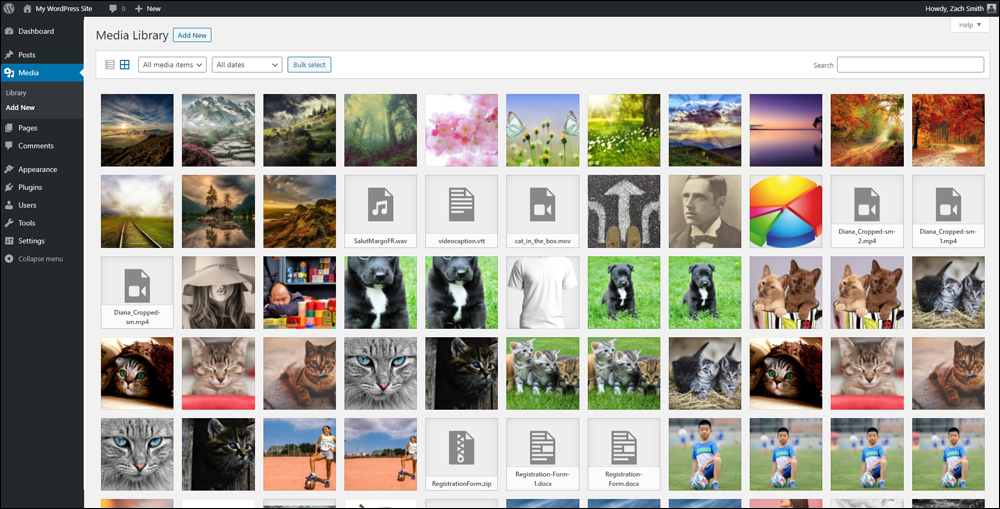
Images, videos, and other media uploaded to your website are normally managed through the WordPress Media Library.
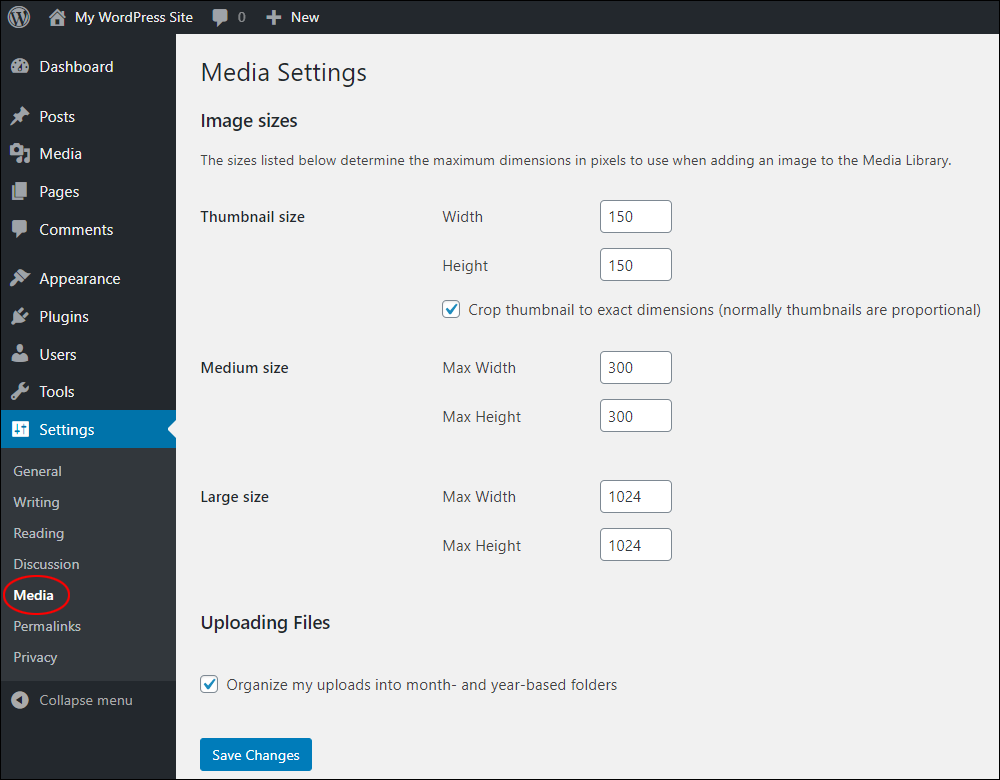
Your media settings are configured in your Media Settings section.
Here you can specify maximum image sizes and whether to store your media uploads into month and year-based folders.
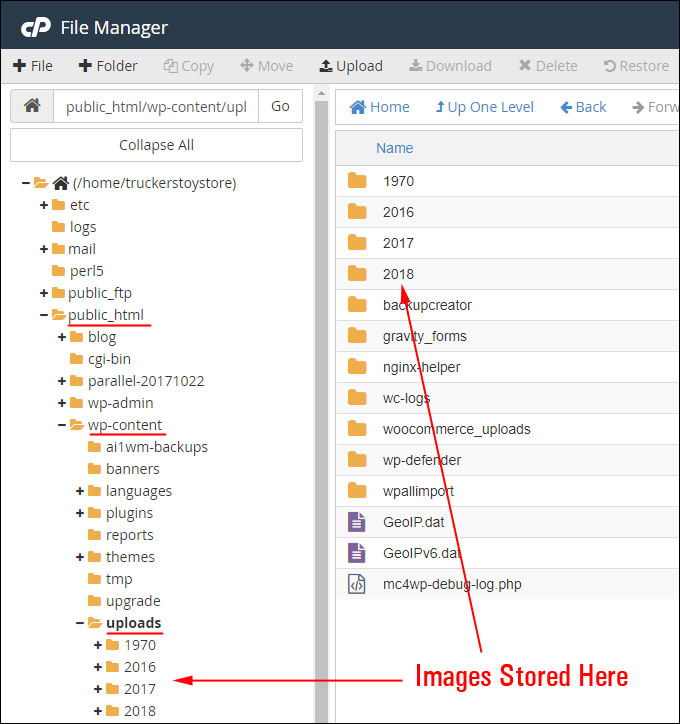
When you add media files to your site via the Media Library, these are then uploaded to your server and stored in a directory called the wp-content > uploads folder.
Note: To access and view the contents of folders on your server requires using applications like FTP or a File Manager tool provided by your web host (e.g. cPanel’s File Manager).
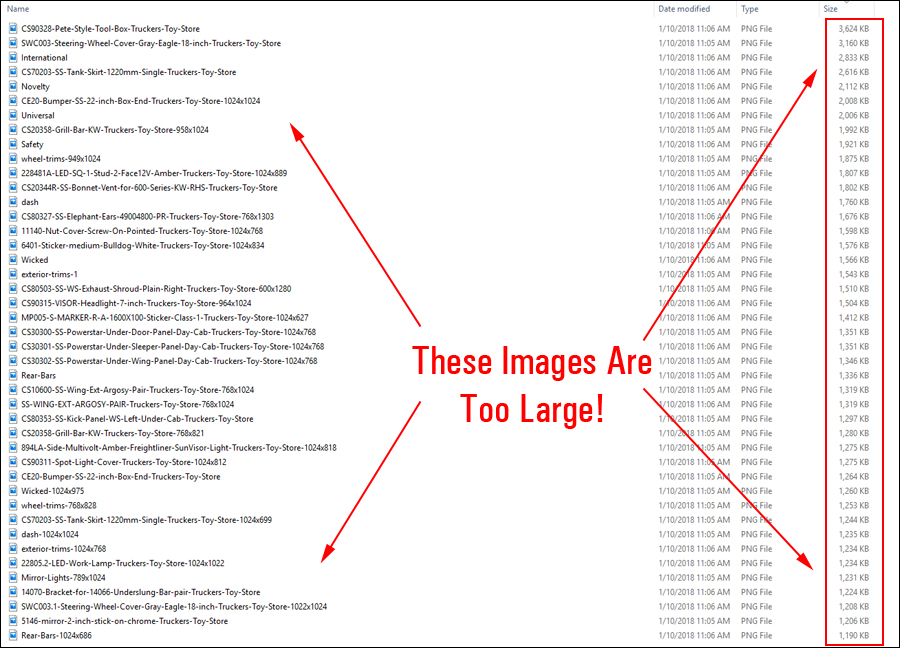
Uploading loads of large images and other media files to your Media Library will cause your server’s disk storage to swell up in size.
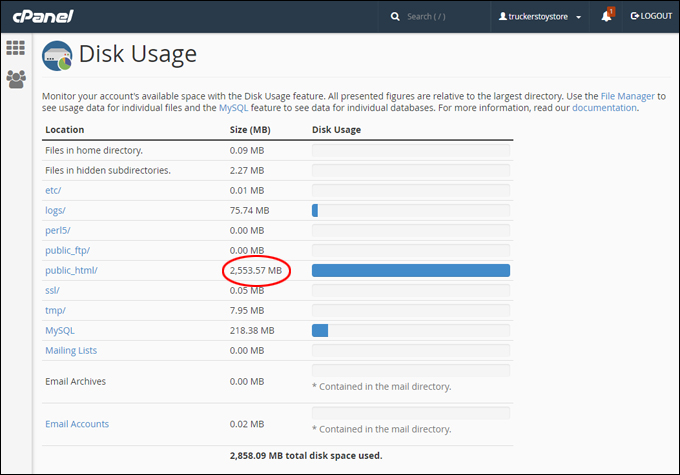
Storing large media files in your server can lead to problems like backing up files and slow down your website’s performance and web page loading speed.
Hence, the reason why we recommend uploading large media files to a cloud storage service or a platform like YouTube (for videos) and embedding links to these files into your content using the Add Media tool.
Before we look at ways to reduce image file size, let’s go over some image file basics.
Image Specifications & Guidelines
To avoid problems, we recommend spelling out some basic specifications and guidelines for using images on your website and making sure that everyone in your team understands things like:
- The difference between image size vs image resolution.
- Different image formats and when to use these.
- Different image specifications and settings for use in digital content vs print.
Let’s go briefly through each of the above.
Image Size vs Image Resolution
Image size refers to the dimensions of an image and is usually expressed in terms of pixels or points.
Image resolution refers to the number of pixels that can fit inside a specific area of a screen or printed surface and is normally expressed in terms of pixels per inch (ppi) or dots per inch (dpi).
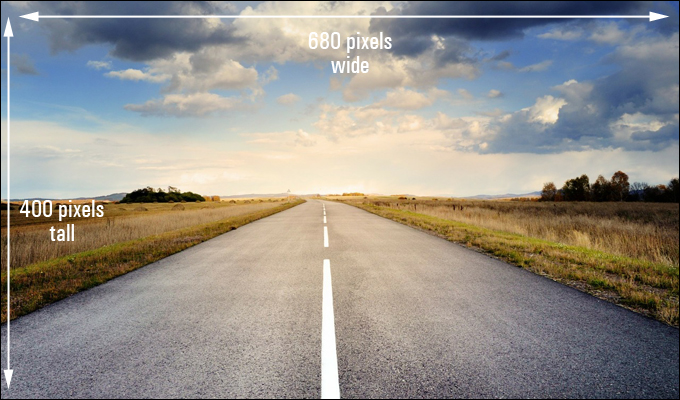
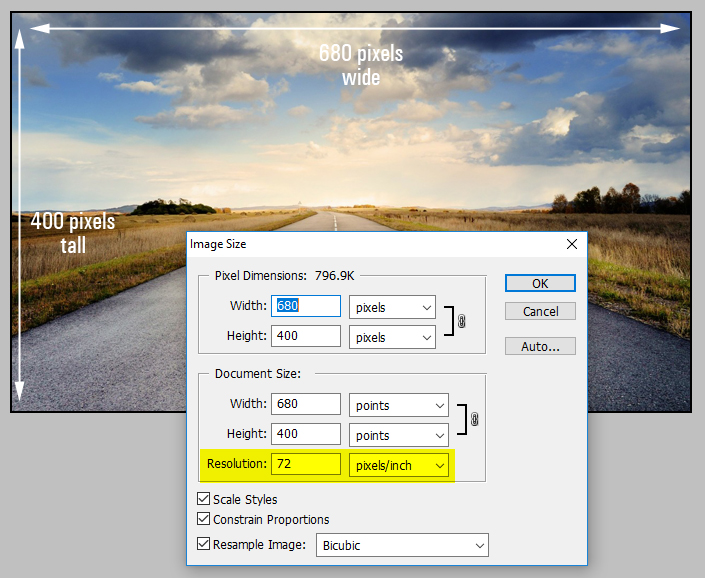
For example, the dimensions of the image below are 680 pixels wide x 400 pixels tall…
Using an image editing tool like Photoshop, we can see that the resolution of this image is 72 pixels per inch.
Most images, photos, screenshots, logos intended for use in web content are only going to be viewed on computer and mobile device screens, which display low-resolution images (72-96 dpi) very well.
Images for printed publications (e.g. magazines, brochures, etc.) need to be output at a much higher resolution (e.g. 300 dpi).
Errors using images occur when confusing image size with image resolution. A large image with a low resolution will not work for print (images will become pixelated) and uploading high-resolution images to your website will increase the size of your server’s database unnecessarily.
Image Format
Common formats used for saving images for use in websites include .jpg, .png, .gif, and newer formats like WebP.
For practical purposes and simplicity’s sake, here’s a good commercial rule of thumb to follow when deciding on which image format to use:
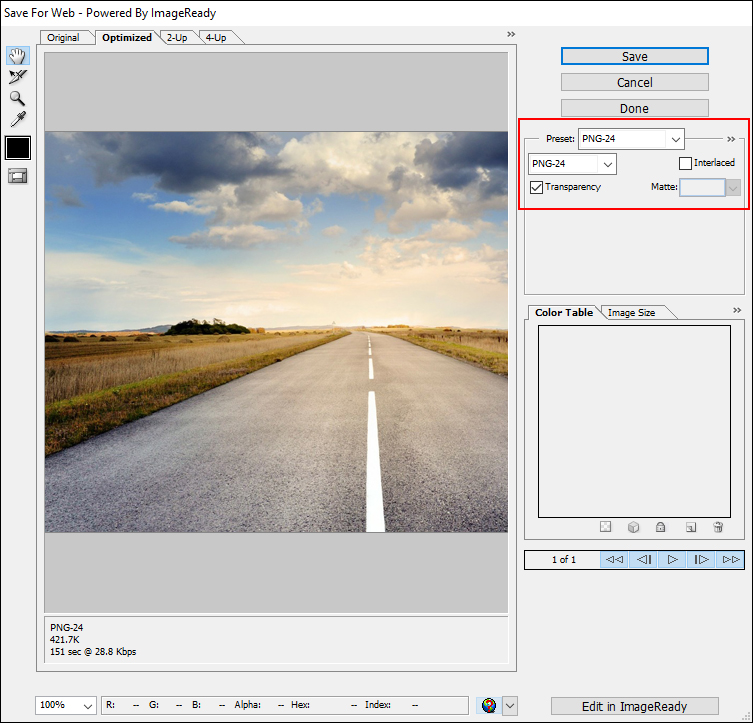
- Save images like photos as .jpg unless your images need to have a transparent background.
- Save non-photographic images like logos, graphics, and banners as .png.
- If your image needs to have a transparent background, save it as a .png and turn on the transparency option.
- Animated images (e.g. advertising banners) are normally saved as a .gif (or .webp)
You can learn more about different image formats here.
Digital Image Specs
If you plan to upload many images to your Media Library (e.g. product images for a large eCommerce site), then follow the specs below to ensure that your server’s disk space won’t become excessively large and difficult to manage:
- Image File Size: Aim for image file sizes no larger than around 500 kb.
- Image Resolution: 72-96 ppi.
- Image Dimensions: Try keeping your maximum image width to 900 – 1280 pixels. Typically, a width of 600-800 pixels is sufficient for most product images and screenshots.
- Image Format: .jpg (maximum quality) unless image requires a transparent background. If the image requires a transparent background, then save it as .png with the transparency option turned on.
- Image Mode: RGB
Print & Display Advertising Image Specs
High-quality printing or display advertising (e.g. magazines) typically require high-resolution images (e.g. 300 dpi) saved in CMYK image mode.
![]()
- If creating images for logos or company artwork, create these as high-resolution images in large sizes (e.g. 5,000 pixels wide), as these images will probably be used in print and make sure to reformat these images for use in digital artwork or web content using the digital image specs given earlier.
- Always work from larger to smaller dimensions and from higher to lower resolutions. Reducing image sizes and resolutions will retain image quality but not the other way round (i.e. going from smaller to larger image size or resolution will make the image appear blurred or pixelated).
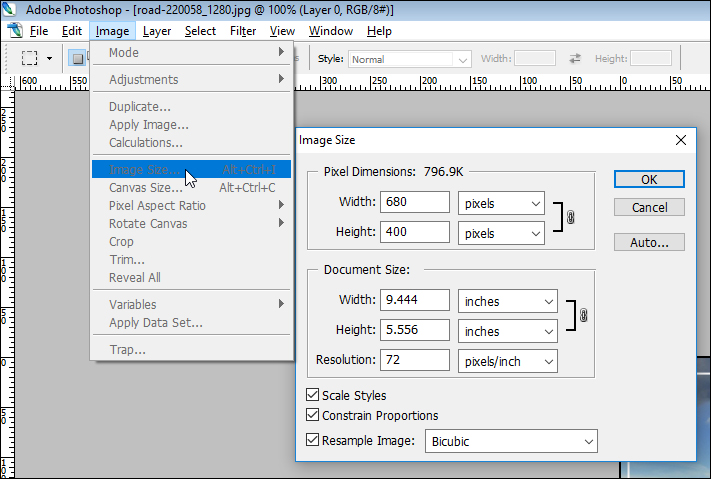
- When creating images from scratch, set out the dimensions and resolution of your image before you start.
For example, you can set image size and resolution in Photoshop using the Image > Image Size dialog box.
How To Reduce Image File Size
Before making any changes to images that have already been uploaded to your website and are currently being used in your content, do the following:
- Back up your website.
- Download folders containing images stored on your server to your hard drive. For example, if your images are stored on a server that uses CPanel, use an application like File Manager to compress and download a copy of the image folders to your hard drive, or use an FTP tool.
- Extract and make a copy of these image folders. You will edit the images in the copied folders to make sure that nothing happens to the original files.
- Create a folder inside your working images folder where you will edit and save images (call the folder something like “reduce these”).
- Select all large images above a certain file size (e.g. 500 kb) and copy these to your editing folder.
- Work systematically through your files. Open and edit your images in an image editing application like Photoshop.
- Save the edited image to the image editing folder containing all resized images.
- Again, begin to systematically replace large file-sized images on your website with the smaller file-sized images you have just created.
- After replacing all images on your website, review all pages to make sure that all images have been replaced correctly.
- Delete the large images from your server. If you followed the above process, you should have a backup copy of the originals.
- Go back to your website and check pages and content to make sure that no images are missing in your content.
- Your files should now be significantly reduced in size.
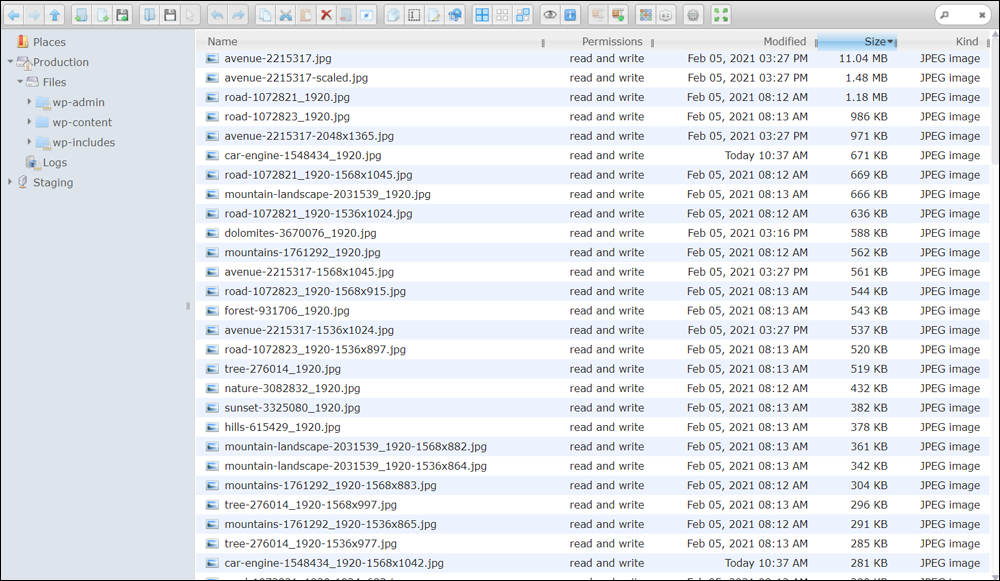
If you can’t view image file sizes in your hard drive’s image folder, do the following:
Open the folder in your hard drive that contains your images, then right-click inside the folder and select View > Details.
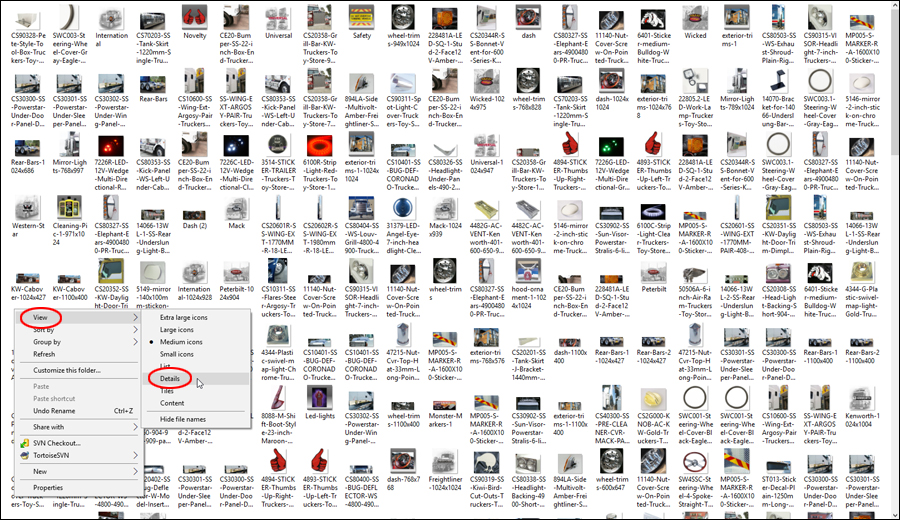
You should now be able to see all the image file sizes listed.

The next step is to start reducing each image file to a smaller size.

Let’s look now at ways to reduce image file sizes.
Save Files As .Jpg
Images saved in .jpg format normally result in smaller file sizes than the same image saved in .png format.
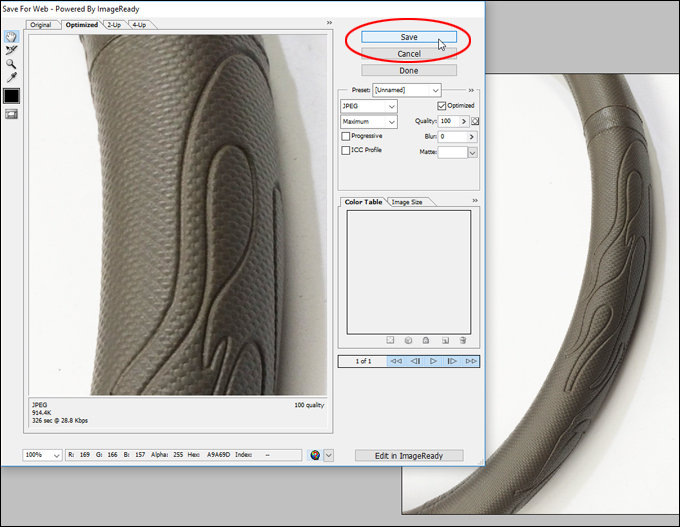
For example, if we save this example image as a .png…
And then save the same image as a .jpg (maximum quality) …
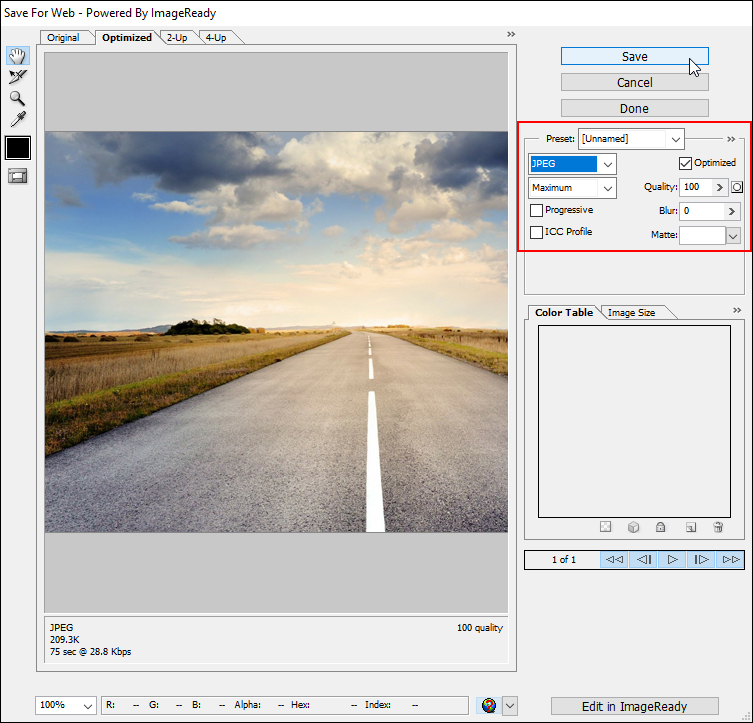
You can see that even though they are both the same image, the .png file has a larger file size than the .jpg image.

Keeping this in mind, here’s something you can do if you have unnecessarily saved lots of image files on your website as .png instead of .jpg.
Convert .png Images To .jpg
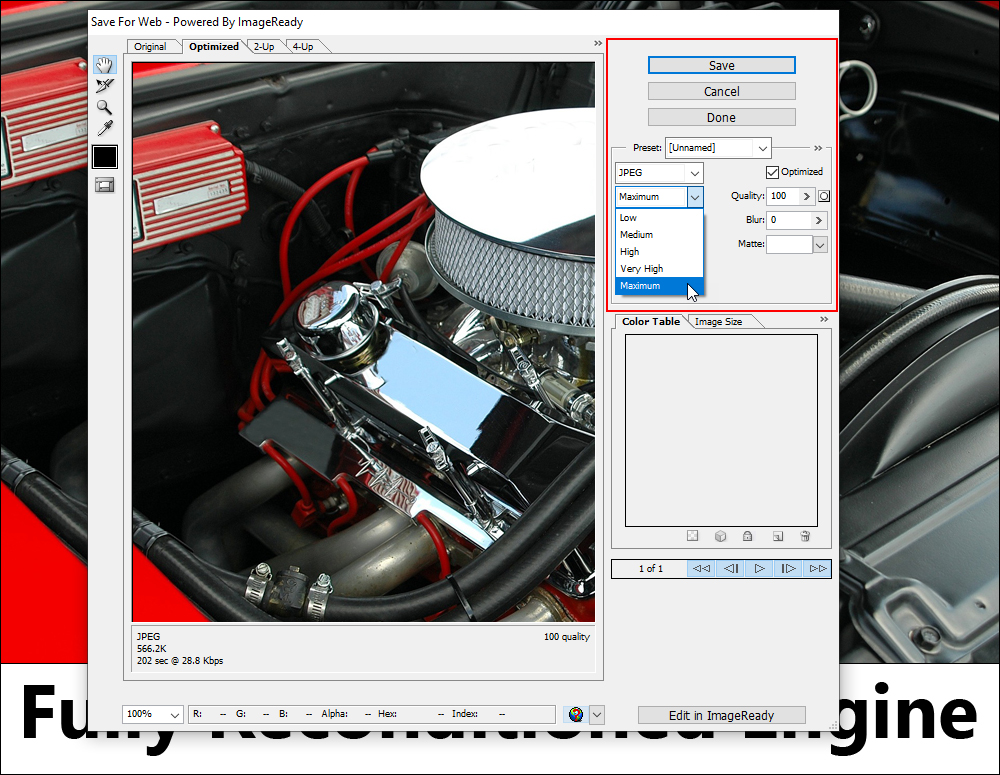
Locate and open a large .png file from your working images folder using your image editor (e.g. Photoshop).
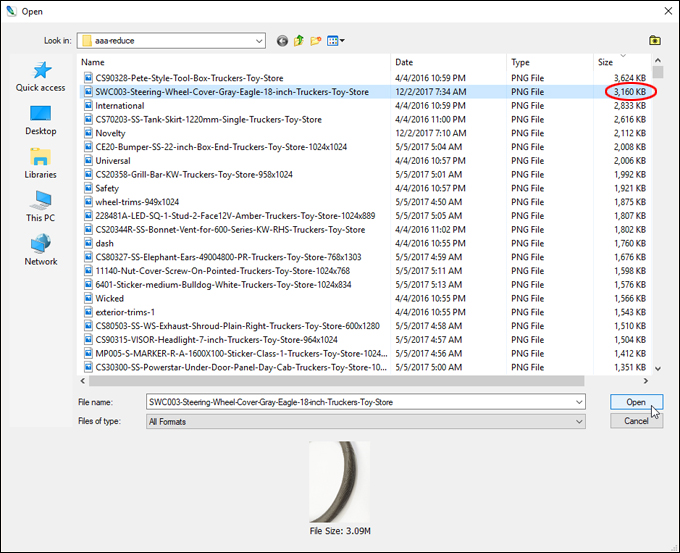
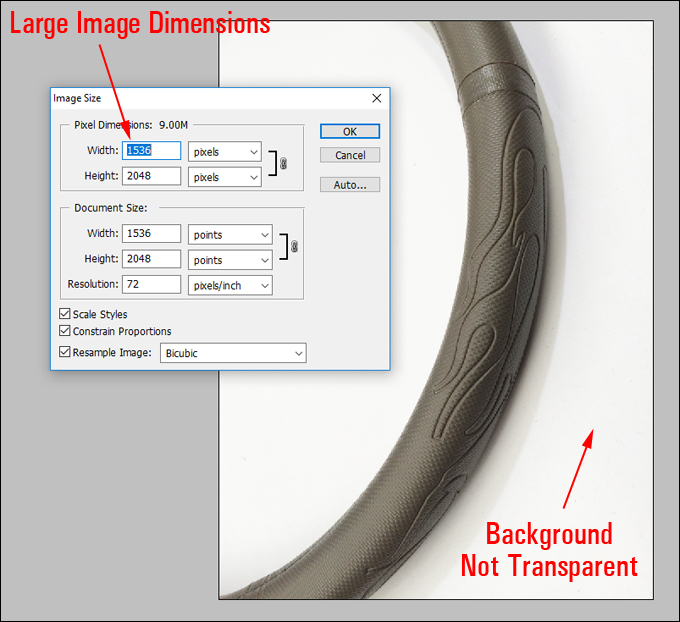
For this example, we have selected an image that is over 3 Mb in size (3,160 kb). If we apply the image specifications from our earlier section to this image, we can see that:
- The file doesn’t need to have a transparent background. It can be resaved as a .jpg image.
- The image dimensions are much larger than necessary.
Let’s save this file as a .jpg image first and see how much we can reduce the image file size.
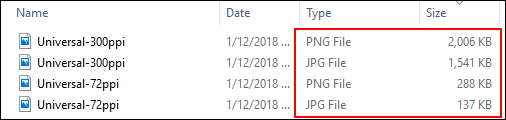
By changing the file format from .png to .jpg, we have significantly reduced the image file size (from 3,160 kb to 915 kb).

This reduced image, however, is still almost twice as large as the file size specifications we have set for our images (no larger than 500 kb).
Now we have two options. We can reduce the image file size by:
- Reducing file size dimensions
- Reducing image quality
Reduce File Size Dimensions
Let’s repeat the above process, but this time, we’ll reduce file size dimensions before saving the image as a .jpg.
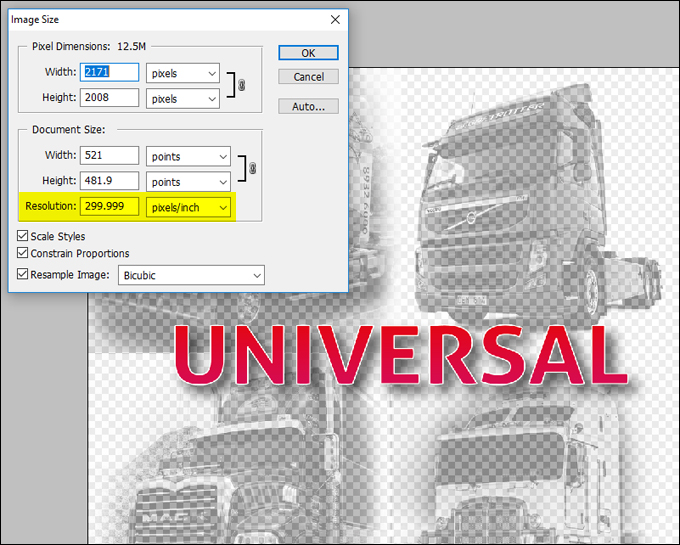
First, select the image and open the ‘Image Size’ dialog box (Image > Image Size in Photoshop).

Change the image dimensions to reduce the image size and make it fit within your specifications.

Now resave the image as a .jpg and look at the resulting file size.

We have significantly reduced the file size of this image.
![]()
Resizing image dimensions in your web pages will not reduce the file size of the original image on your server.
To reduce the file size of images stored on your server, you will need to change the dimensions of the original image, then replace the original image in your server with your newly edited image.
Reduce Image Quality
Depending on what you plan to use images for, reducing image quality by a level or two won’t make that much difference to the final result and can help improve the loading performance of your page.
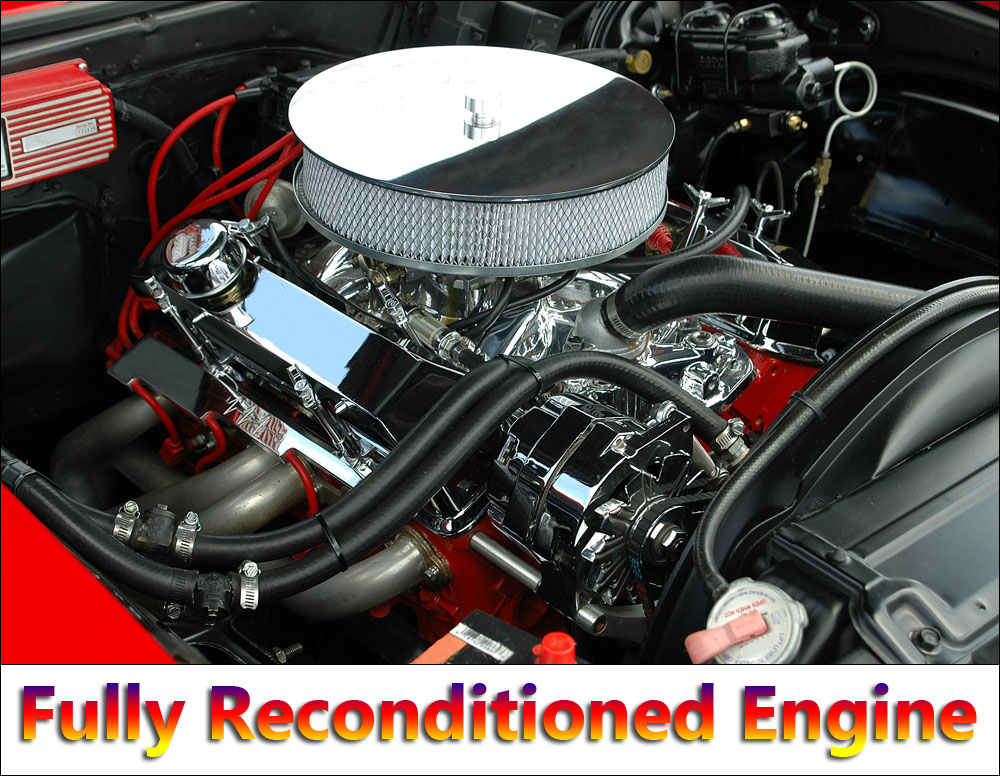
For example, below is a .jpg image saved using maximum quality image optimization settings (100%).

Here’s the same .jpg image saved using the next level down (Very High).

Here’s the same .jpg image saved using the next level down (High).
Here’s the same .jpg image saved using the next level down (Medium).

Here’s the same .jpg image saved using the next level down (Low).
Although there’s not that much of a noticeable visible difference in the images, the difference in file sizes can be significant.

In addition to the above, you can also use the methods below to reduce the image file size.
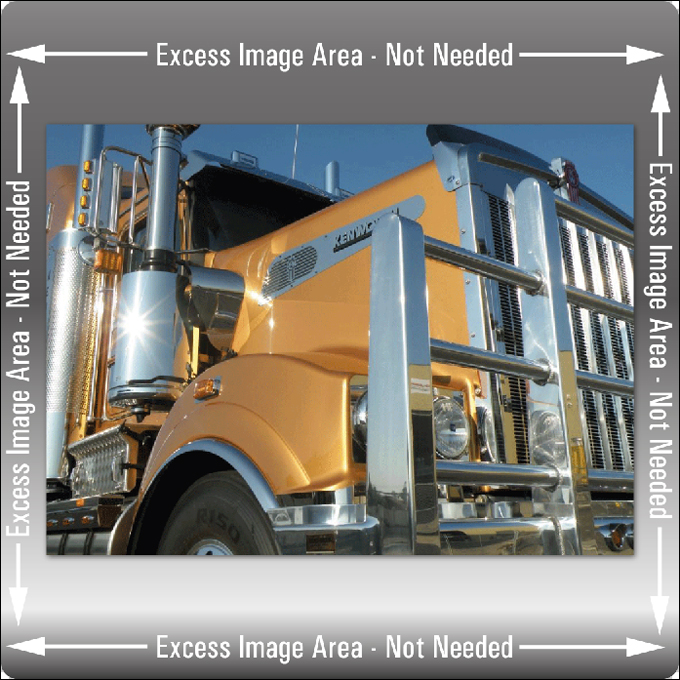
Crop Unnecessary Image Areas
If there are any excess areas around an image that are not required or essential, consider cropping the image to reduce image file size.
Check Image Resolution
Check to see if any large images uploaded to your website have been saved using a high image resolution and change the settings to reduce image file size.
As you can see, using some or all of the above methods can significantly reduce the file size of your stored images.
Reduce Image Bloat And Reclaim Server Storage Space
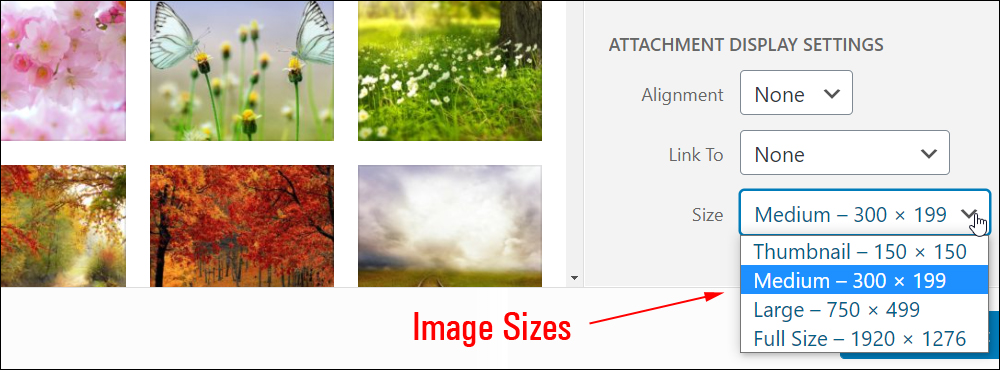
When you upload images to your site via the Media Library, WordPress automatically creates new versions of these images in different sizes by default (e.g. Thumbnail, Medium, Large, and Full Size).
This adds more image files to your server. Over time, these accumulated image files can take up valuable storage space on your server.
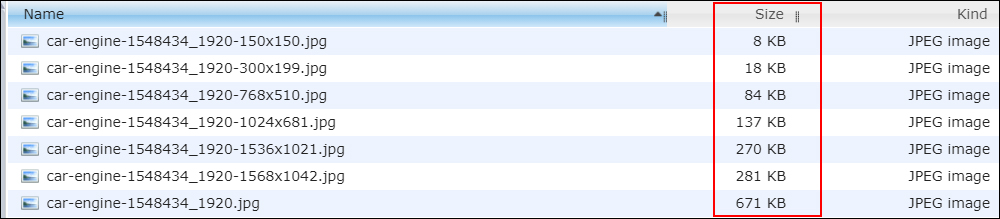
Unless you need to have different-sized files for every uploaded image stored on your server, it’s better to delete these unused files or upload only one version of the image to your server.
![]()
To prevent WordPress from creating different versions of every uploaded image, do the following:
Go to your Media Settings (Dashboard Menu > Media > Settings)
Change all the values in the Image Sizes section to “0” (zero) and save your changes.
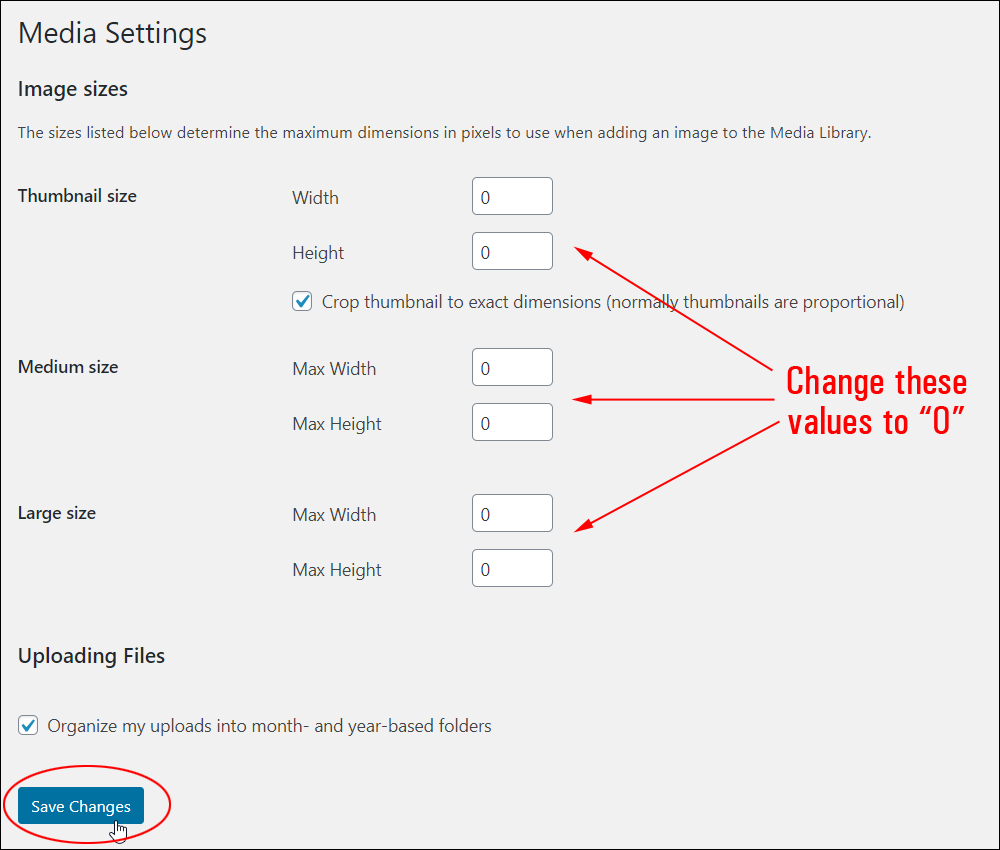
Now, when you upload images to WordPress via the Media Library, only the original uploaded version of the image will be added to your server.
Note: Make sure you upload the correct-sized image you plan to use in your content.
If you check the image folder on your server, you will see that only the uploaded image was added…no other versions!
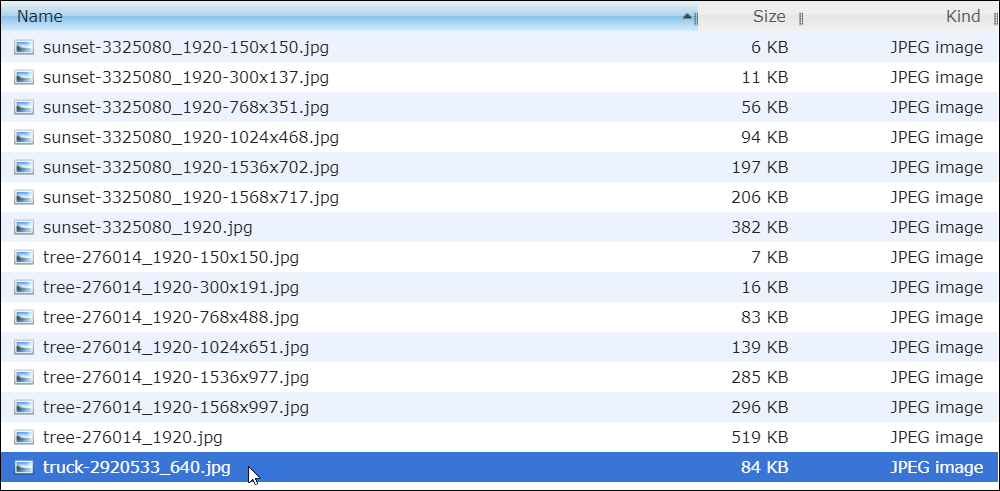
Image & Media Library Optimization Plugins
Whether you choose to store different-sized images on your server or clean up any unused media files, plugins can help.
So, in addition to the methods described above to reduce image file sizes, if you plan to upload loads of images to your site using the WordPress media library, we recommend looking at image optimization and media cleanup plugins like the ones below.
WP Smush
WP Smush scans images that you upload (or have already added) to your site and automatically resizes, optimizes, and compresses these, removing unnecessary data before adding it to your media library.
This plugin strips hidden bulky information from your images and reduces file size without losing image quality.
For more information about this plugin, go here: Smush
Media Cleaner
Media Cleaner cleans your WordPress Media Library of all unused or broken media entries and files that aren’t being used in your website. you can also restrict the scan to images only.
Media Cleaner analyzes and detects any files not being used on your site and places them into the plugin’s internal trash. After testing to make sure that the plugin has not marked any files for deletion that you want to keep, you can restore the files from the trash, or permanently delete them.

Note: Make sure you have a full backup of your site before using this plugin.
For more information about this plugin, go here: Media Cleaner
Additional Resources – Media File Conversion Tools
There are several online tools you can use to convert media files from one format to another (e.g., convert a .png file into a .jpg, or a .gif image into a .mp4 or .webm file).
Here are a couple of free online tools you can check out:
CloudConvert.com
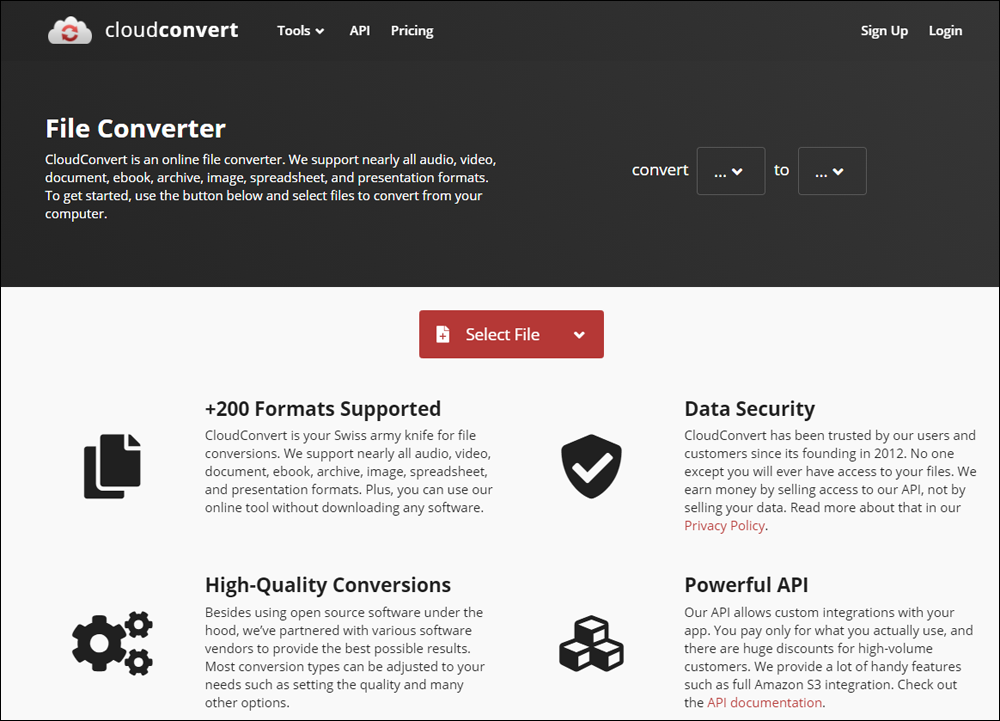
CloudConvert is a free online file converter. It supports +200 file formats and provides high-quality file conversions. Use this tool to convert images, videos, audios, documents, etc. from one format into another.
Go here to access this tool: CloudConvert
GifGifs.com
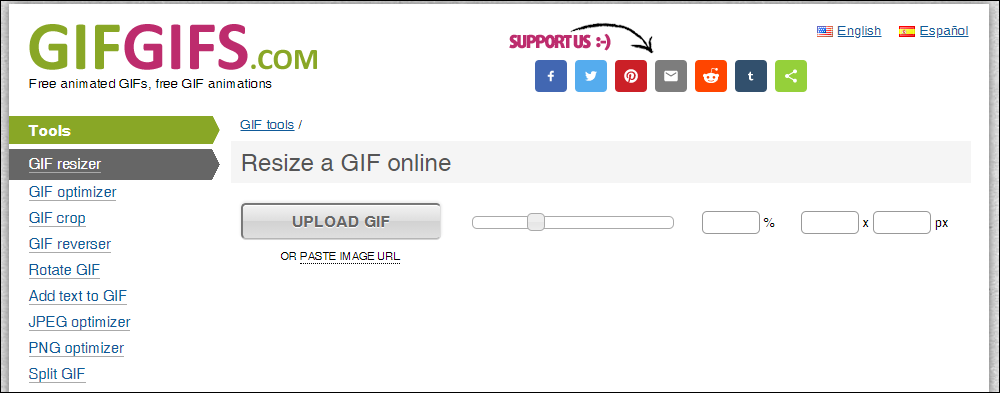
GifGifs.com is a great free online tool that lets you edit .gif images in many ways, such as resizing, cropping, rotating, adding text to images, etc.
Go here to access this tool: GifGifs.com
Using Images In WordPress – FAQs
Here are frequently asked questions about using images in WordPress:
How do I add images to my WordPress website?
You can add images to your WordPress website using various methods such as uploading them directly to your Media Library, inserting them into posts or pages using the Add Media button, or using image blocks in the WordPress Block (Gutenberg) editor.
What are the different image formats supported by WordPress?
WordPress supports common image formats like JPEG, PNG, GIF, and SVG. These formats are suitable for different types of images, such as photographs, graphics, and icons.
How can I optimize images for better performance on my WordPress site?
Optimize your images by resizing them to appropriate dimensions, compressing them without sacrificing quality, and using descriptive filenames. Additionally, consider lazy loading images and leveraging caching plugins for improved performance.
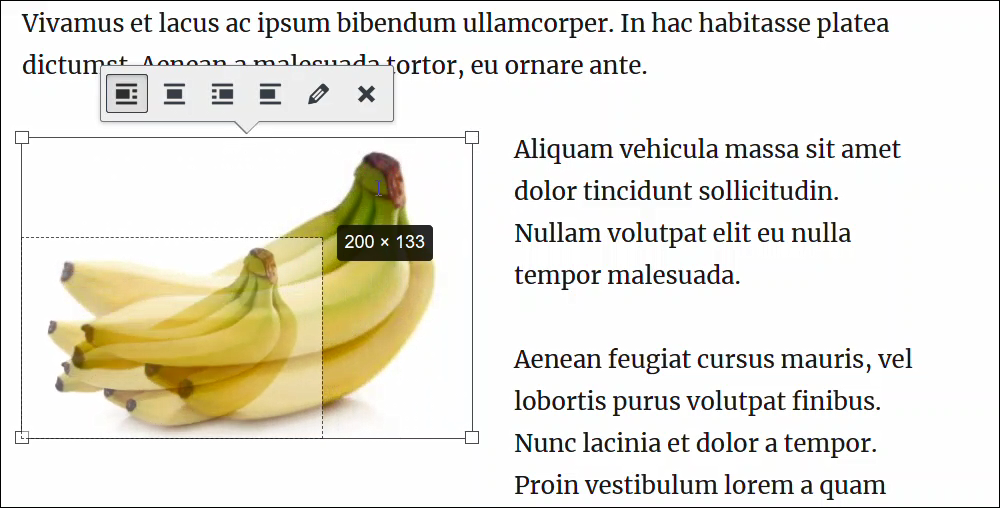
Can I align images with text in WordPress?
Yes, you can align images with text in WordPress. Use the alignment options available in the block editor or manually adjust the image alignment within a paragraph block to make text wrap around the image.
How do I increase the domain authority of my WordPress site using images?
Publishing high-quality, relevant, and engaging content with optimized images can contribute to increasing the domain authority of your WordPress site. Ensure your images are valuable and enhance the overall user experience.
***
Congratulations! Now you know how to reduce image file sizes to help improve your page loading speed.
For more information on using images in WordPress, see these tutorials:
***

Updated: July 5th, 2024