WordPress Block Editor – Video Block
This tutorial is part of our series on How To Use The WordPress Block Editor (Gutenberg).
- To learn more about using the WordPress block editor interface, go here: The WordPress Block Editor – Content Area
- To learn more about using blocks, see this tutorial: How To Use WordPress Block Editor Blocks
- For additional information, see this tutorial: How To Add Videos in WordPress
***
Video Block – Description
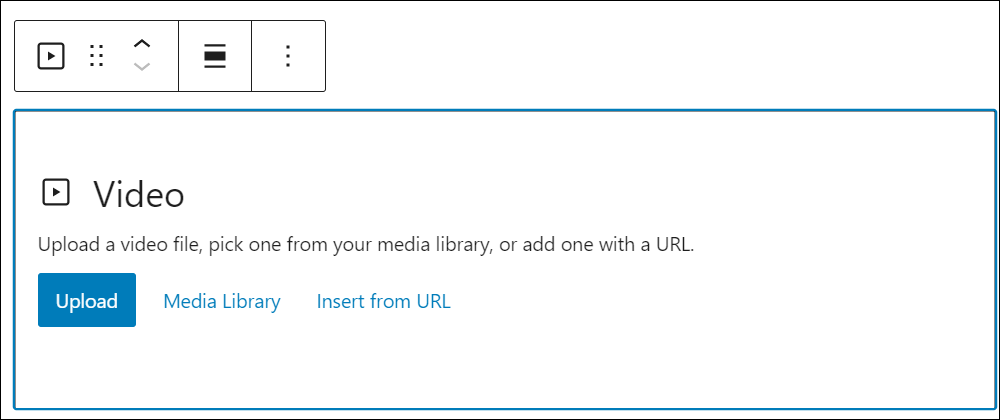
The Video block lets you upload and embed a video on your site from your media library or external URL.

How To Use The Video Block
In this section, we’ll cover:
- How to add a video block to your content.
- How to edit and configure your video block and block settings.
- How to remove the video block from your content.
For more details on using blocks (e.g. how to move blocks around your content), see this tutorial: How To Use Blocks.
Adding A Video Block
To add a Video block to your content:
- Either:
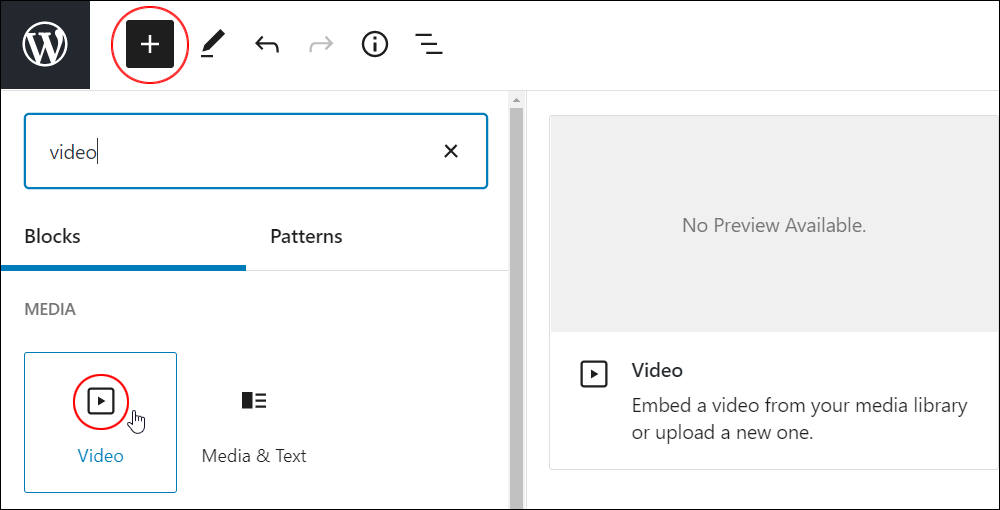
- Click on the ‘Add Block’ tool in the Editing Toolbar section and select the Video block (in Most Used or Media section),
- Add the Video block in the Content Area.
- Add a caption to your video.
- Use the tools in the Video Block Editor or Block Settings section to resize, edit, format, or customize your video.
Let’s go through the above steps.
First, create a new post or page or open an existing post or page and either:
Click on the Add Block tool and select a Video block…
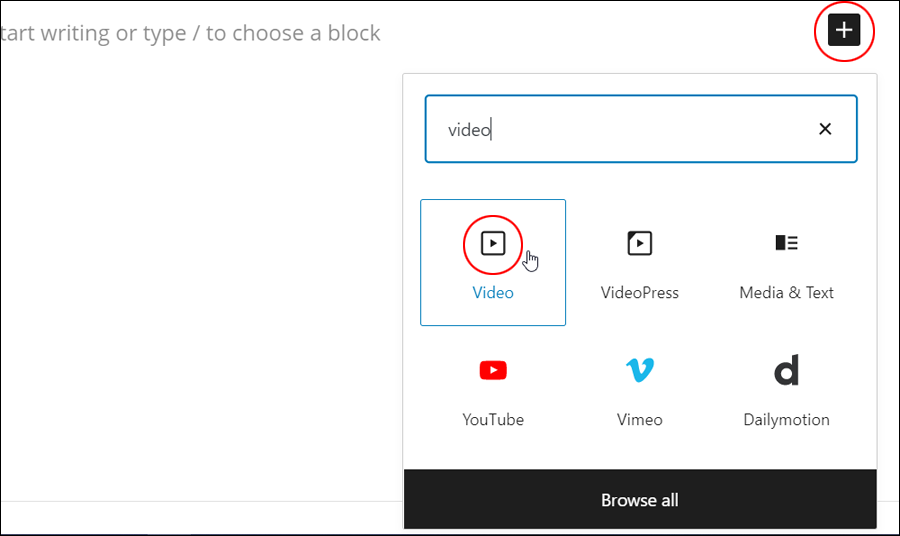
Or, select a Video block using the Inserter tool in the Content Area.
Either of the above methods will add a Video block to your content.
After inserting a Video block, you can add a video to your content:
- Using drag and drop (upload).
- Using the web browser uploader.
- From your media library.
- From an external URL.
- Using a supported video embedding format (requires adding other block types to your content).
Let’s go through the above options:
Add A Video Using Drag & Drop
To add a video using drag and drop:
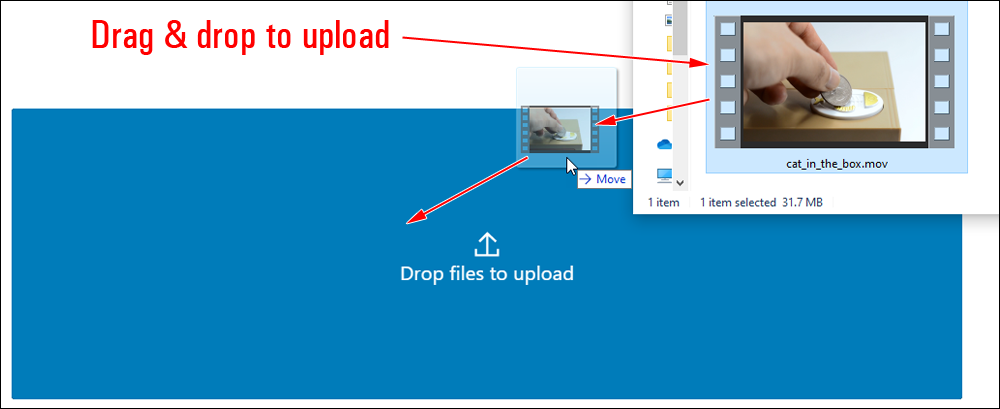
- Make sure you know where your media folder is located and open this folder (you may have to resize your browser to view your post and your media folder).
- Select a video from your media folder and drag it onto the active (shaded) upload area.
- The video will automatically upload to your media library and be inserted into your Video block.
Add A Video Using Your Web Browser Uploader
To add a video using your web browser uploader:
- Make sure you know where your media folder is located.
- Select the Video block and click the ‘Upload’ button to open your web browser’s uploader window.
- Select a video from your media folder and click the ‘Open’ button to import the video into your site.
- This will automatically upload the video to your media library, insert it into your Video block, and add it to your post or page.
Let’s go through the above steps:
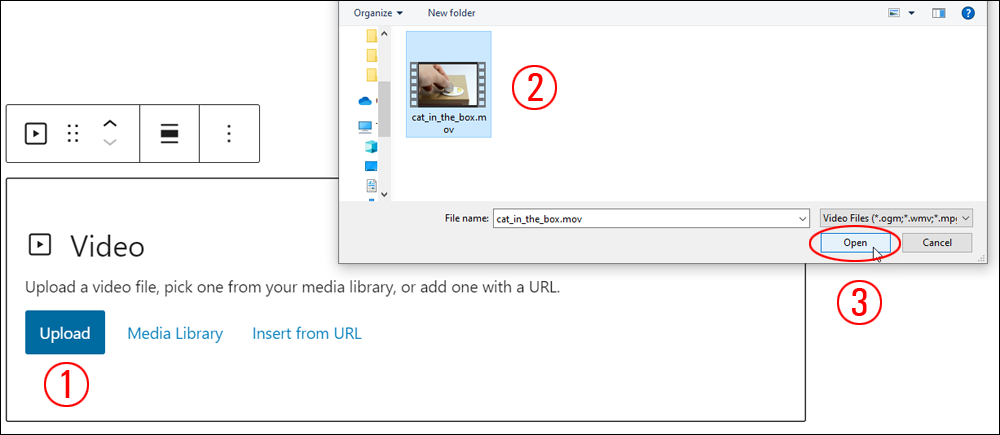
First, click on the ‘Upload’ button in the Video block (Step 1)…

This will bring up the ‘Upload Media’ window on your browser. Select a video from your media folder (Step 2) and click on ‘Open’ to import the video into the Video block and add it to your post or page. (Step 3)
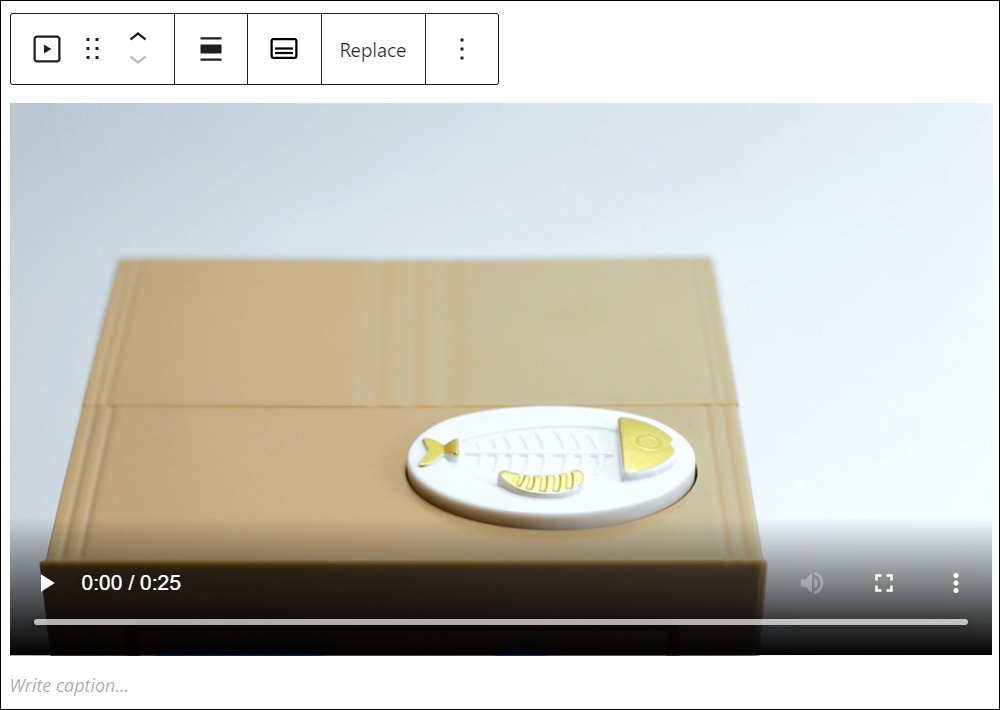
The video will be imported into your Video block and added to your content.
Add A Video From Your Media Library
To add a video from your media library:
- Make sure that you have uploaded the video to your media library (if you need help with this step, see our tutorial on How To Use The WordPress Media Library).
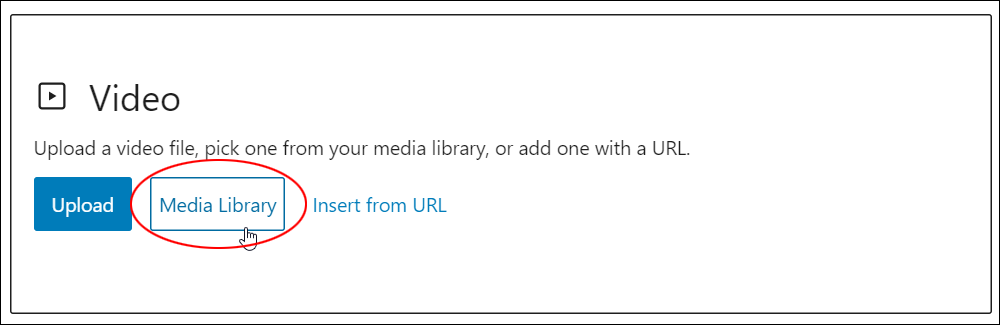
- Select the Video Block and click on the ‘Media Library’ button.
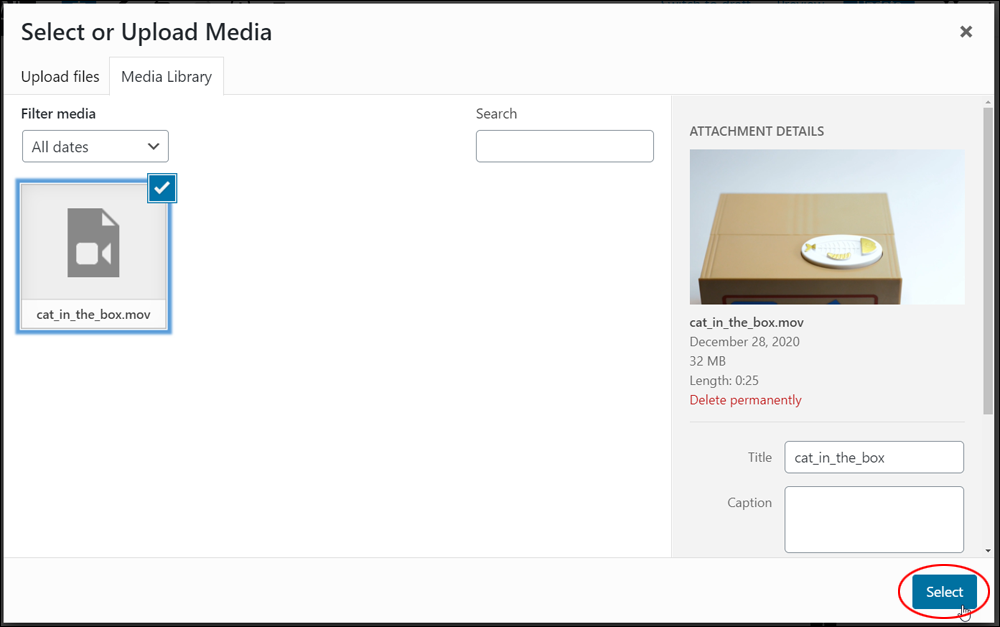
- Click on a video from the Media Library to select it.
- Click on the ‘Select’ button.
- Your video will be imported to the Video Block and added to your post or page.
- Update or publish your post or page to save your changes and update your content.
Let’s go through the above steps:
Hover over the Video block and click on the ‘Media Library’ button…
Select a video from your media library (or upload one from your media folder, then select it) and click on the ‘Select’ button.
The video will be imported into your Video block and added to your content.
Add A Video From An External URL
You can also add a video to your post or page from an external URL.
To add a video from an external URL:
- Make sure the video has been uploaded to your server or an external cloud storage location (e.g. Amazon S3, Dropbox, etc.)
- Copy the video’s URL.
- Select the Video Block and click on ‘Insert from URL’.
- Paste the video URL into the URL field.
- Click ‘Apply’ to insert the video into your content.
Let’s go through the above process:
Upload the video to your storage location and copy its URL to your clipboard, then select the Video block, and click on ‘Insert from URL’.
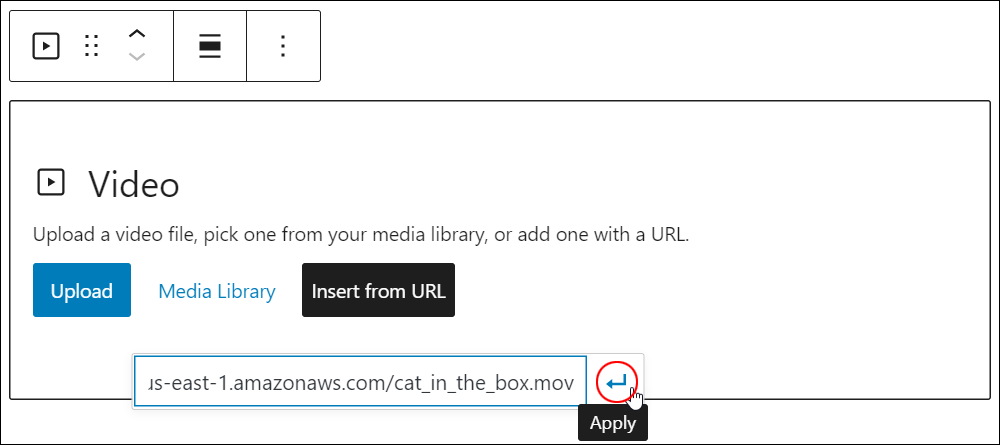
Paste the video URL into the URL field and click ‘Apply’ to add the video to your post or page.
Add A Video From A Supported Embedding Format
With WordPress, you are not restricted to adding videos to your content using only the Video block.
You can also add videos from a supported embedding format (e.g. a YouTube video) using other types of blocks, such as:
For example, to add a video from a supported embedding format to a Paragraph block:
- Add a Paragraph Block to your content.
- Paste in the video URL from a supported source (e.g. a YouTube video URL).
- The Paragraph Block will automatically convert into an Embed block and display your video.
After adding videos to your content, you can:
- Edit and configure your block’s settings,
- Save, publish, or update your post or page.
How To Edit A Video Block
To edit a Video block:
- Click inside the Video block to select it.
- Use the Block Editor tools to:
- Change the alignment of the video (left, center, right).
- Change the width of the video relative to the content on your page (wide width, full width).
- Add and format a video caption (e.g. bold, italics).
- Add a hyperlink to the video caption.
- Use the Block Settings to:
- Configure video settings (e.g. autoplay, loop, muted).
- Configure playback controls (e.g. auto, metadata, none)
- Add a video thumbnail image (poster image).
Let’s go through some of the above options:
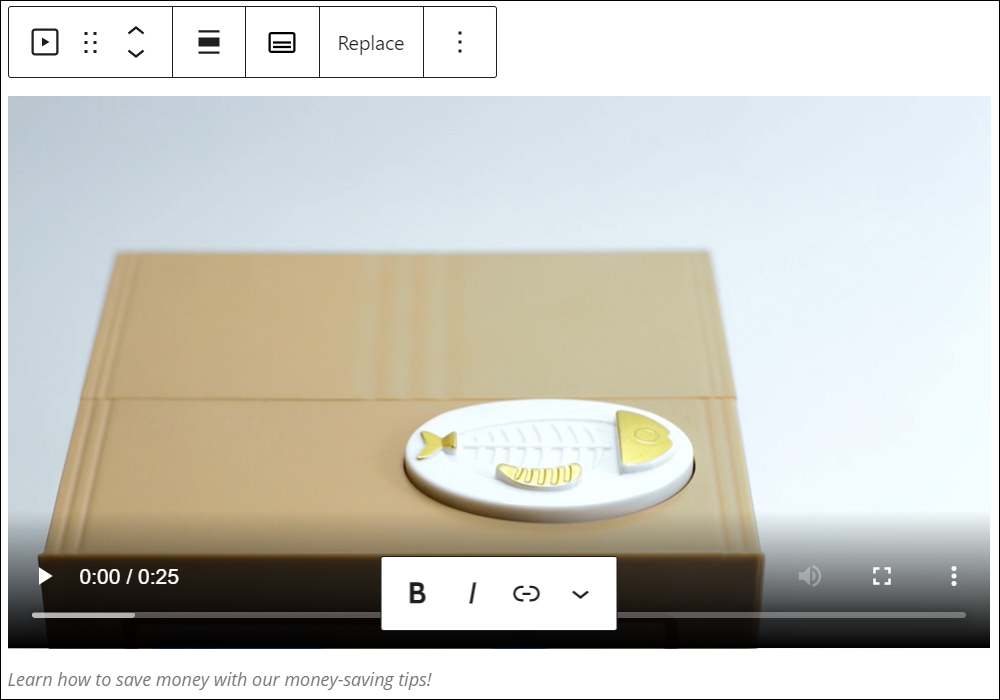
Add A Caption To Your Video
To add a caption to your video, do the following:
- Click on the video block.
- Select the ‘Write Caption…’ field below the video.
- Type or paste in your video caption.
- Use the formatting tools to format your caption (e.g. bold, italics, hyperlink, etc.).
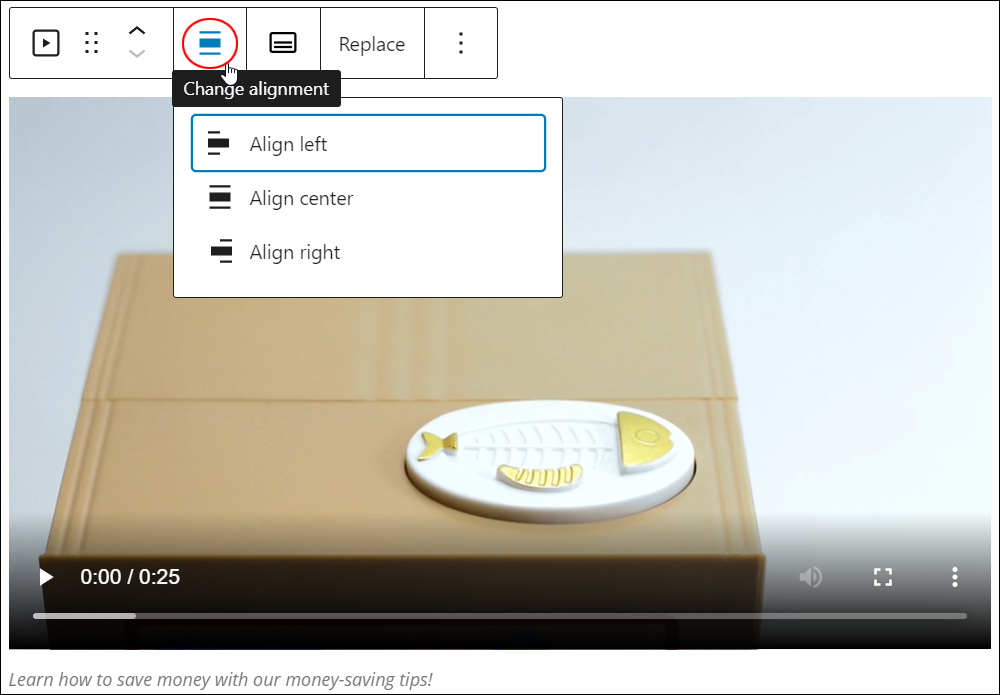
Change Video Alignment & Width
The Video block editor includes the Change alignment tool.

Click on the Video block and select an option from the Change Alignment tool’s menu to align your video in your content (left, center, right) or adjust its width (wide width or full width).
![]()
Note: Your theme must support the ‘Wide width’ and ‘Full width’ options. Not all themes support these options.
Add Text Tracks
Text Tracks help make your content more accessible to a wider range of users and allow you to display timed text tracks (such as subtitles or captions) while your media is playing.
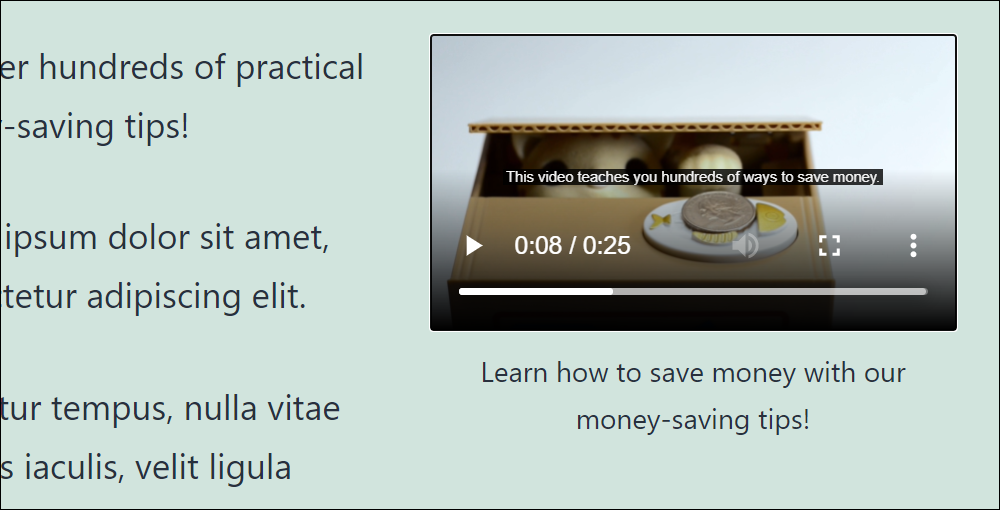
![]()
Web Video Text Tracks use WebVTT format (.vtt files). You can find many tutorials online on how to create a VTT file.

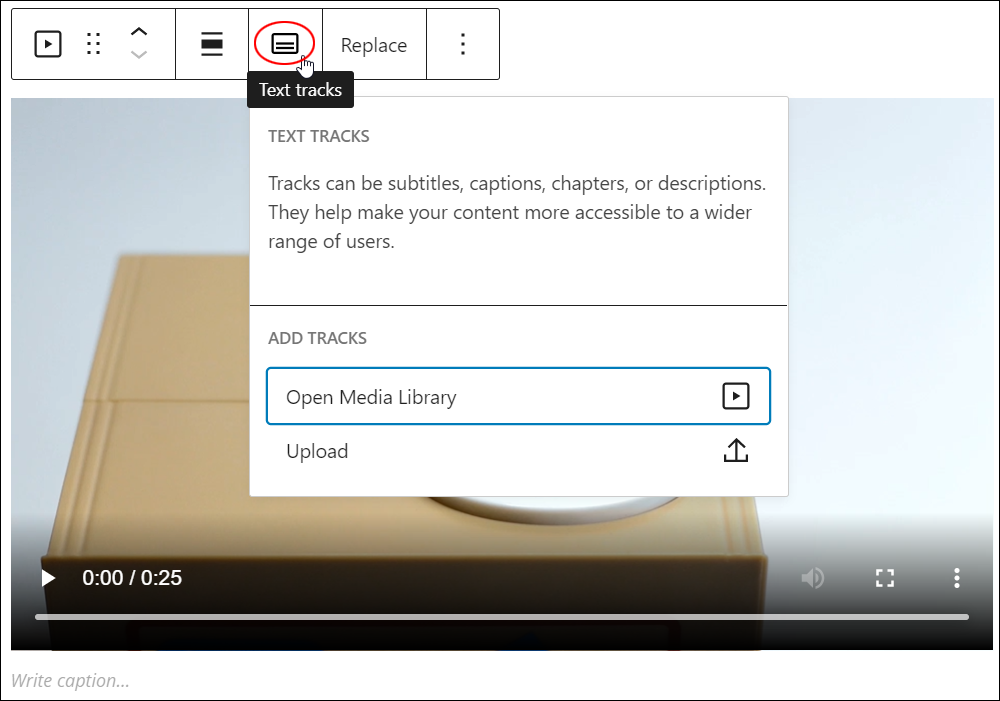
To upload a text track to your video, click on the Text tracks tool and select the option to either:
- Open Media Library – Add a text track from your Media Library.
- Upload – Add a text track from your hard drive or other storage location.
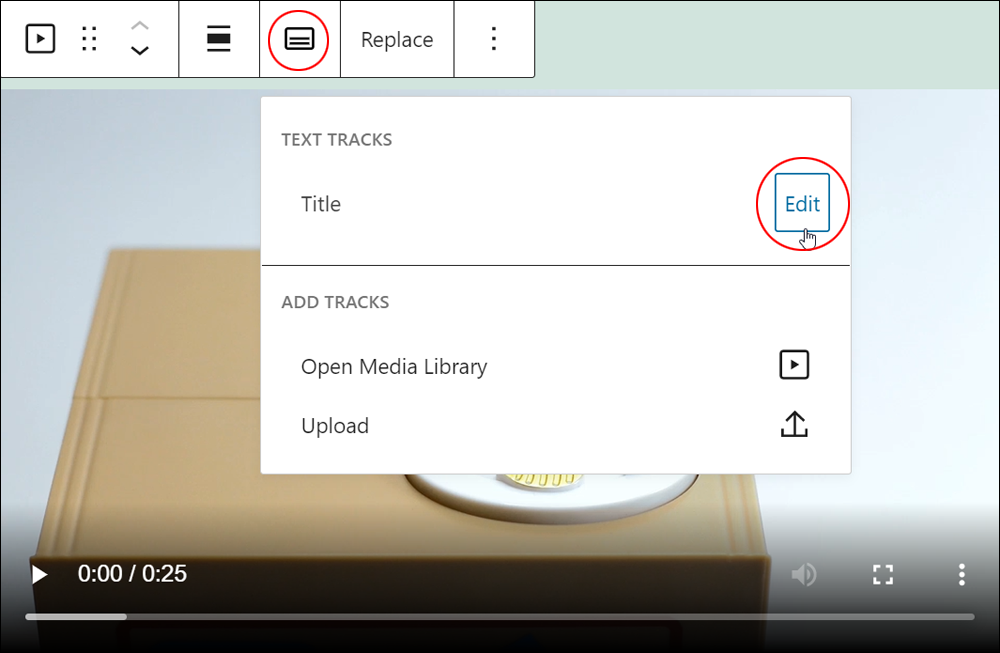
After uploading your track, the Edit Track screen will display the following options:
- Label – Add a title to your text track. This user-readable title will be used by your browser when listing available text tracks.
- Source language – Specify the language of the track text data.
- Notes:
- You must use a valid BCP 47 language tag.
- If the Kind attribute is set to Subtitles, then you must define the source language. (see below)
- Notes:
- Kind – Select an option to specify how the text track will be used from the dropdown menu. (Note: If omitted, the default kind is Subtitles. If the attribute contains an invalid value, it will use Metadata):
- Subtitles: Add translations of the dialogue in the video. Suitable for when audio is available but not understood. Subtitles display over the video.
- Captions: Add transcriptions of the dialogue, sound effects, musical cues, and other audio information. Suitable for viewers with hearing impairments and muted videos. Captions display in the video.
- Descriptions: Add text describing what’s happening in the video. Descriptions are read by a screen reader or turned into a separate audio track. Suitable for vision-impaired users and users that cannot use a screen (e.g. while driving or engaged in other tasks).
- Chapters: Add chapter titles or a list of chapters to create a navigation structure within the video that users can click on to go to a specific chapter or section of the video.
- Metadata: Add tracks with data meant for scripts and other uses (e.g. javascript). Metadata tracks aren’t shown to users.
- Remove track – Click this link to remove the track from your video.
- Close – Click this button to update your settings and exit the screen.

You can upload multiple text tracks to each video block and associate this with your video. To edit a text track, click on the Edit button next to the track label.
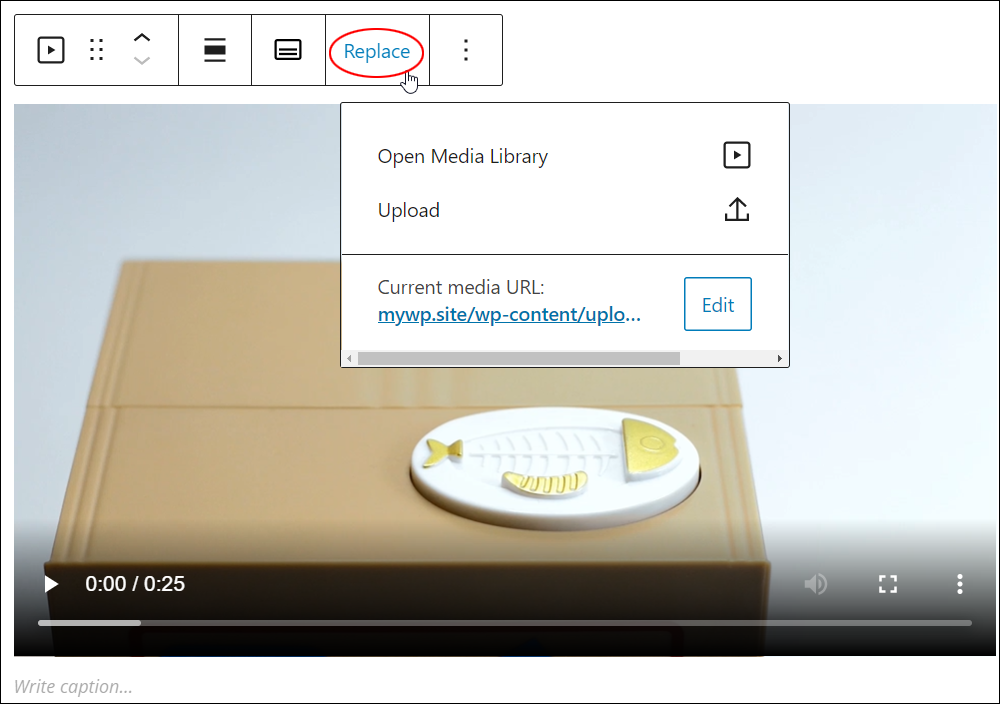
Replace Your Video
You can replace the video in a Video block by:
- Selecting an already uploaded video from your Media Library,
- Uploading a new video from your media storage device, or
- Replacing the current media URL with another URL (e.g. a link to a video stored in a cloud storage folder).
Remember to update and publish your post or page to save your settings.
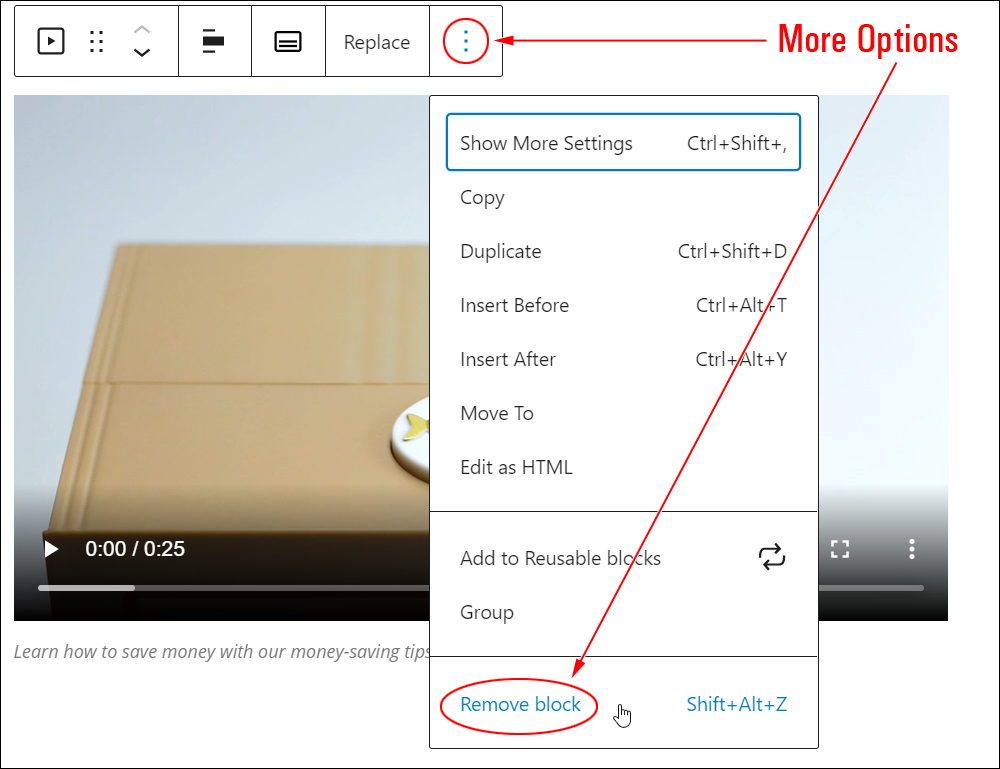
How To Remove A Video Block
To remove or delete a Video block from your content:
- Click inside the Video block to select it.
- Select the ‘More Options’ tool in the Block Editor.
- Click on ‘Remove block’.
- This will remove the Video block from your content.
Additionally…
- You can reposition your block using the ‘Move Up’ and ‘Move Down’ arrows or the Drag and Drop handle tool (if you need help with this step, see our tutorial on How To Use Blocks).
- You can also convert a Video block into a Reusable block.
Video Block Tools, Options & Settings
The Video block includes tools, options, and settings for:
- Video Block Editor
- Video Block Settings
Video Block Editor
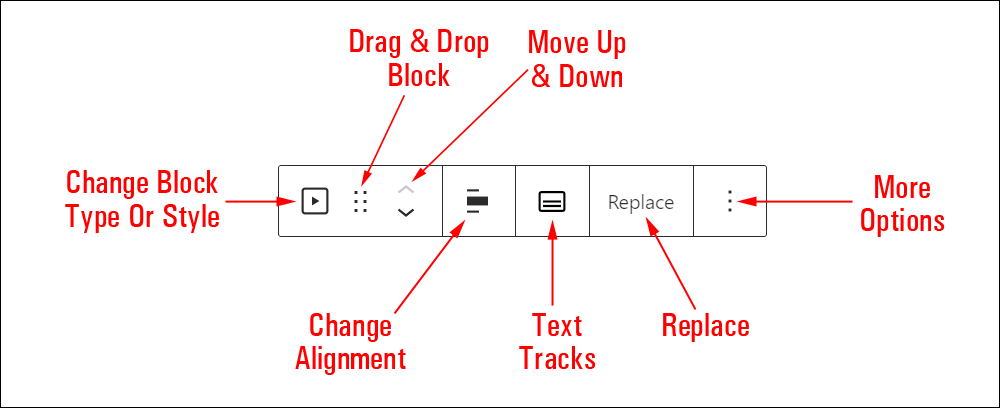
The Video Block Editor includes tools that let you perform the following operations:
- Change Block Type (See ‘Video Block – Additional Info’ section below.)
- Drag & Drop Tool
- Move Up and Down Tool
- Change Alignment
- Align video left
- Align video center
- Align video right
- Wide width – makes the block stick out on either side of regular content.
- Full width – makes the block stretch over the entire width of the browser window (regular content remains within margins on either side).
- Text Tracks
- Open Media Library
- Upload
- Edit track
- Replace
- Open Media Library
- Upload
- Current media URL
- Video Caption Tools
- Add and edit text
- Formatting tools:
- Bold
- Italic
- Link/Unlink
- More Rich Text Controls – See How To Use Blocks to learn how to use this section.
- More Options – See How To Use Blocks to learn how to use this section.
Video Block Settings
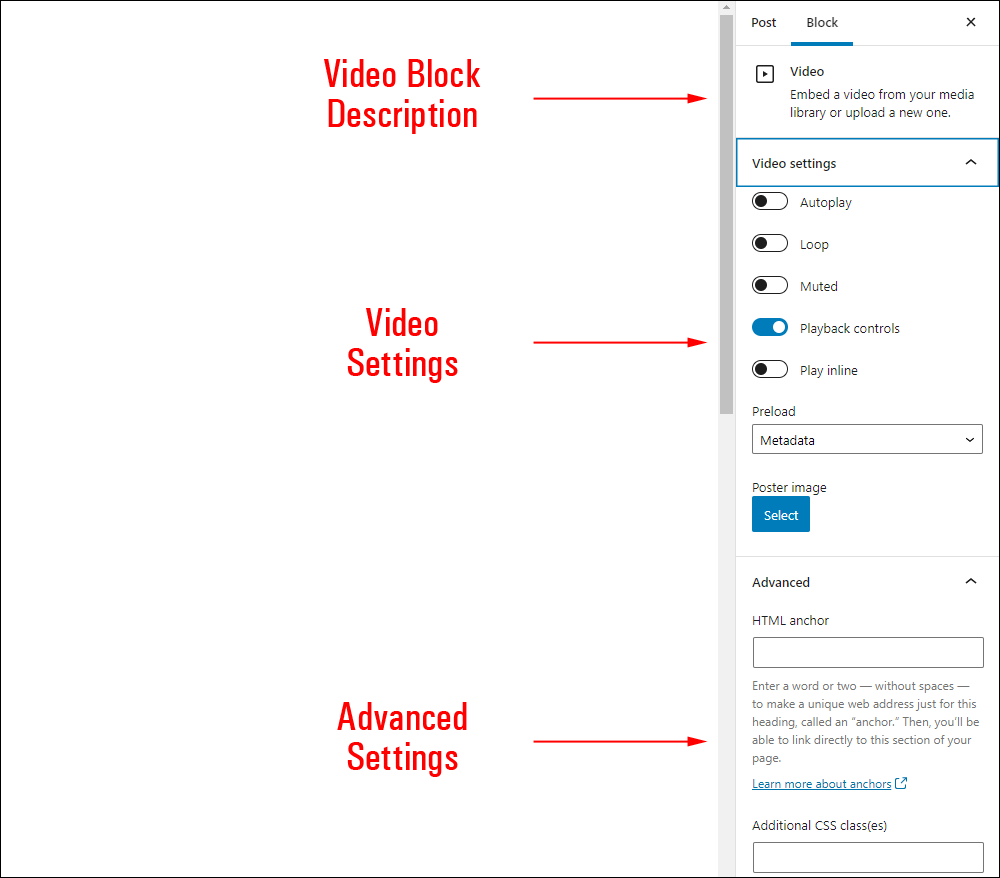
Video block settings include:
- Block description area
- Video Settings
- Autoplay (on/off) – Begin playing your video automatically when someone visits your page or post (i.e. when the page is loaded in the visitor’s browser).
- Loop (on/off) – Video repeats after it’s been played. If set to ‘on’, the video will keep looping after initial playback.
- Muted (on/off) – Mute the video soundtrack.
- Playback Controls (on/off) – Display or hide your video playback controls.
- Play inline (on/off) – Set your video to be played within the element’s playback area. Note: turning this setting to ‘off’ doesn’t imply that your video will always play in fullscreen mode.
- Preload – This section lets you specify how much of the video file is preloaded (downloaded automatically) when the page or post is loaded. Note: having the whole file download automatically can slow down your page’s load speed. There are three settings to choose from:
- Auto – This downloads the entire video file as soon as the page loads, regardless of whether the visitor clicks the Play button or not. Note: this setting has the biggest impact on your page or post’s load speed, especially with larger video files.
- Metadata – Only basic info about your video file is preloaded: dimensions, first frame, tracklist, duration, etc. Like the None option, your video file only begins downloading when someone clicks the Play button. This setting is very fast, as the only thing downloaded is text.
- None – No video preloading takes place automatically. Your video file only begins downloading when someone clicks Play. This is the fastest setting. Note: there’s not much difference between selecting Metadata and None.
- Poster Image – Select an image thumbnail for your video from your media library.
- Advanced Settings
- HTML Anchor – Create a unique web address to send users directly to this block using a unique jump link URL. To learn more about using HTML Anchors, see our tutorial on How To Use Blocks.
- Additional CSS Class(es) – This field lets you add multiple CSS classes to your block separated with spaces. This allows you to write custom CSS and style the block as you see fit. Note: This requires having knowledge of CSS (Cascading Style Sheets).
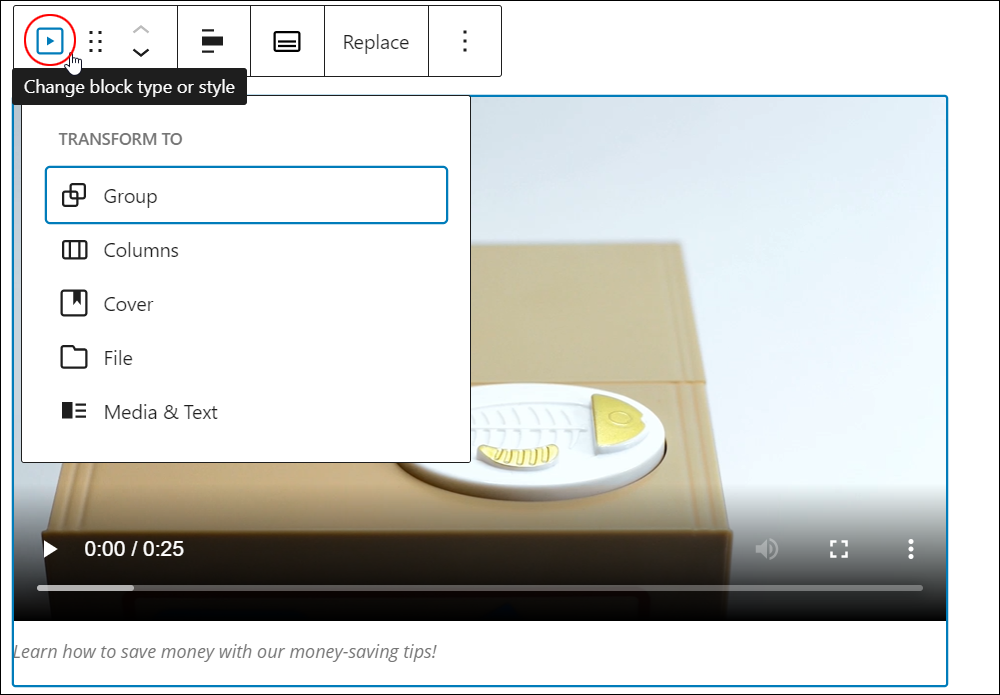
Video Block – Additional Info
The Video block can be converted into the following block types:
Additionally:
Installing plugins or themes on your site may also add new functionality, options, or settings to the Video block.
Congratulations! Now you know how to use the WordPress content editor’s Video block.
To learn how to use other blocks, go here: WordPress Block Editor – How To Use Blocks
***
Stock video by Videezy

Updated: July 5th, 2024