WordPress Block Editor – Heading Block

This tutorial is part of our series on How To Use The WordPress Block Editor (Gutenberg).
- To learn more about using the WordPress block editor interface, go here: The WordPress Block Editor – Content Area
- To learn more about using blocks, see this tutorial: How To Use WordPress Block Editor Blocks
***
Heading Block – Description
Headings are normally used to indicate the start of a new section or topic. The Heading block lets you introduce new sections and organize content around topics to help visitors (and search engines) better understand your content structure.
How To Use The Heading Block
In this section, we’ll cover:
- How to add a Heading block to your content.
- How to edit and configure your Heading block and block settings.
- How to remove the Heading block from your content.
For more details on using blocks (e.g. how to move blocks around your content), see this tutorial: How To Use Blocks.
Adding A Heading Block
To add a Heading block:
- Either:
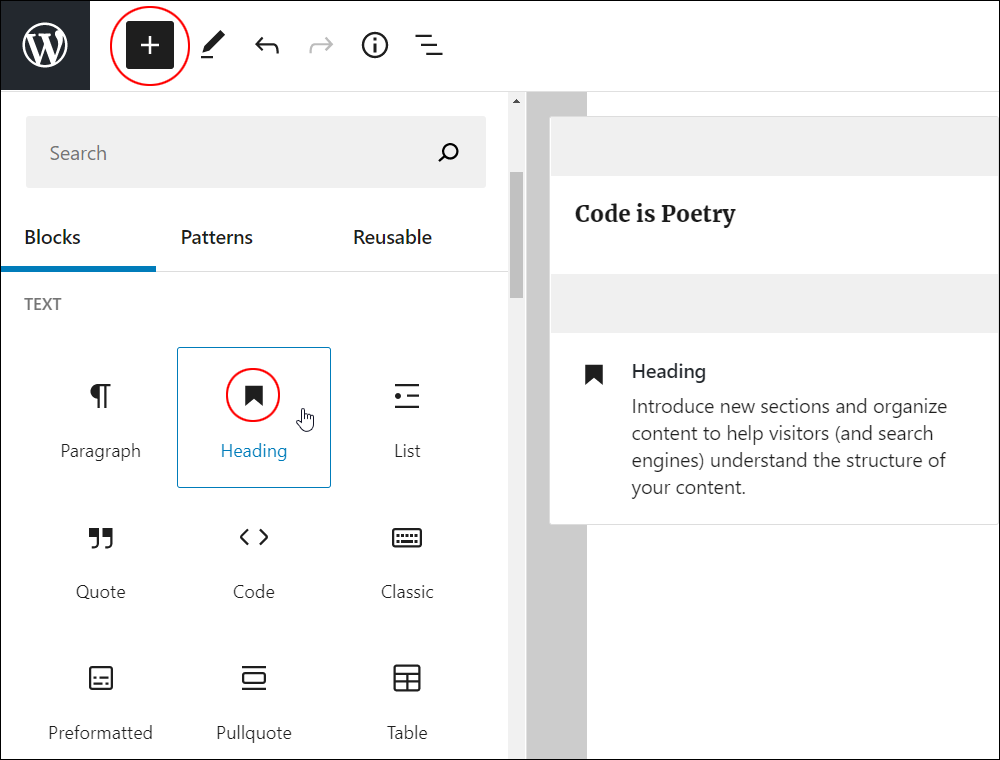
- Click on the ‘Add Block’ tool in the Editing Toolbar section and select the Heading block (in Most Used or Text section),
- Add the Heading block in the Content Area.
- Type or paste in your heading.
- Use the tools in the Heading Block Editor or Block Settings section to edit and format your heading.
Let’s go through the above steps.
First, create a new post or page or open an existing post or page and either:
Click on the Add Block tool and select a Heading block…
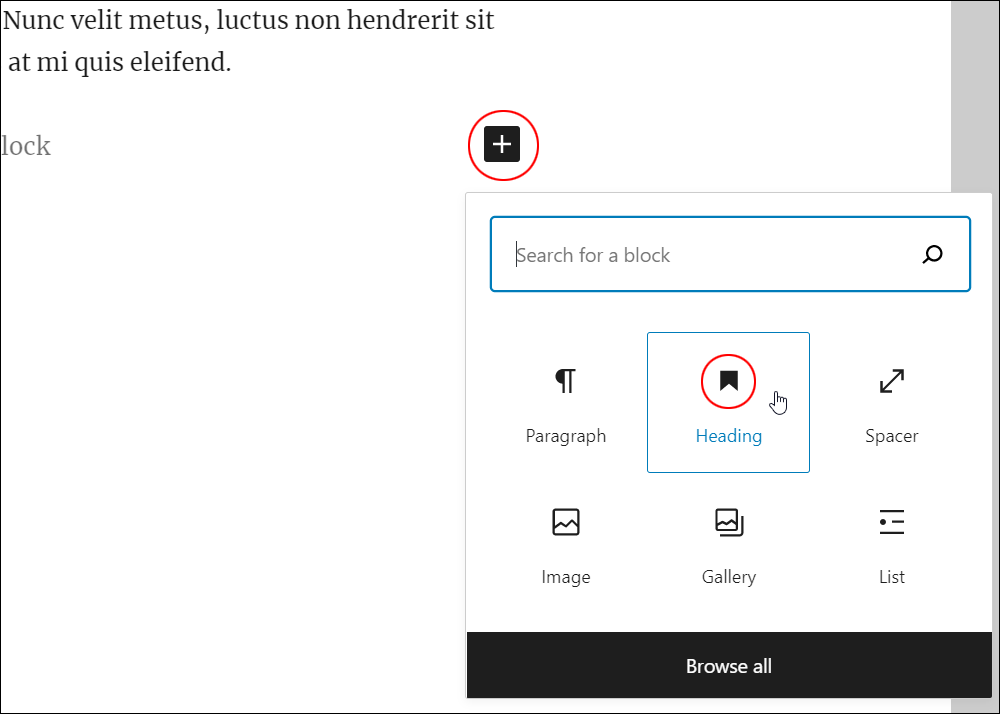
Or, select a Heading block using the Inserter tool in the Content Area.
Either of the above methods will add a Heading block to your content.

After adding a Heading block, simply type or paste in your heading.
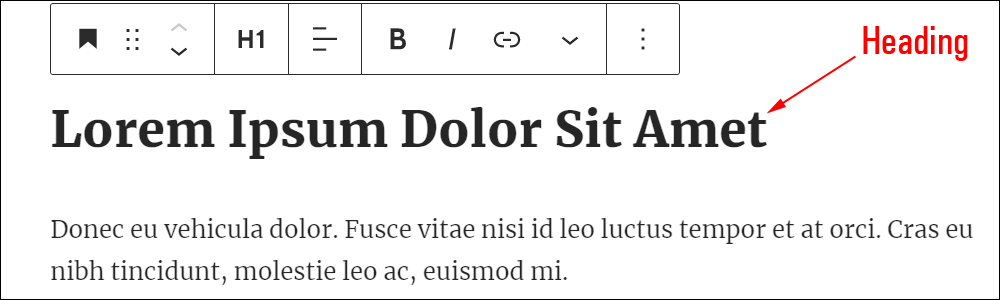
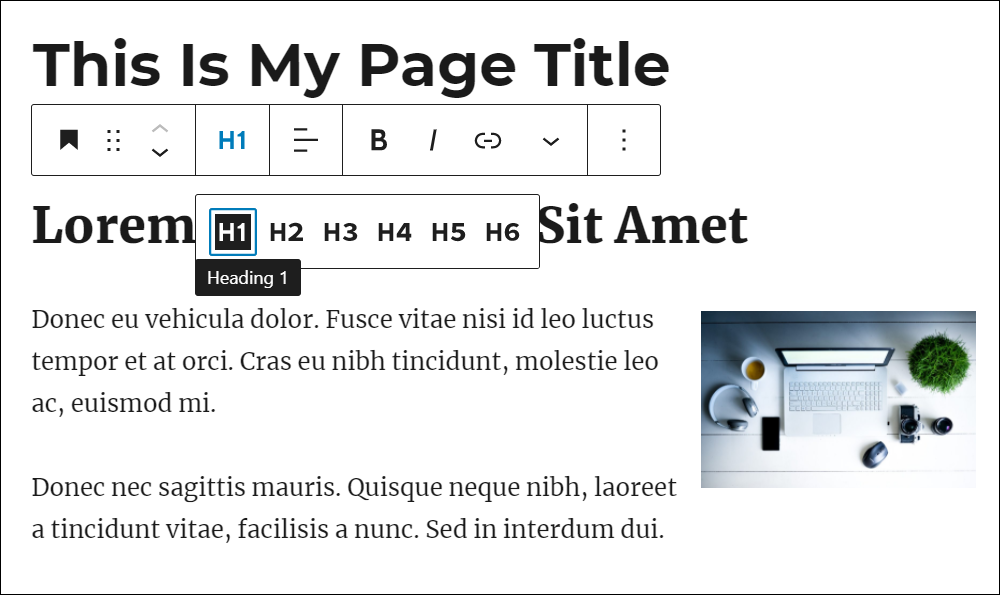
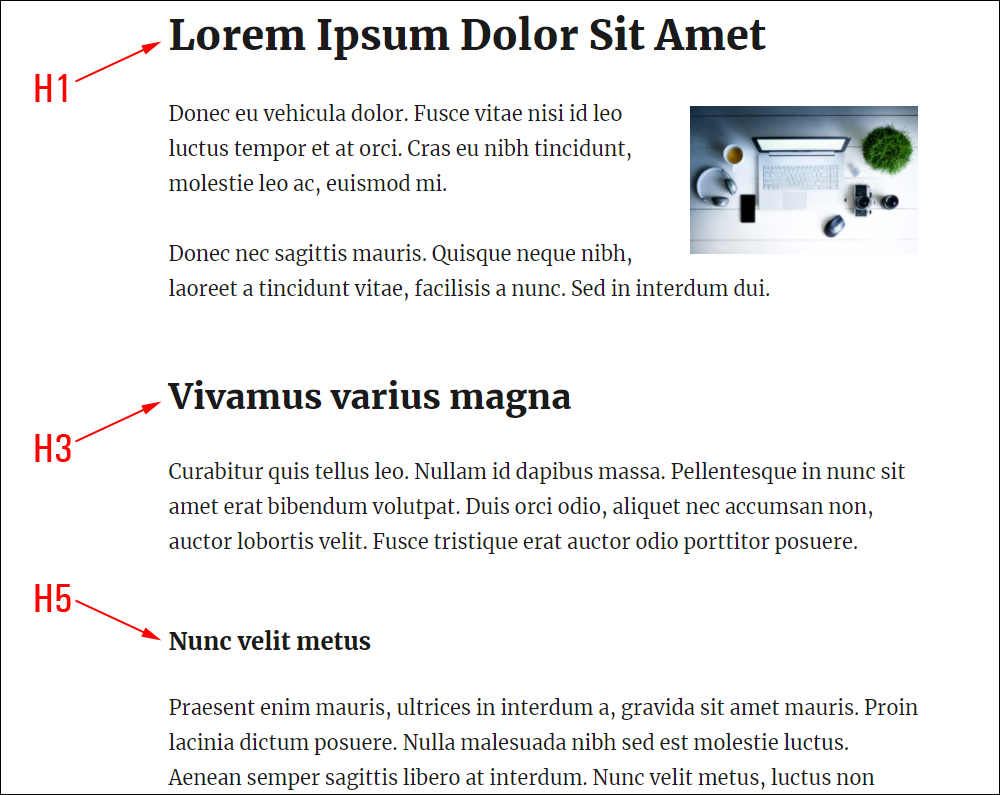
Go through your post or page and select different heading levels (H1-H6) for different sections of your content.
Repeat this process for all your content headings.
![]()
Notes:
- The Heading block supports all HTML heading tags (H1 – H6).
- The Heading block also supports HTML Anchors (also referred to as Jump Links – see further below).
- By default, heading styles are determined by your site’s theme. you can also customize heading styles if you have knowledge of using CSS (Cascading Style Sheets).
After adding headings to your content:
- Edit and configure Heading block settings,
- Save, publish, or update your post or page.
How To Edit A Heading Block
To edit a Heading block:
-
- Click inside the Heading block to select it.
- Use the Block Editor tools to:
- Change the heading Level (H1 – H6)
- Change the heading alignment (left, center, right)
- Format the text (bold, italics, strikethrough, etc.)
- Add a hyperlink or jump link to your heading.
- Use the Block Settings to:
- Change the heading’s typography (font size and line height).
- Change the heading’s color settings (text color, background color).
- Create an HTML anchor (see further below) or style your heading using CSS.
Let’s go through some of the editing functions of the Heading block.
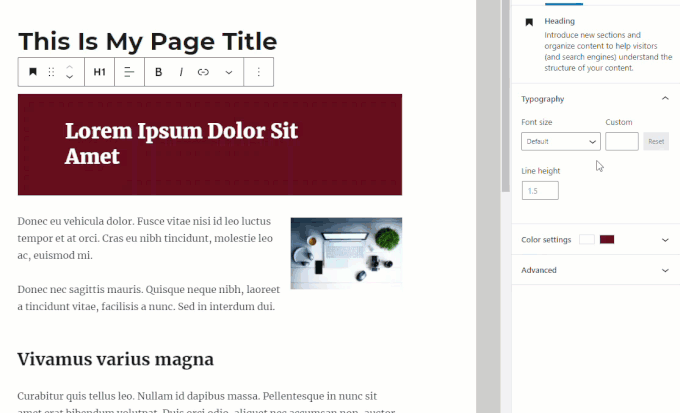
After adding a heading using the Heading block, you can change its text or background color.
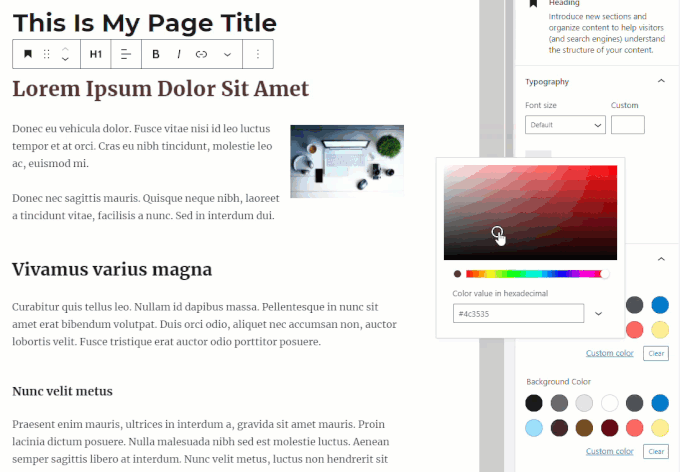
You can also change the size of the font and line spacing in the Typography section. Click the ‘Reset’ button to return your heading to its default setting.
HTML Anchor
An HTML anchor lets you add “jump links” in your content pointing to different sections of your page (e.g. like in a Table of Contents).
To create an HTML anchor:
-
-
- Click inside the Heading block of the section you want visitors to jump to when they click on an anchor link.
- In the Advanced Settings > HTML Anchor section of the Heading block settings, type in a unique anchor by entering one or two words without spaces (you can use hyphens to separate words).
-
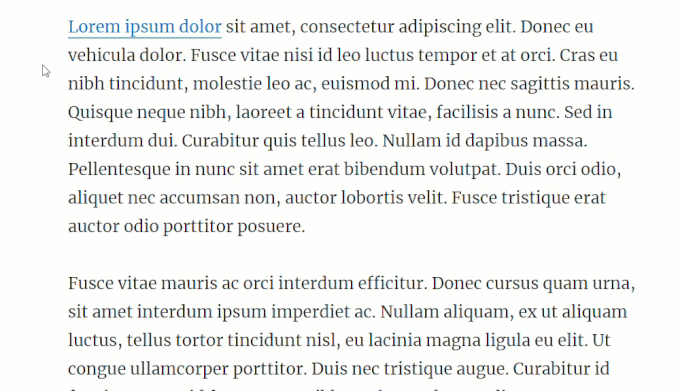
For example, in the screenshot below we have created an HTML anchor using the text ‘main-title‘…

The next step is to connect the anchor you’ve added in your Heading block to your page.
To do this:
-
-
- Select and highlight text in your content and click on the Hyperlink tool in the Heading block editor.
- Add the anchor name into the URL field preceded by a ‘hash’ symbol (#). In our example, this is ‘#main-title‘ (without the quote symbols).
- Make sure your anchor text matches the one created in the block’s advanced settings section.
- Click the Enter button to create the link.
- Save and publish or update your post or page.
-

Now, when users click on the text containing your Anchor link, they will be taken to the section of the page you have marked with an HTML anchor.
For more information about linking content on your site, see this tutorial: How To Link Content In WordPress
![]()
You can easily convert a Paragraph Block into a Heading block if you know how to use WordPress keyboard shortcuts.

Remember to update and publish your post or page to save your settings.
How To Remove A Heading Block
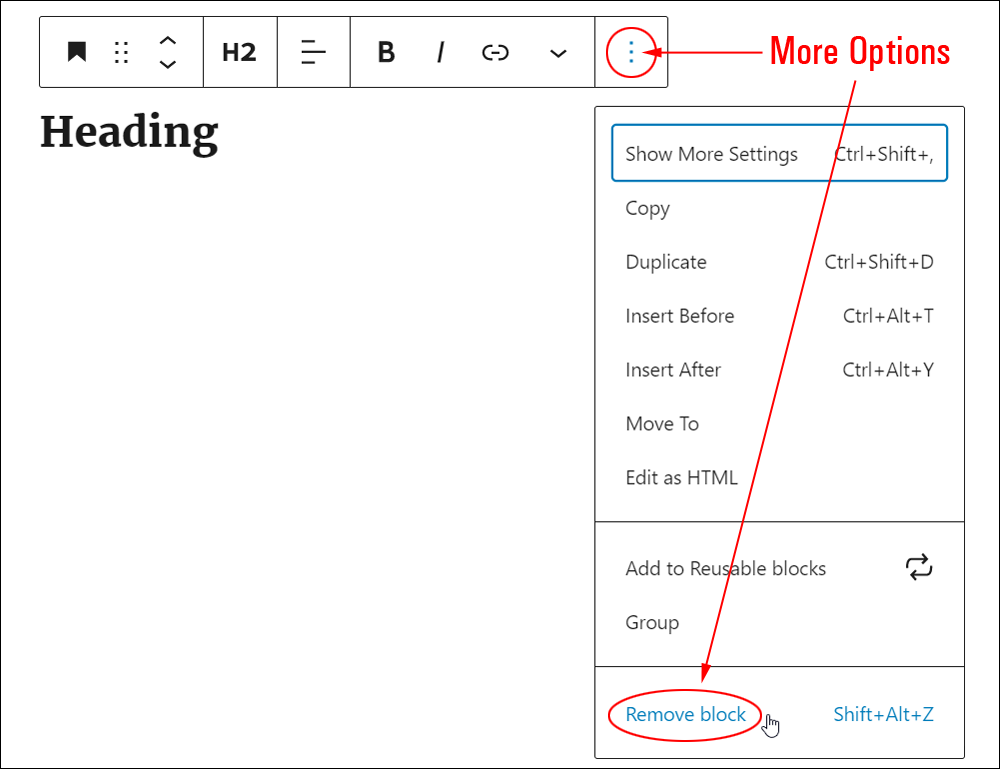
To delete or remove a heading block:
- Click inside the Heading block to select it.
- Select the ‘More Options’ tool in the Block Editor.
- Click on ‘Remove block’.
- This will remove the Heading block from your content.
Additionally…
- You can reposition your block using the ‘Move Up’ and ‘Move Down’ arrows or the Drag and Drop handle tool (if you need help with this step, see our tutorial on How To Use Blocks).
- You can also convert a Heading block into a Reusable block.
Heading Block Tools, Options & Settings
The Heading block includes tools, options, and settings for:
-
-
- Heading Block Editor
- Heading Block Settings
-
Heading Block Editor
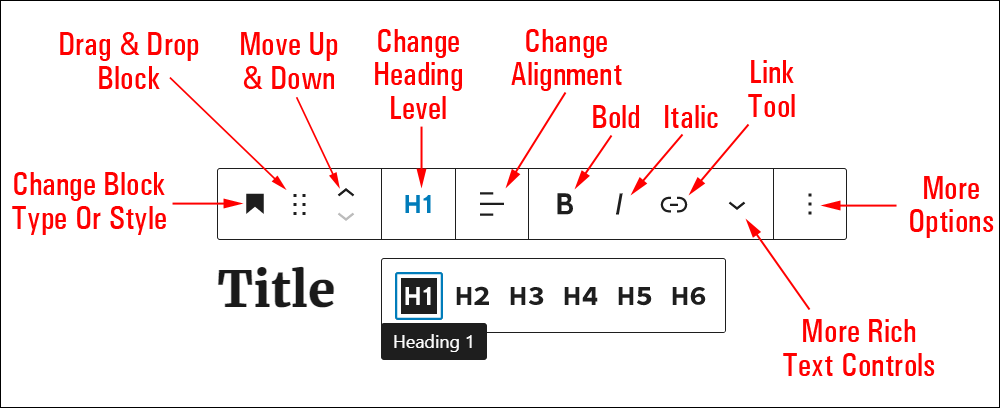
The Heading Block Editor includes tools that let you perform the following operations:
- Change Block Type (See ‘Heading Block – Additional Info’ section below.)
- Drag & Drop Tool
- Move Up and Down Tool
- Change Heading Level
- H1
- H2
- H3
- H4
- H5
- H6
- Change Alignment
- Align text left
- Align text center
- Align text right
- Bold – Add bold text formatting to your file’s link text.
- Italic – Add italicized text formatting to your file’s link text.
- Link Tool – Link and unlink text in your heading.
- Custom URL – Paste a URL or type a search term to bring up a list of posts, pages, or custom post types on your site containing your search term.
- Clicking on the Link settings button brings up the following options:
- Open the link in a new tab (on/off).
- Apply button. Once the Apply button is clicked, your link displays the following additional options:
- View the link.
- Edit the link.
- Delete the link.
- Clicking on the Link settings button brings up the following options:
- Custom URL – Paste a URL or type a search term to bring up a list of posts, pages, or custom post types on your site containing your search term.
- More Rich Text Controls – See How To Use Blocks to learn more about using rich text control settings.
- More Options – See How To Use Blocks to learn how to use this section.
Heading Block Settings

Heading block settings include:
-
-
- Block description area
- Typography
- Font Size
-
- Default
- Small
- Normal
- Medium
- Large
- Huge
- Custom
-
- Custom font size
- Value field – Enter a value in points
- Reset – Resets font size to default.
- Line height – Enter a line height value (decimal values allowed, e.g. 2.5)
- Font Size
- Color Settings – Select from the preset color palette or add a custom color using hexadecimal or RGB values. Click the Clear button to restore the default text color.
- Text color
- Background color (Solid/Gradient)
- Advanced Settings
- HTML Anchor – Create a unique web address to send users directly to the block using a unique jump link URL. To learn more about using HTML Anchors, see our tutorial on How To Use Blocks.
- Additional CSS Class(es) – This field lets you add multiple CSS classes to your block separated with spaces. This allows you to write custom CSS and style the block as you see fit. Note: This requires having knowledge of CSS (Cascading Style Sheets).
-
Heading Block – Additional Info
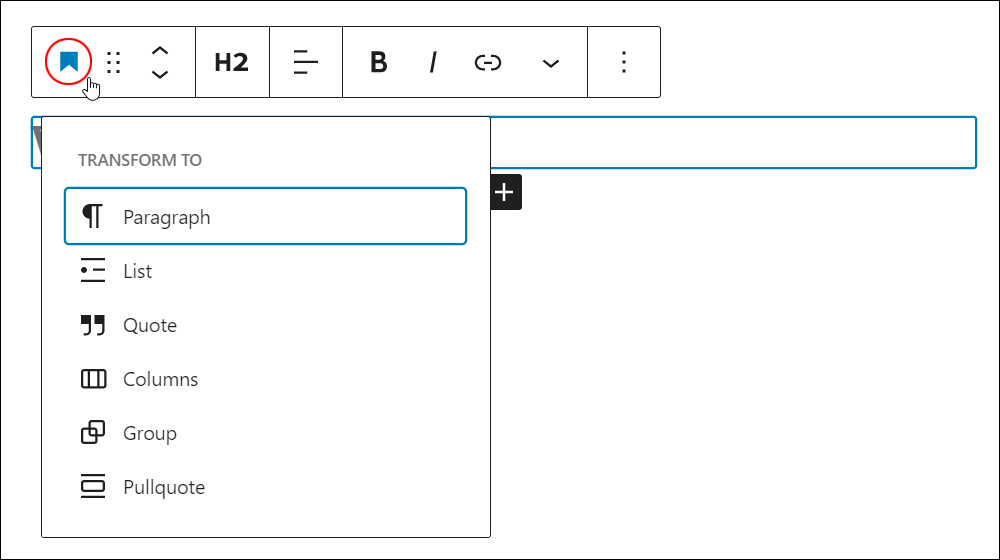
You can convert a Heading block into the following block types:
Installing plugins or themes on your site may also add new functionality, options, or settings to the Heading block.

Congratulations! Now you know how to use the WordPress content editor’s Heading block.
To learn how to use other blocks, go here: WordPress Block Editor – How To Use Blocks
***

Updated: July 5th, 2024