WordPress Block Editor – Block Settings: Audio
 This tutorial is part of our series on using common block settings in the WordPress Block Editor Settings Section.
In this tutorial, you will learn how to customize a block’s video settings and properties.
For a complete understanding of how to use the WordPress Block Editor, see the other tutorials in this series:
- WordPress Block Editor: Block Settings
- How To Use The WordPress Block Settings Section
- How To Use WordPress Blocks
***
Block Settings – Audio
Some types of blocks allow you to customize and edit their audio settings and options.

![]()
Note: Block types that support audio properties must be selected in the content editor area to display the settings in the Block Settings panel.
Note: A block’s audio settings may include additional options depending on which type of block you are using and what plugins and themes are installed on your site.
If you need help using block settings, see this tutorial: WordPress Block Editor: Block Settings
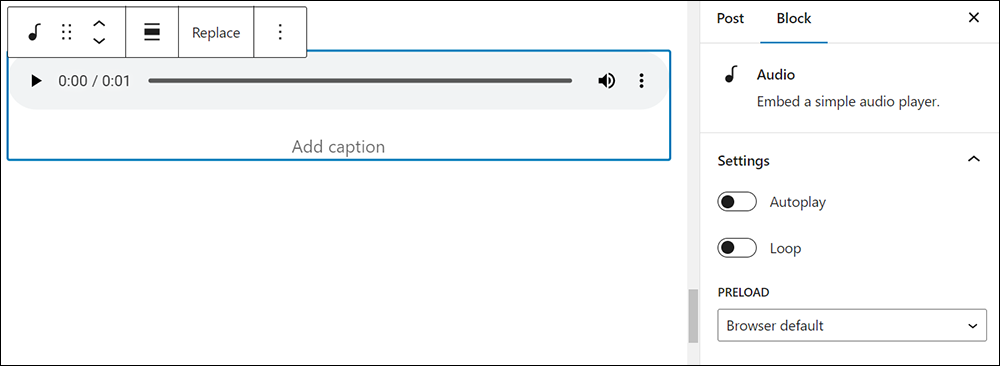
Audio Options
Here are the default settings and options available for blocks that support audio files:
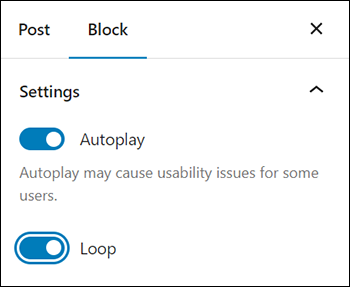
Audio Settings
- Autoplay (On/Off) – Set the audio to begin playing as soon as the page is loaded on a visitor’s browser.
- Loop (On/Off) – Set the audio file to loop after playing.
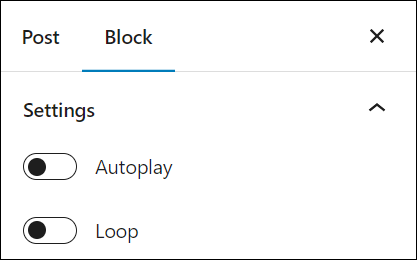
You can turn the above audio settings on or off by switching the toggle for that function.
Preload
This option allows you to select how much of the audio file is downloaded when the page or post is loaded.
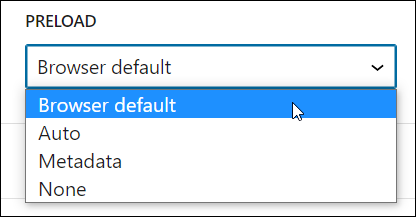
While it may be tempting to go ahead and have the whole file download automatically, this can slow your page’s load speed down.
Settings include:
- Browser default – The user’s browser settings control the audio file’s download.
- Auto – The audio starts loading as soon as the page loads. The entire audio file is downloaded, regardless of whether the visitor clicks the Play button or not. Note: This will create the biggest impact on your page or post’s load speed, especially with larger audio files.
- Metadata – Only basic info about the file (i.e. metadata) will be downloaded automatically: dimensions, first frame, tracklist, duration, etc. Like the None option below, the audio file only begins downloading when someone clicks Play. This setting is also very fast, as the only thing downloaded is text. There’s not much difference between selecting None and Metadata.
- None – No preload is done. Nothing about the audio file is downloaded automatically. The download of the audio file only begins when your visitor clicks the Play button. This is the fastest setting.
Remember to save your work after making changes to update your block’s settings.
WordPress Block Editor Audio Media Settings – FAQs
Here are frequently asked questions about WordPress Block Editor Audio Media settings:
How do I set default audio settings in WordPress?
Default settings for audio, such as autoplay and loop, can be configured on a per-block basis in the Gutenberg editor when you insert an audio file.
Can I manage audio quality and effects through WordPress?
Managing audio quality and effects directly through WordPress settings is not supported natively. For advanced audio handling, consider using plugins that integrate with the Block Editor.
How do I add an audio file to my WordPress post or page?
Use the Audio block to insert audio files such as music, podcasts, or sound clips. You can upload audio directly from your computer or select files from your media library.
What audio file formats are supported by the Audio block?
The Audio block supports common audio formats including MP3, WAV, and OGG. Ensure your audio files are in these formats to ensure compatibility.
Can I control audio playback features like looping or autoplay?
Yes, when you select an audio block, you can configure settings such as autoplay, loop, and preload in the block’s toolbar or settings panel. However, use autoplay cautiously as it can affect user experience.
Is it possible to add a download link for the audio file?
Yes, the Audio block allows you to include a download button. Users can directly download the audio file from your post or page.
How can I ensure that my audio files are accessible to all users?
Provide a text transcription of the audio content whenever possible. This helps in making your content accessible to users who are deaf or hard of hearing and also enhances SEO.
Can I style the audio player in the Block Editor?
Basic styling options such as width and alignment are available directly in the block settings. For more advanced styling, you may need custom CSS.
***
Congratulations! Now you know how to adjust your block’s audio settings.
Additional Block Settings
Click on a tutorial from the list below to learn about using other common block settings in the WordPress block editor.

***
For more tutorials in this series, go here:
- The WordPress Block Editor (Gutenberg)
- How To Use WordPress Blocks
- How To Use The WordPress Block Editing Toolbar
- How To Use The WordPress Block Editor Content Area
- How To Use The WordPress Block Editor Settings Section
- WordPress Block Editor: Block Settings
***

Updated: July 5th, 2024