The WordPress Site Editor
 In this tutorial, you will learn about the WordPress Site Editor – a feature that allows block editor users to build and fully customize their site using blocks and a new styling system.
Refer to the following tutorials if you need help with this section:
- What’s New In WordPress – WP 5.9
- WordPress Block Themes
- The WordPress Block Editor
- How To Use WordPress Blocks
- The Command Palette
- WordPress Blocks – Navigation Block
- Using WordPress Themes
- Where To Find WordPress Themes
- How To Use The WordPress Theme Customizer
- Using Widgets
***
What Is The Site Editor?
As described in this tutorial, WordPress has been moving toward a way of creating and designing websites made entirely out of blocks and block-based features like block themes, templates, and global styles called Full Site Editing (FSE).
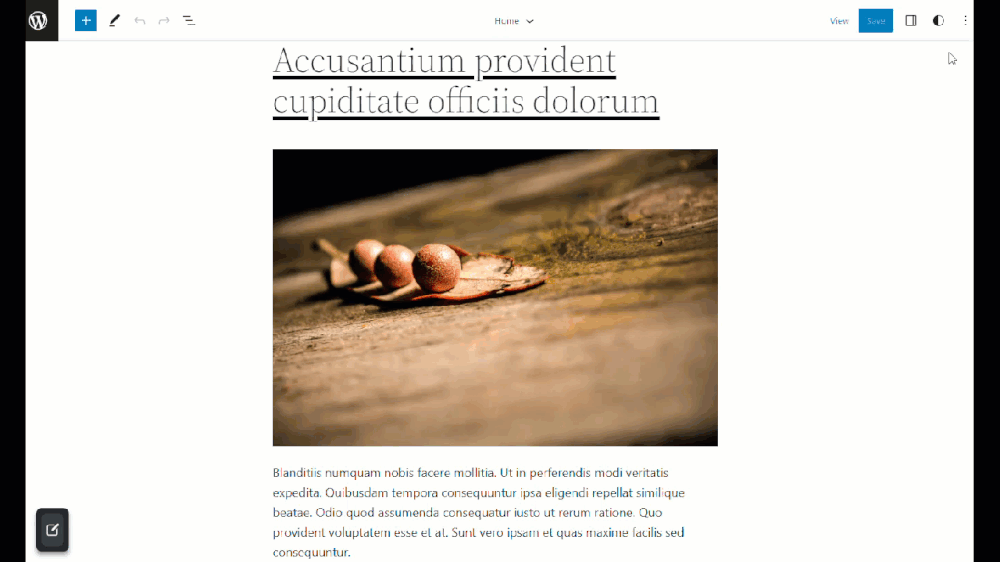
For example, WordPress 5.9 included its first block theme, called Twenty Twenty-Two:
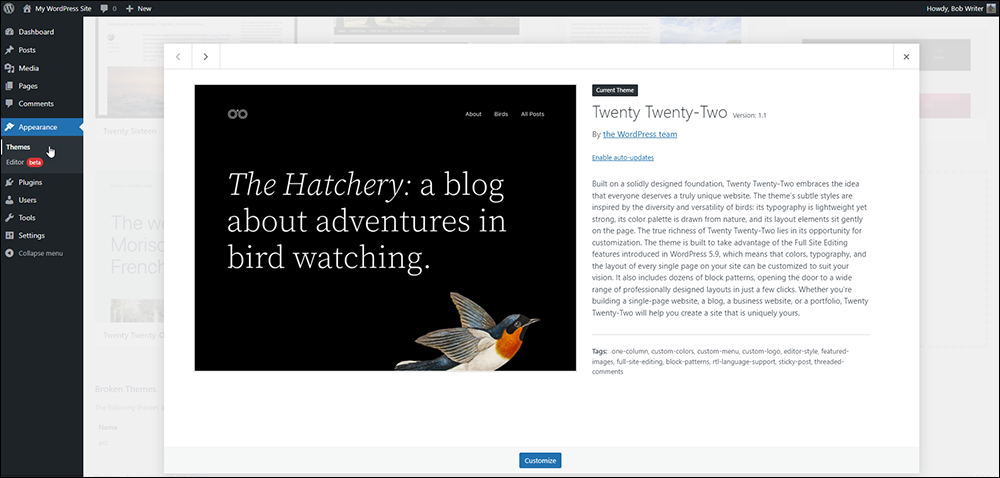
This theme is composed entirely out of blocks.
Block themes let you create entire pages or websites using blocks, and edit and customize all parts of your WordPress site without changing themes.
The Site Editor is a feature of block themes that allows block editor users to build and fully customize their site using blocks and a global styling system.
Some of the Theme blocks you can edit in the Site Editor include the following:
- Navigation
- Template Part
- Site Logo
- Site Tagline
- Site Title
- Query Loop
- Post Title
- Post Content
- Post Date
- Post Excerpt
- Post Featured Image
- Post Categories
- Post Tags
- Login/out
- Page List
How To Access The WordPress Site Editor
You can only access the Site Editor if your site is using a Block theme.
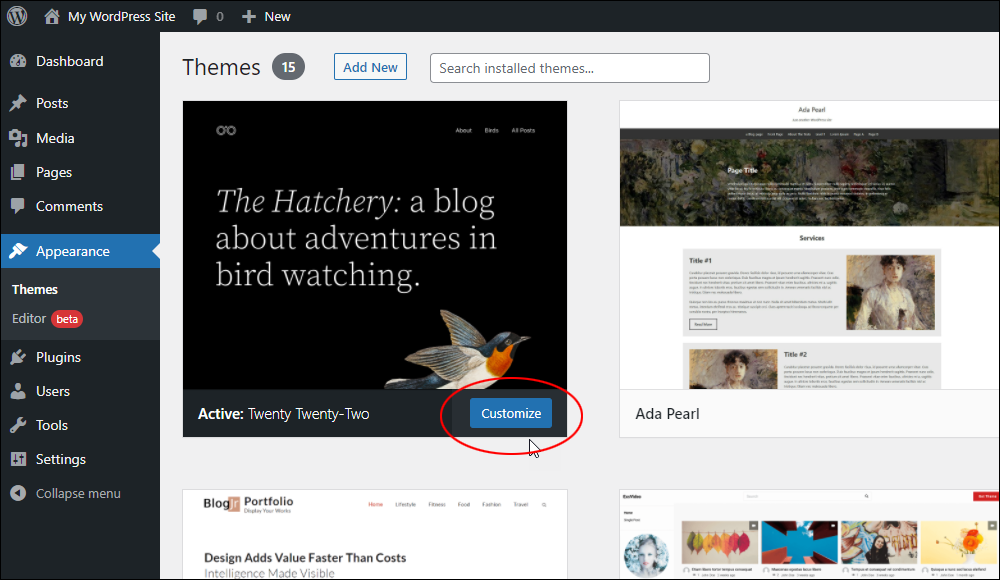
To access the Site Editor and edit or customize your theme, go to Appearance > Themes and click on the Customize button…
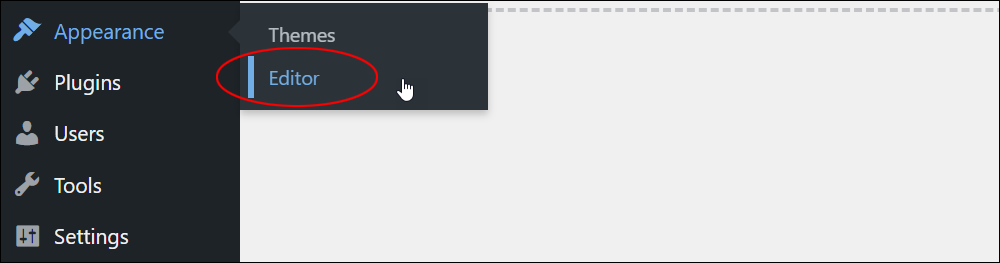
Or by going to your admin menu and selecting Appearance > Editor…
This brings you to the Site Editor and gives you access to its features.
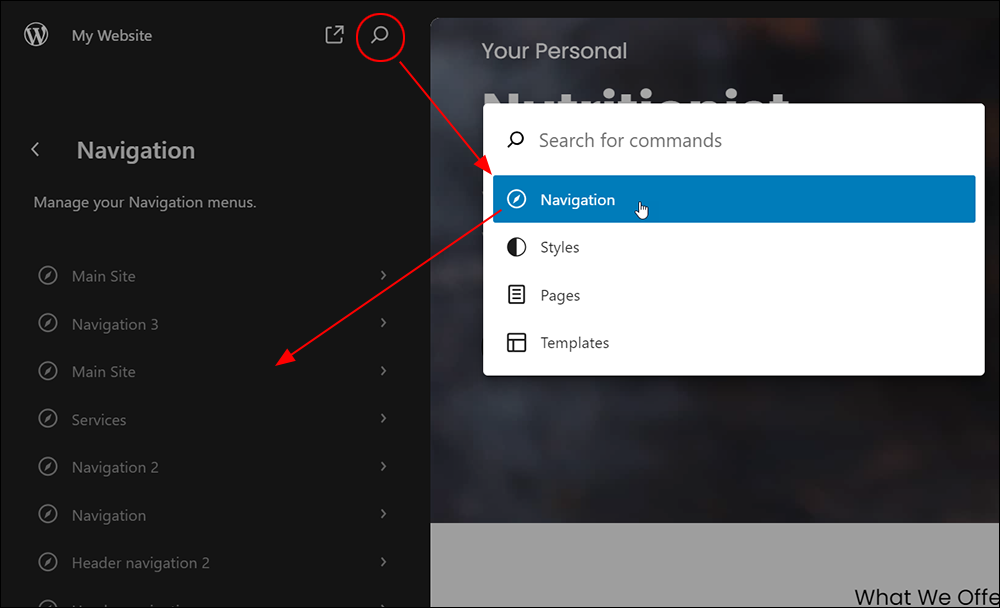
The Command Palette
Introduced in WordPress 6.3, the WordPress Editor Command Palette is a centralized tool within the site editor interface designed to streamline workflow by providing quick access to various editing functions and commands.
For a detailed tutorial on how to use this time-saving feature, go here: The Command Palette
Let’s go briefly over the main features of the Site Editor:
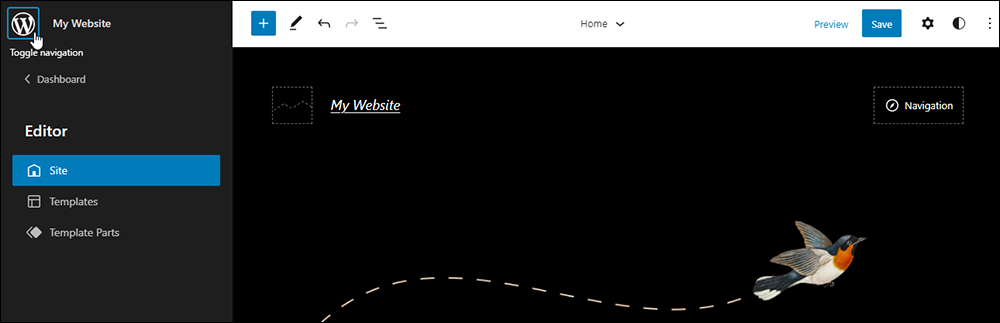
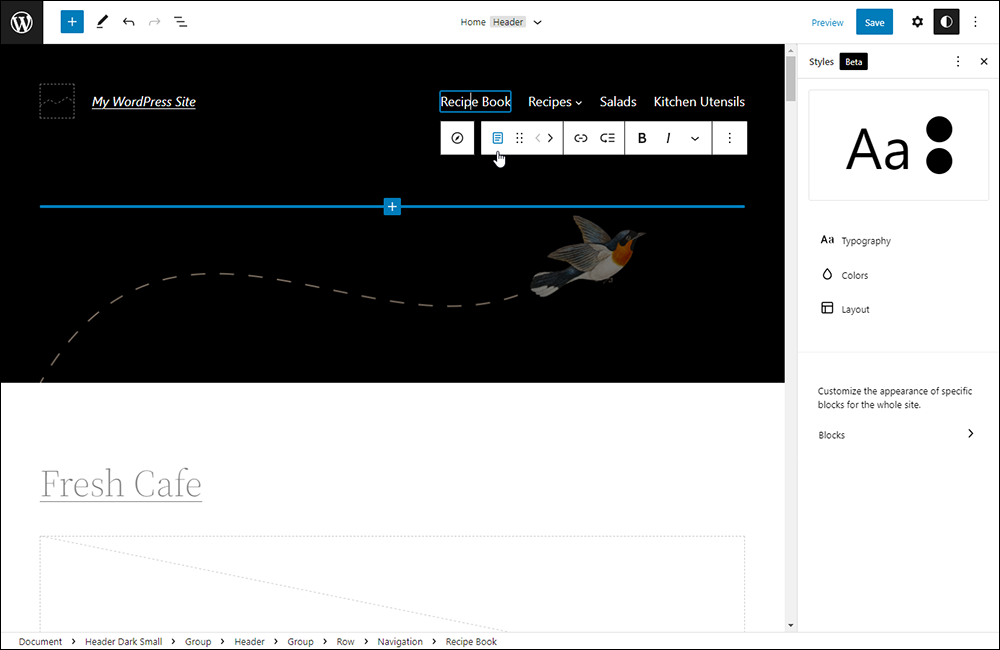
Site Editor > Site
This is the main section of the Site Editor. After going to Appearance > Editor > Site, you can edit all parts of your site, quickly customize everything from your background colors to font sizes for all Heading blocks, navigate between templates, and more.
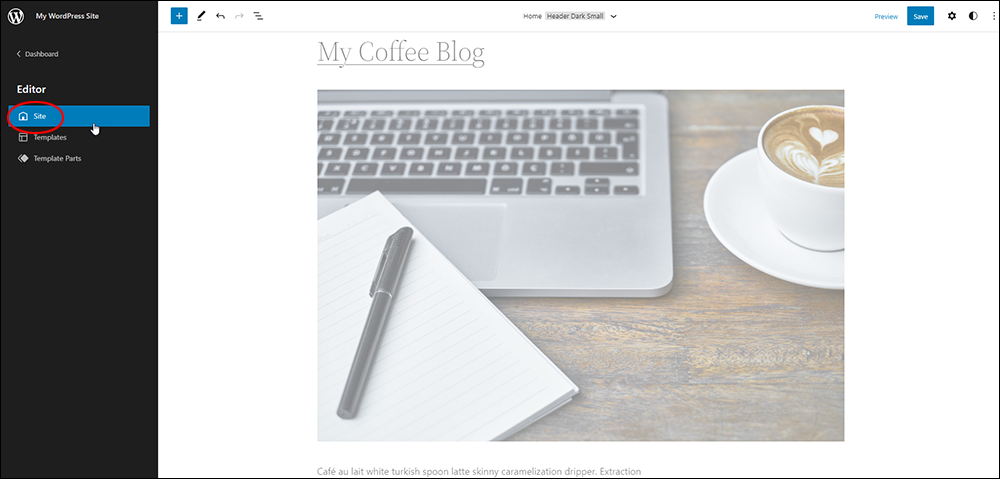
Clicking on any section of this screen will bring up a block with options for editing that element. Most of the changes you make and save here will apply across your entire website.
Site Editor > Templates
To access this section, go to Appearance > Editor > Templates.
Templates are groups of blocks combined to create a design for a webpage. You can create custom templates or use templates provided by your theme or a plugin.
When you make changes to a template, the editor updates the blocks on all pages/posts that use the template. A template for a post or page displays your content with the post content block.
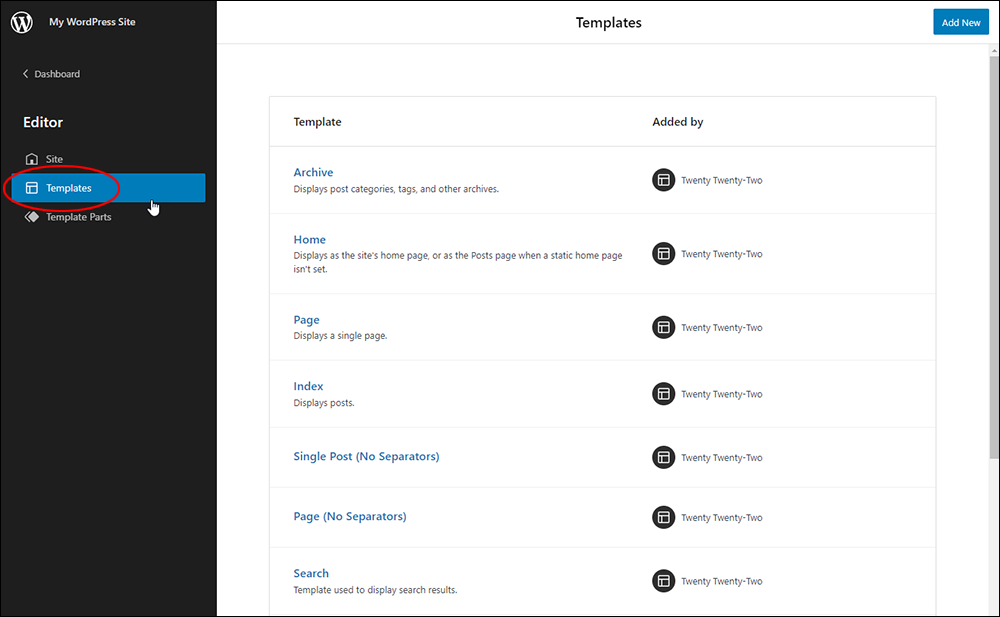
For more information about using Templates, see this support article from WordPress: Template Editor.
Site Editor > Template Parts
To access this section, go to Appearance > Editor > Template Parts.
A Template part is a block for managing different areas of your webpage that help set the structure for reusable items like a Footer or Header. Template parts are primarily meant to be used for your site’s structure.
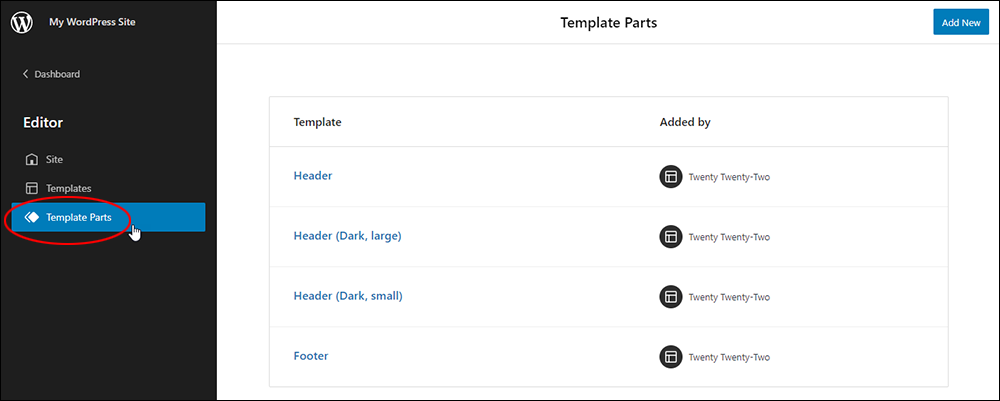
For more information about using Template parts, see this support article from WordPress: Template Part.
How To Browse Between Templates And Template Parts
After going to Appearance > Editor, you will be taken to the template used by your homepage with the option to switch between different templates and template parts.
In order to switch what you’re currently viewing, simply click on the WordPress icon. You will then be able to select between going back to your Dashboard, your list of templates, your list of template parts, or back to editing what your home page displays.
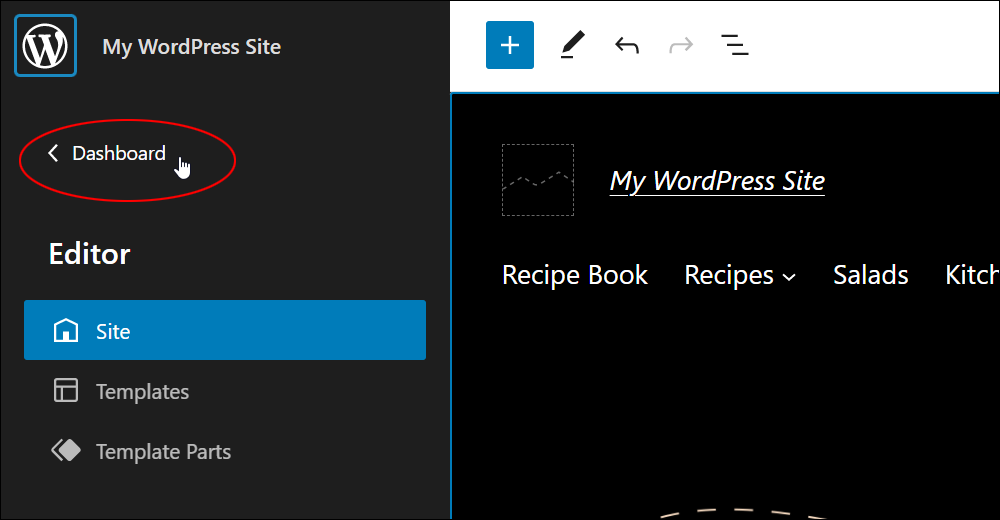
How To Return To Your Dashboard
To return to your dashboard, click the WordPress icon to open the Site Editor navigation and then click on the Dashboard link. This will take you back to your site’s dashboard.
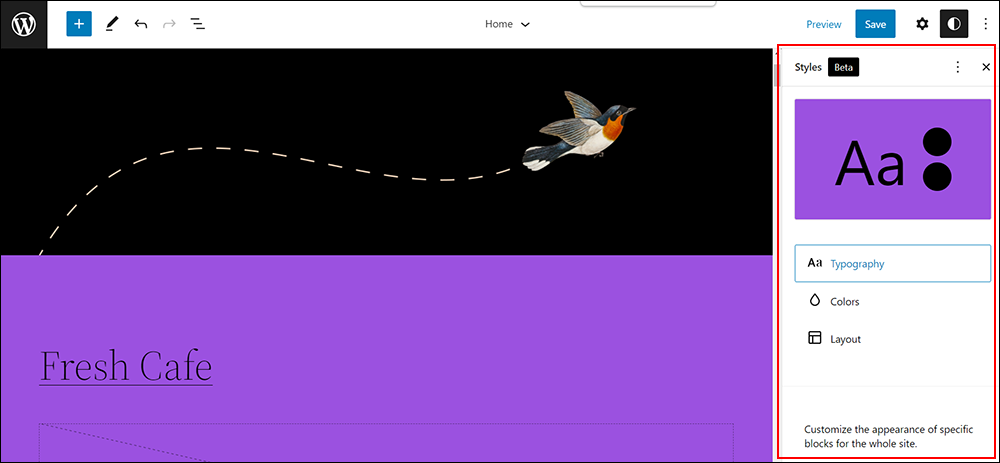
Site Editor > Styles
The Styles section was introduced in WordPress 5.9 and comes included in Block Themes. It lets you change site-wide settings with different colors, typography, layouts, and more.
You can also change and adjust the site-wide appearance of blocks to ensure a cohesive experience across your site.
For example, you can add your unique colors to a branded Button block or adjust the Heading block to your preferred size.
The changes you make using the Styles Editor affect your entire site. So, if you change the background color, this will change the background color of all of your posts, pages, and templates.
Your theme and WordPress itself supply various default settings to your site. Styles allow you to override these options with your own, so you can add your own custom colors to the color palette, change the layout controls, and more.
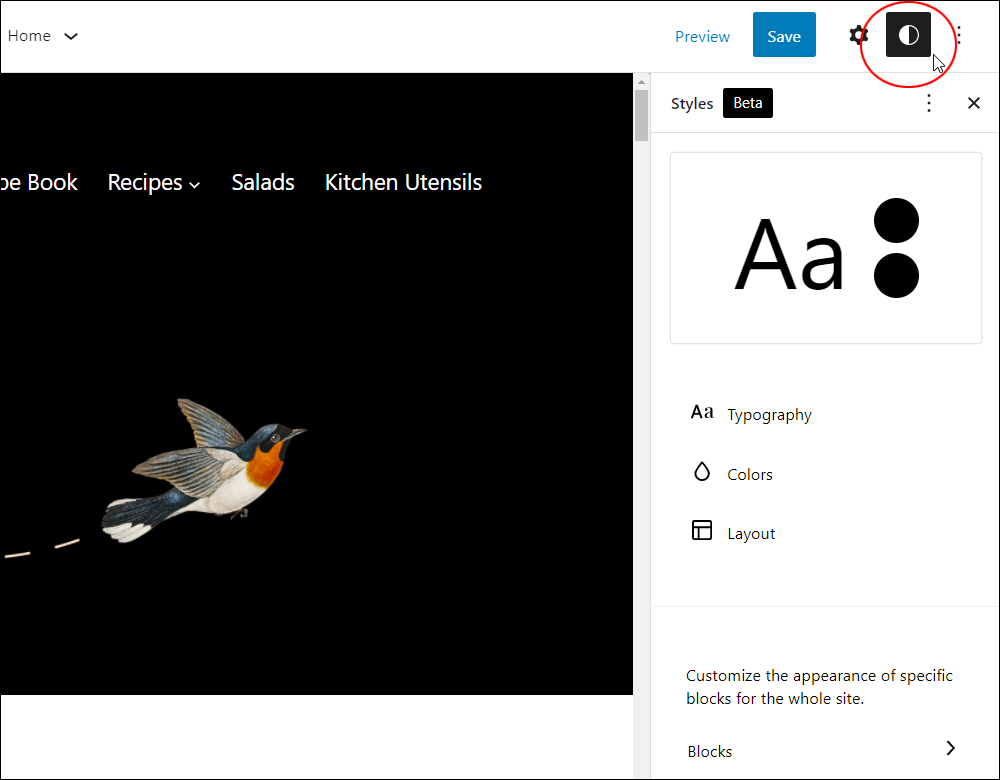
How To Access The Styles Editor
In the Site Editor, click on the Styles icon in the top-right section of the screen.
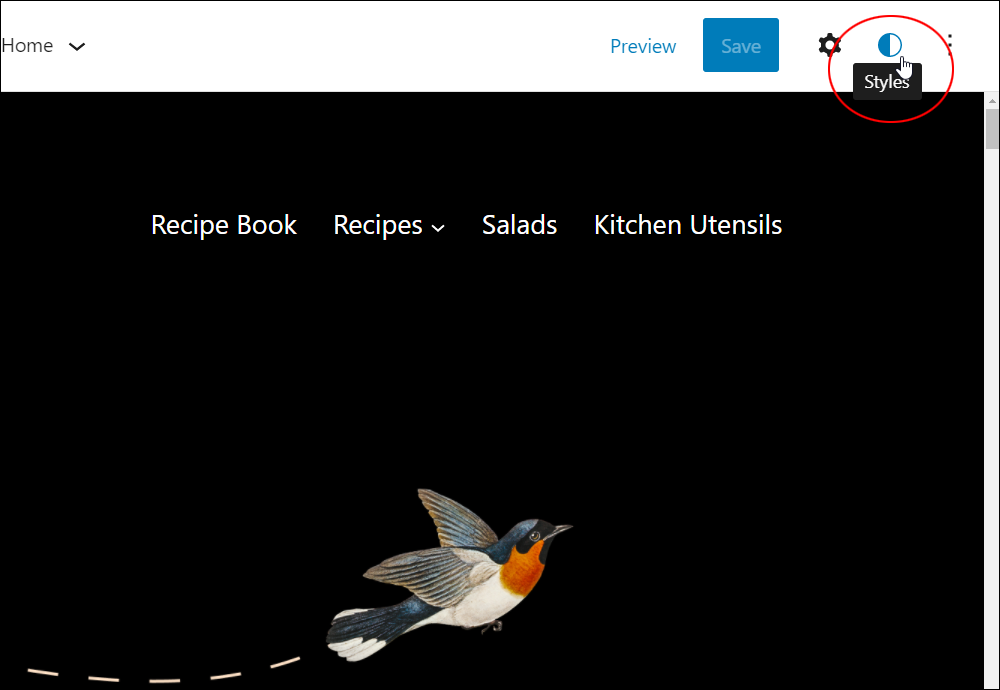
Clicking on the Styles icon toggles the Styles editor on and off.

You can use the Styles editor regardless of the template or template part you are editing.
Styles Features
Let’s go briefly through each of the main sections of the Styles Editor.
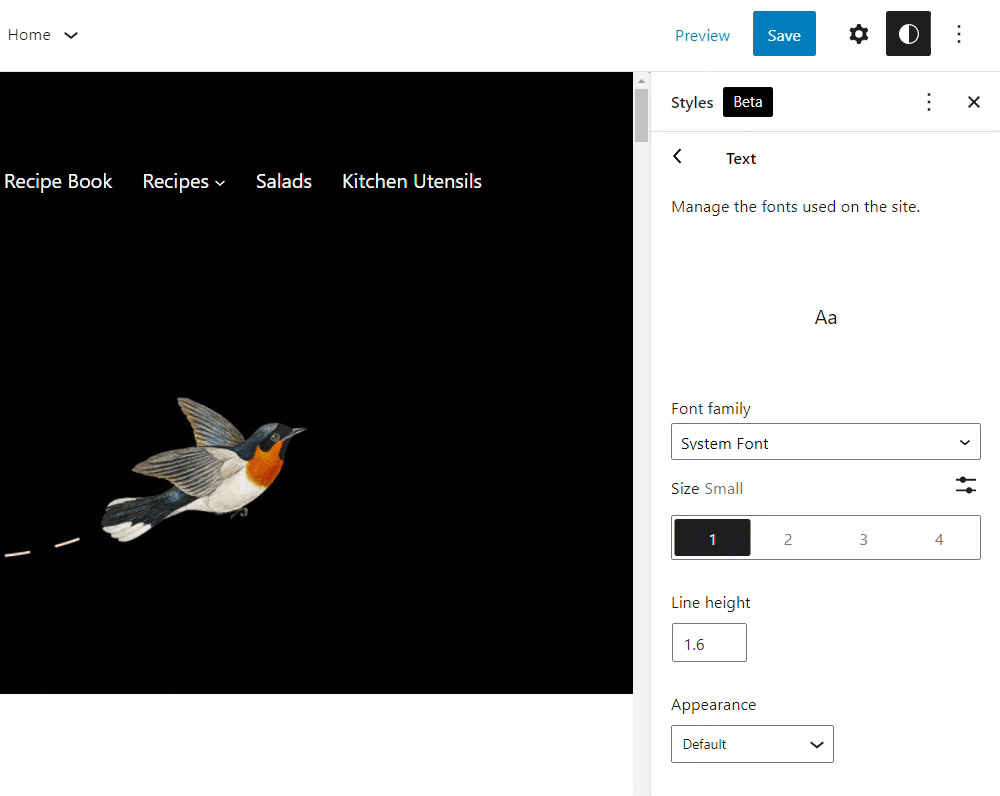
Typography
This section lets you manage the fonts used on your site and the default aspect of global elements like font weight and line height.
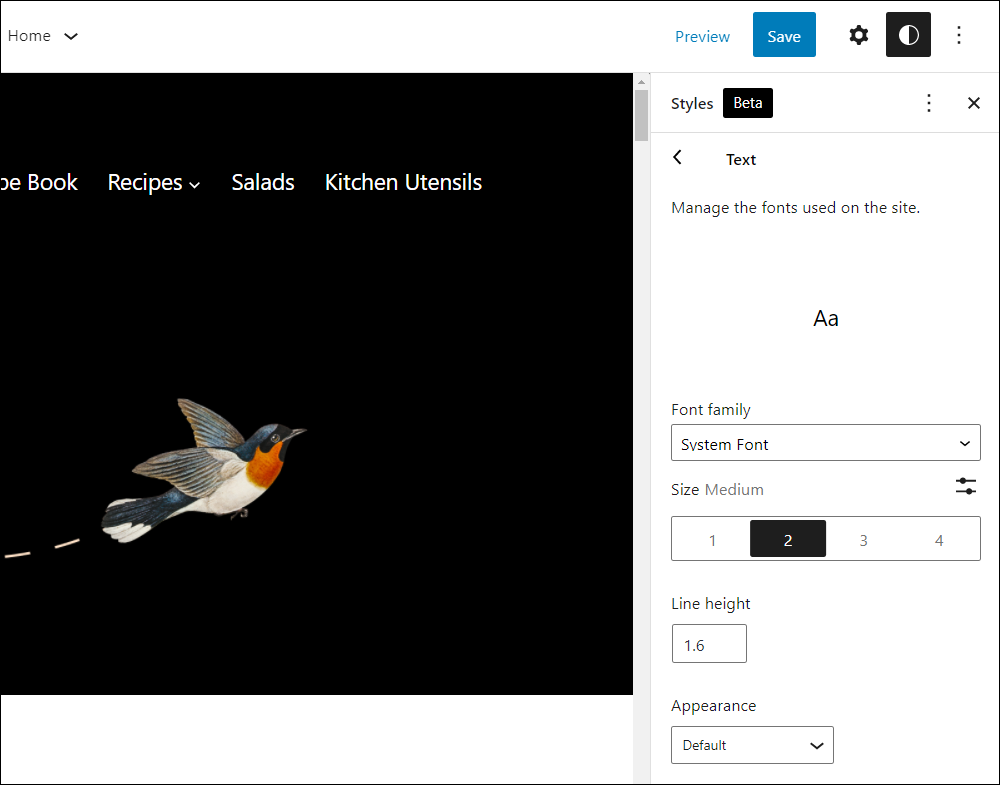
Selecting Typography gives you the option to edit both Text and Links and customize elements like the font family, font size (preset or custom size), line height, and appearance.
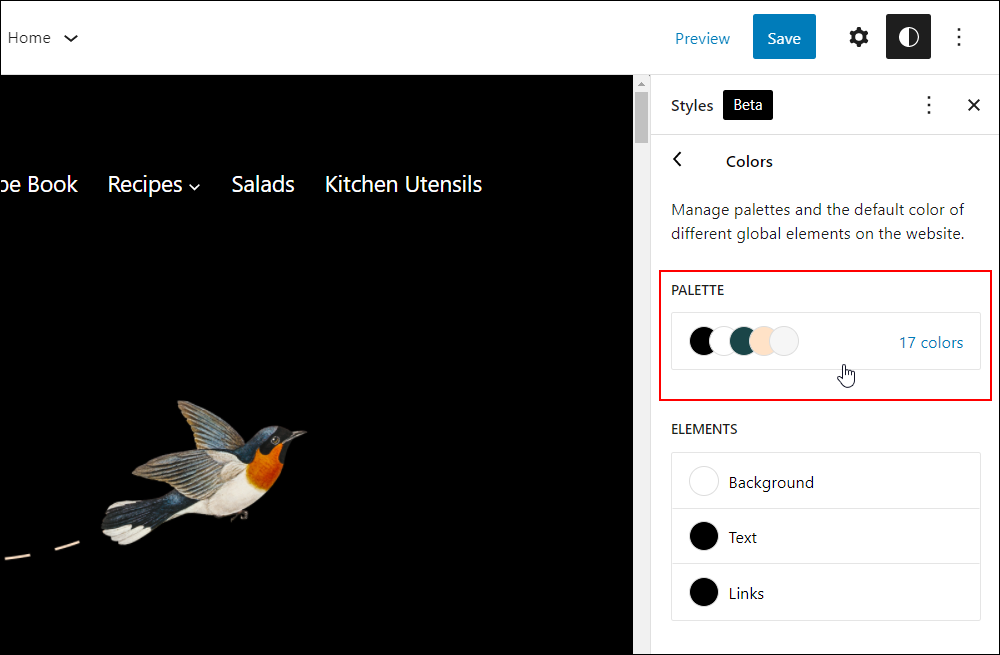
Colors
This section lets you manage color palettes and the default color of global elements on your site like the background color, text color, and link color.

How To Add A Custom Color Or Gradient
To add a custom color for use across your entire site, do the following:
Go to the Site Editor and open the Styles interface.
Select the Colors section.
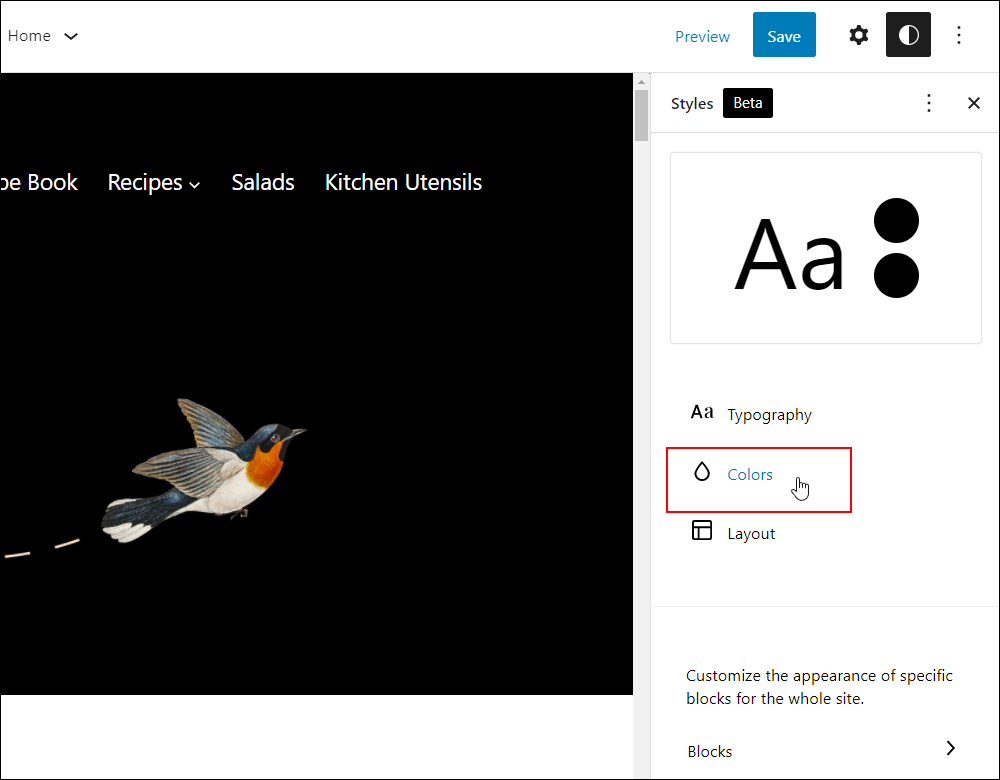
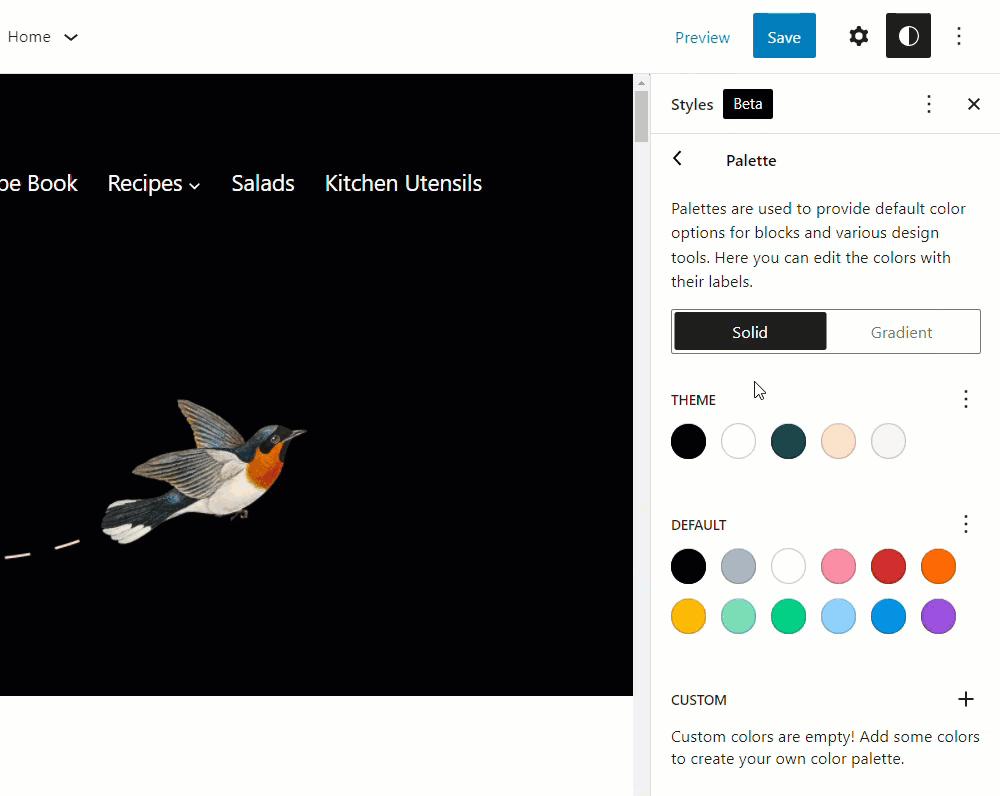
Select the Palette section.
Choose either the Solid or Gradient tab.
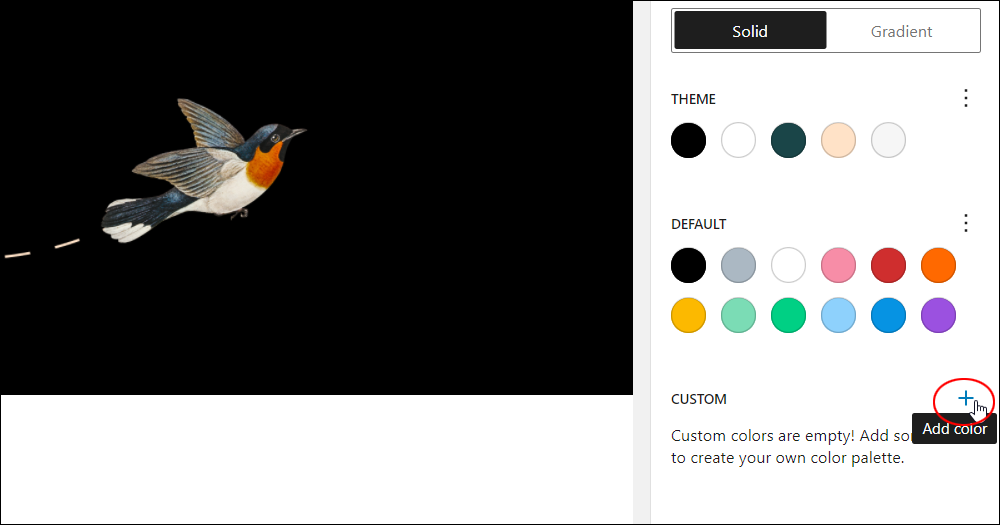
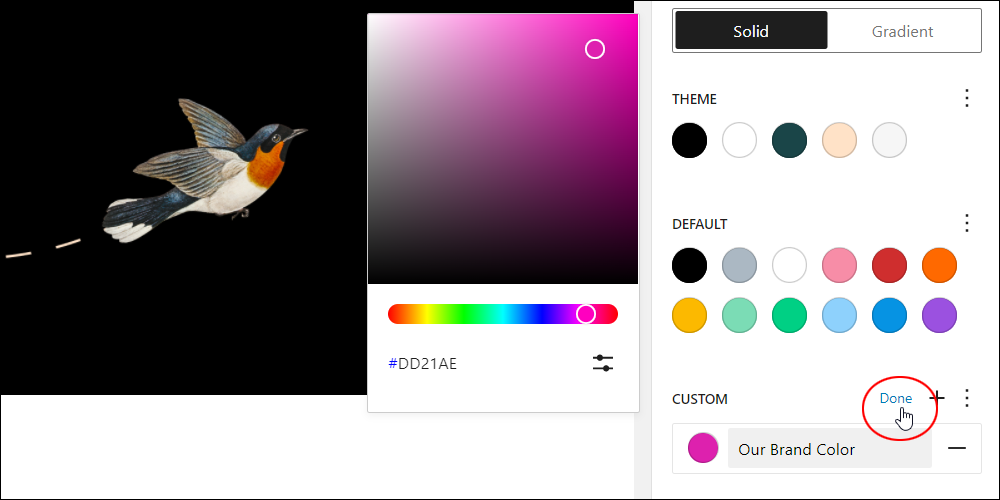
Under Custom, select the + button.
Select and name your custom color option using the color tool. Note: Avoid choosing common color names (blue, green, etc.) when naming custom colors to prevent overlapping other common color names.
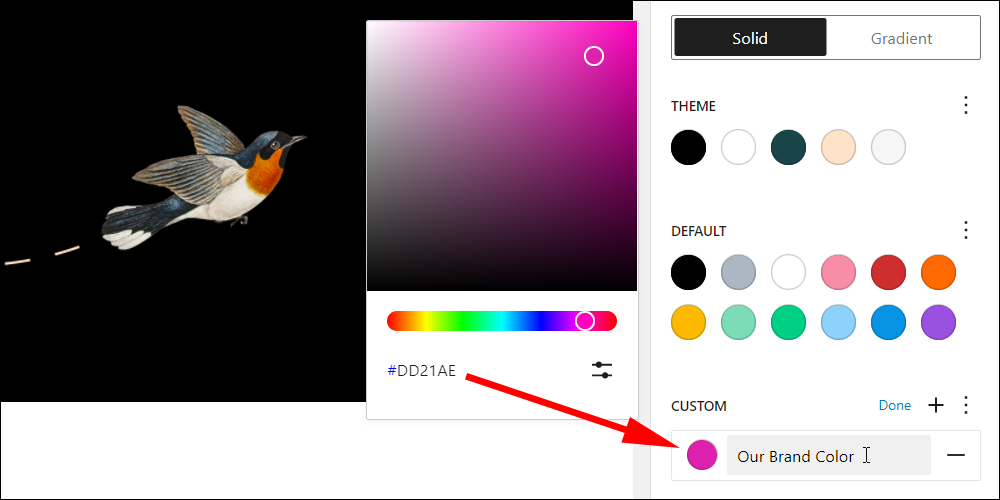
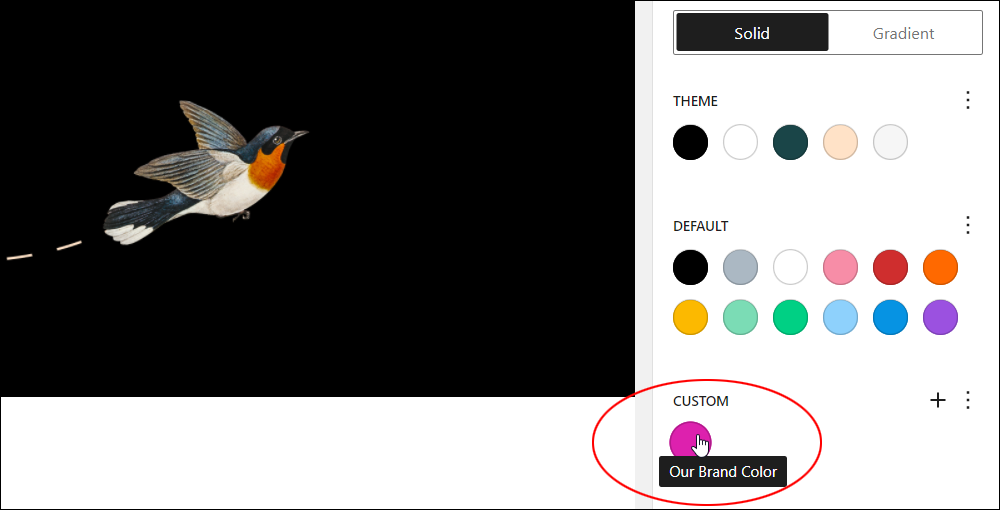
After selecting and naming your custom color, click Done, then click Save to save and update your settings.
Your new custom color option is now available for use throughout your site.
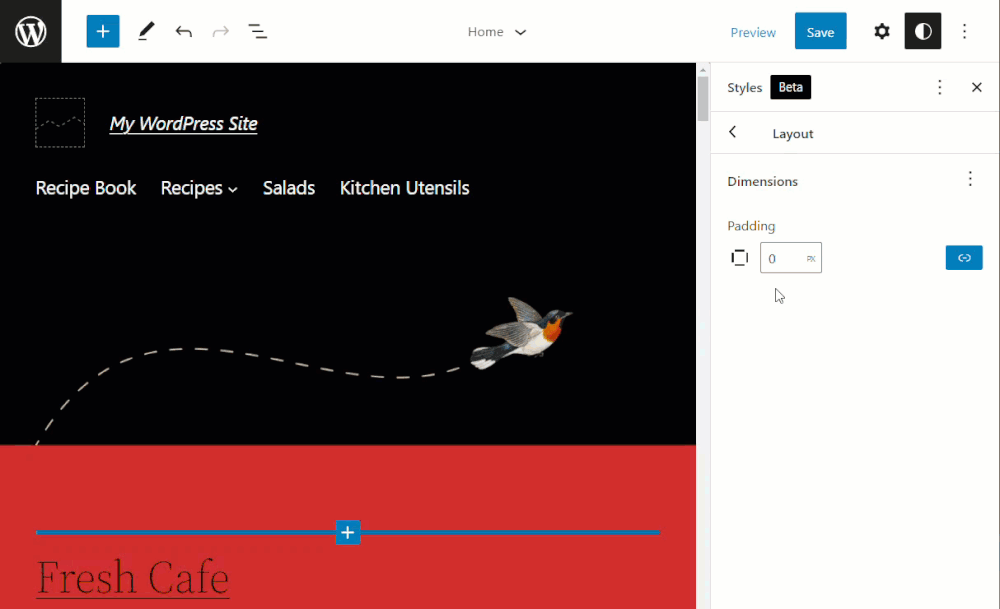
Layout
This section lets you add and adjust the global padding dimensions of your site’s layout.
To adjust the padding of your site globally, select a template section to work on (e.g. Header, Footer, Page, etc.), then click the Layout option.

Next, enter padding values into the Padding field:
- Padding – Set padding values for your layout. Select a unit from the drop-down menu:
- PX (Pixels)
- EM (Font size)
- REM (Root em)
- VW (Viewport Width)
- VH (Viewport Height)
- Link/Unlink sides
- Link sides – Set up uniform padding values for the left, right, top, and bottom sides of your template layout.
- Unlink sides – Set up different padding values for the left, right, top, and bottom sides of your template layout.
- Reset All – Resets padding values to default (no padding). Note: Select this option by clicking on the vertical ellipsis next to Dimensions.
Blocks
You can make global adjustments and customize the appearance of every block on your site to suit your needs in the Blocks section of the Styles Editor.
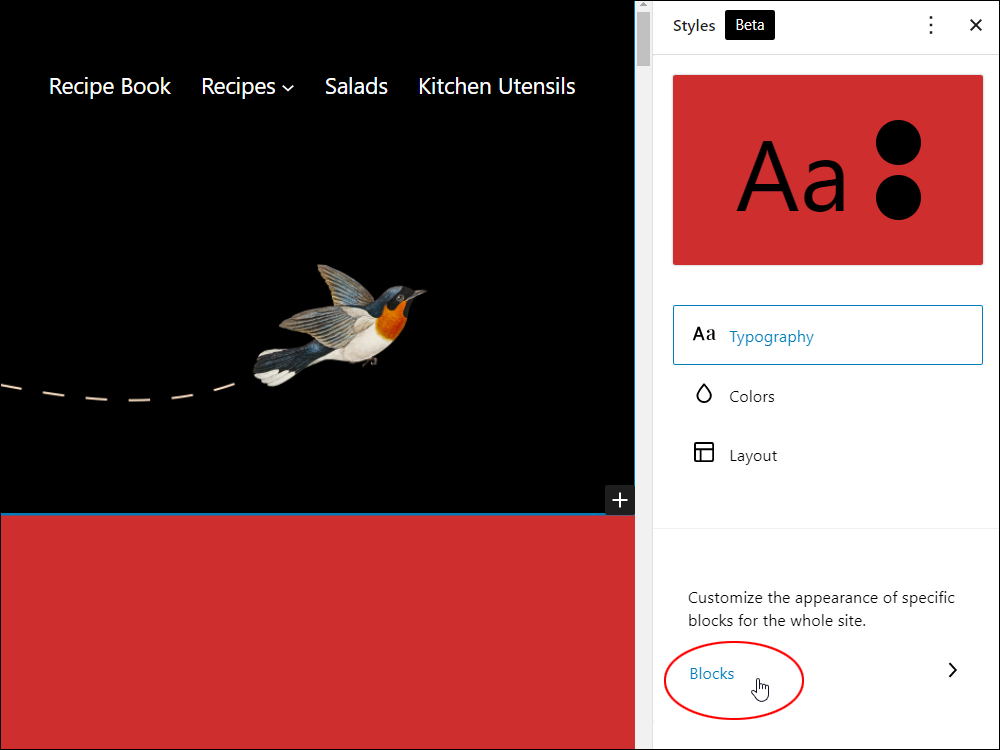
Each block has its own customizable set of options. For example, the Image block has options around Layout and the Button block has Typography, Colors, and Layout options.

Note: Any changes made will affect the default state of the block wherever it is placed on your site unless you have customized it individually. For example, if you set a custom color with an individual button block previously, the Styles that you set here won’t override those individually set colors.
Style Book
The Style Book lets you see how your site’s overall design and styling settings will affect every block that can be inserted on your site.
For example, you can preview what the site-wide background and text colors, font family, or font sizes of blocks will look like. This also lets web designers preview how global styles will affect the display of any block, without inserting those blocks into a template.
Access the Style Book by clicking on the eye icon in the Styles header within the Global Styles section.
To adjust a block’s styling, click on a preview of a block within the Style Book, and it will navigate you to the block-level global styles. This makes it easier to preview changes to block-level global styles without having to insert the block within the current template.
Custom CSS
Control your site’s look and feel by adding custom CSS to your site or individual blocks.
To access this feature:
- Click on the Styles menu icon (the divided circle)
- Click on the Eye icon in the Styles header section
- Scroll down to the “Customize the appearance of specific blocks for the whole site” section
- Select a block type
- Scroll down to the “Add your own CSS to customize the block appearance” section and click on “Additional Block CSS”
- This brings up the CSS section.
- Enter your CSS code in the Additional CSS field.
Sticky Positioning
Keep top-level group blocks fixed at the top of a page as visitors scroll for a dynamic visual experience.
More Global Styles Actions
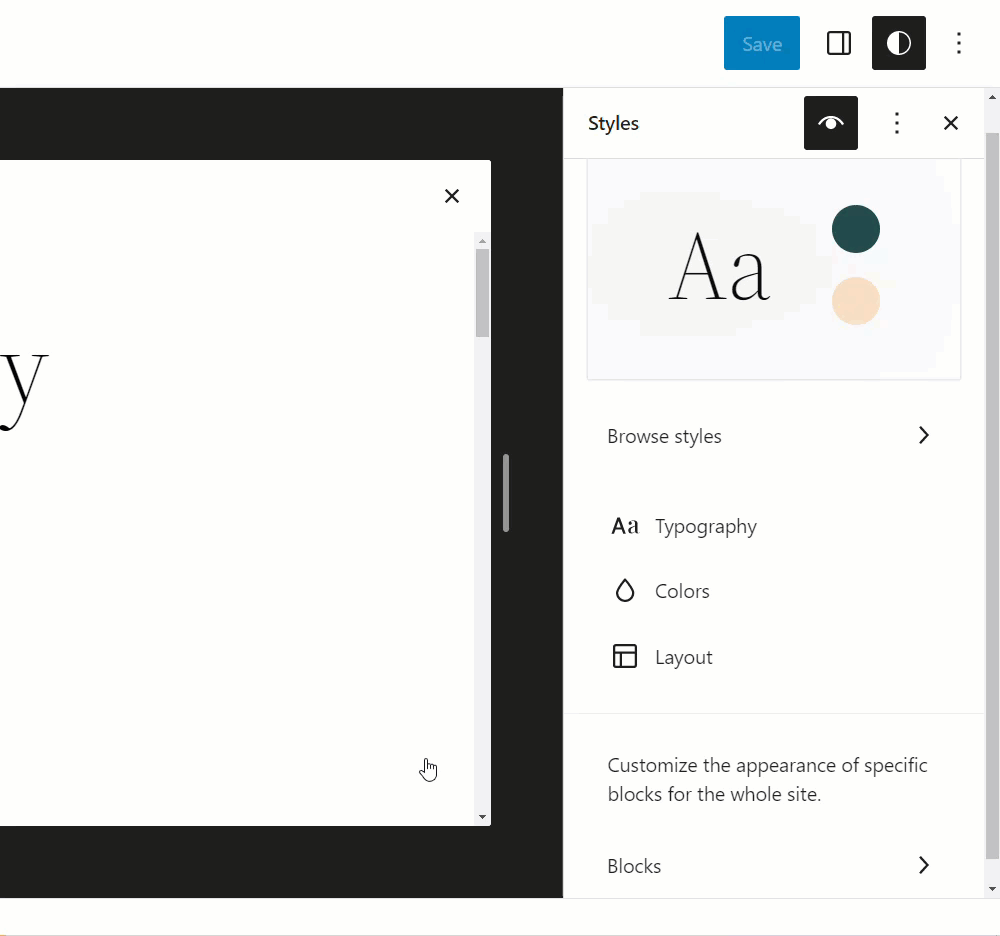
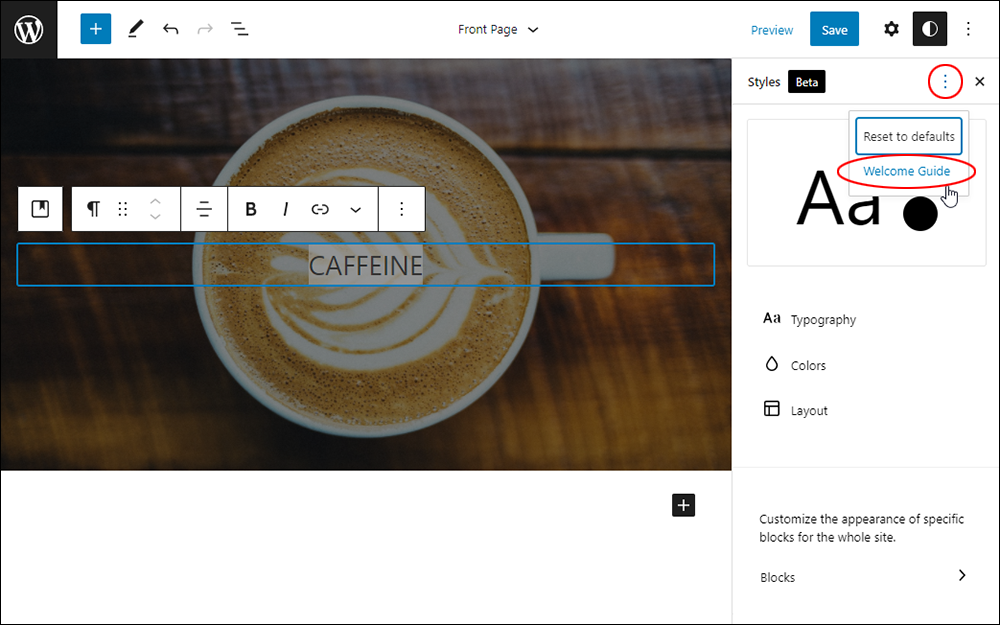
To reset all Styles to their default settings, click on the vertical ellipsis icon in the Styles title section, then select Reset to defaults from the dropdown menu.

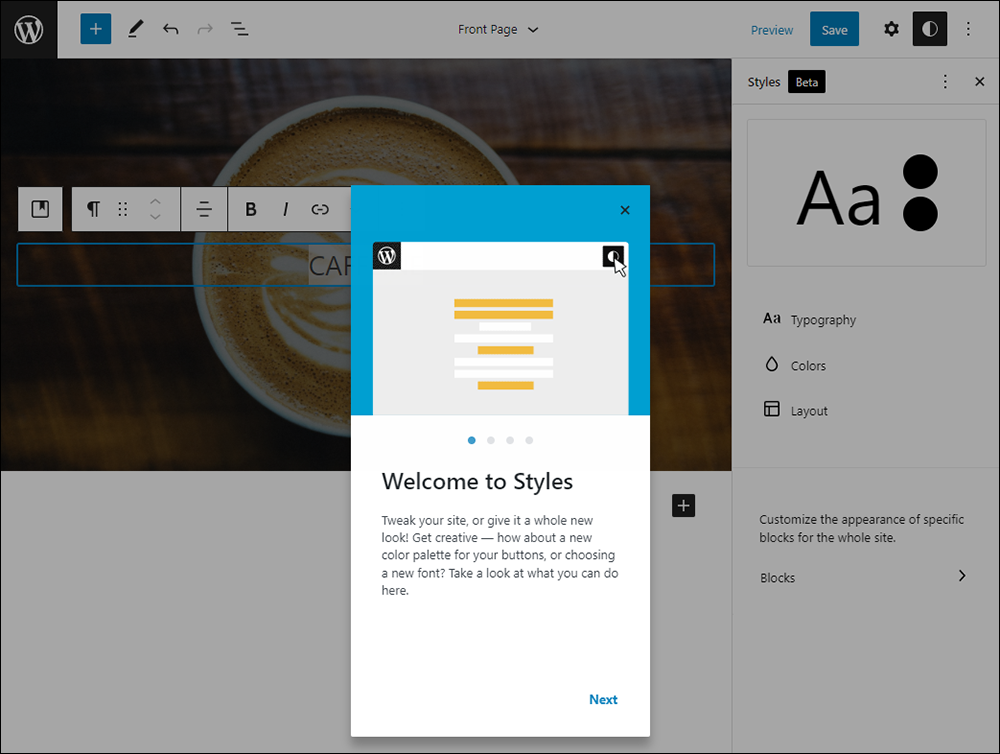
You can also access the Styles Welcome Guide from this menu…
This will give you a quick overview of the features available in the Styles Editor and what you can do in this section. Click the ‘X’ to close the guide when done.
How To Update What Your Homepage Displays
Your homepage can show a list of your latest blog posts or a static page with custom content. The setting you use depends on which templates are included in your theme.
To view the list of templates in your Site Editor, go to Administration Screen > Appearance > Editor > Templates.
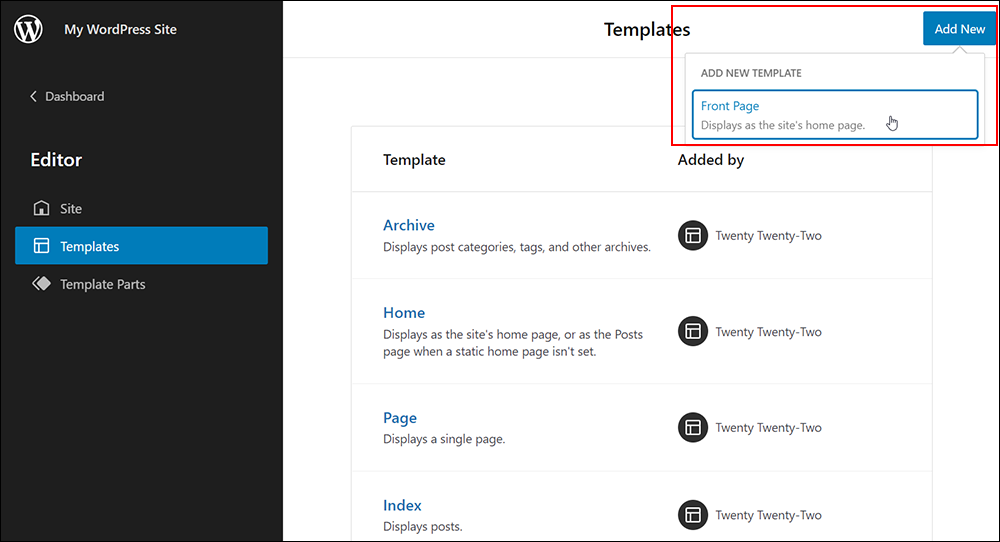
- If your theme does not have a Home or Front Page template, select the Add New button to create a new Front Page.
- If your theme has a Front Page template, click on the link with the template name to open the editor.
- If your theme has a Home template, you can edit the template or set what you want to display in Administration Screen > Settings > Reading.
So, for example, here’s how you create a new Front Page template…
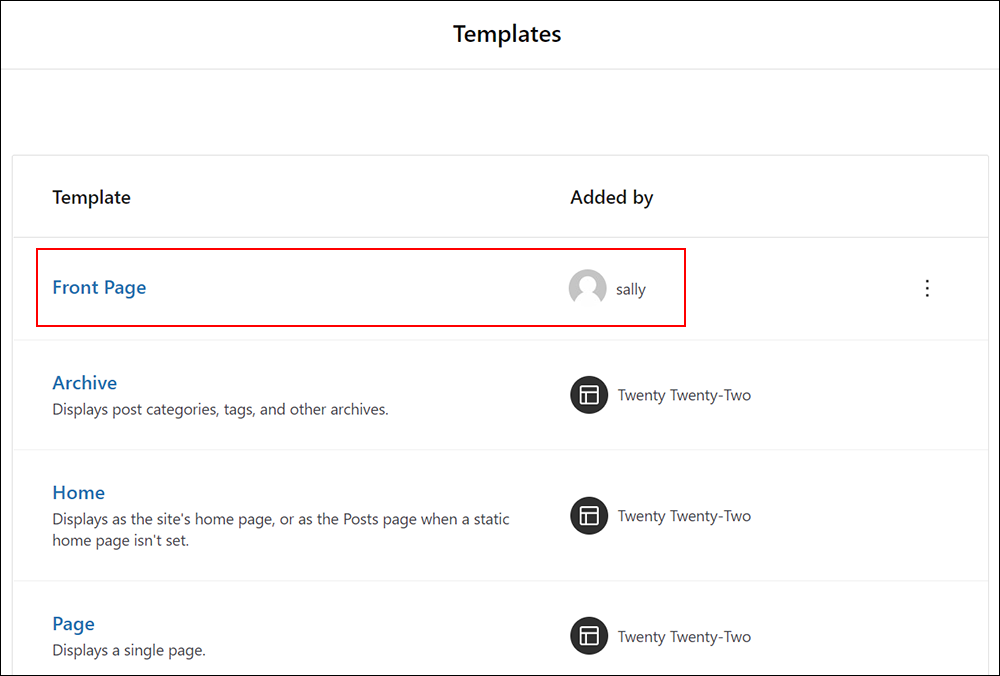
Your new template will be added to the Templates section…
Clicking on the Template title opens up the template and allows you to edit and customize it. Note: Creating a new template gives you a blank page with only the Block Editor screen.
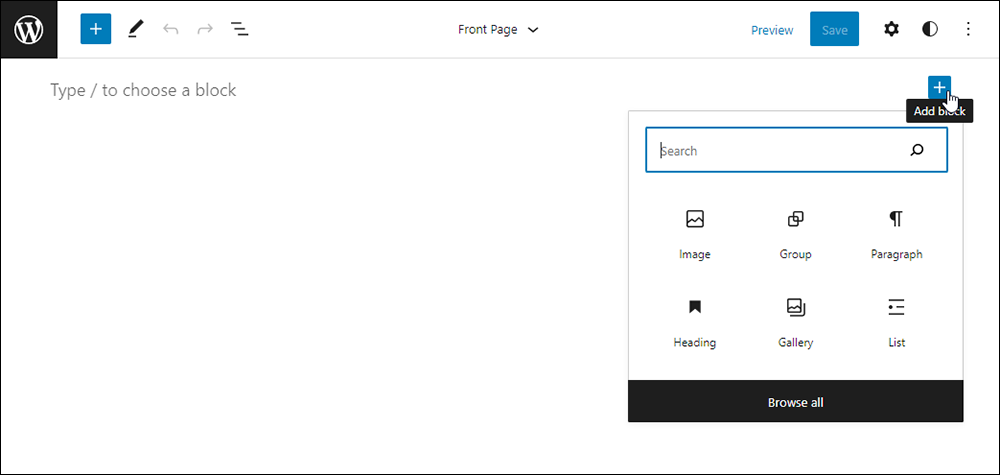
Use blocks to create and customize your front page.
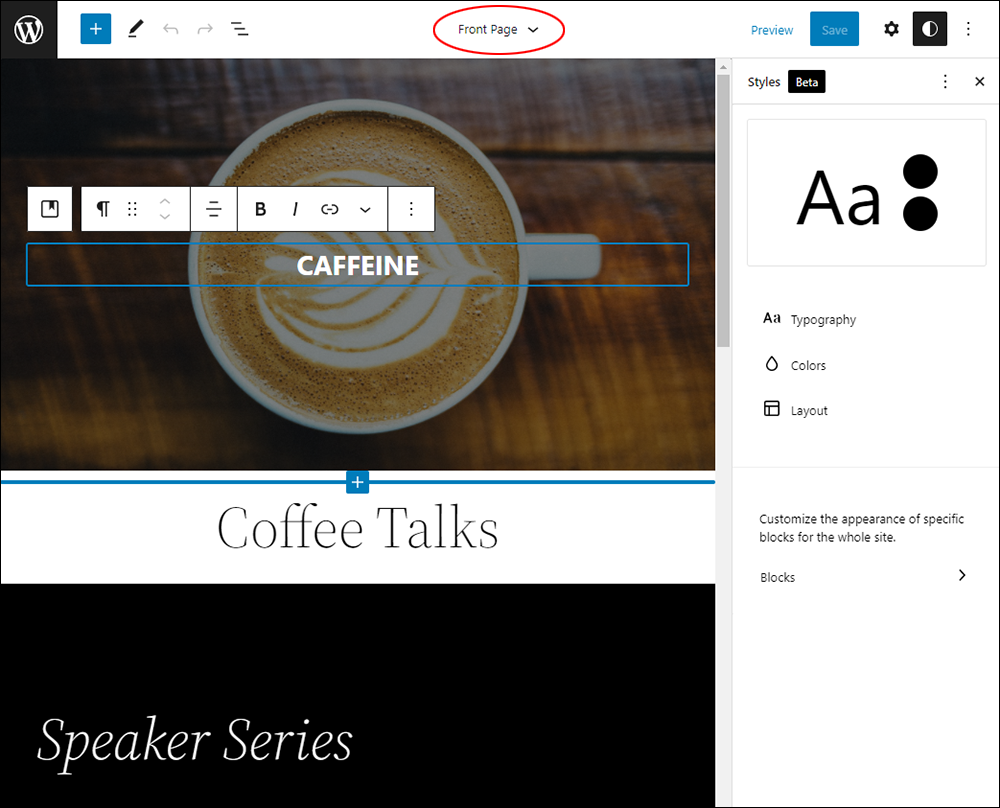
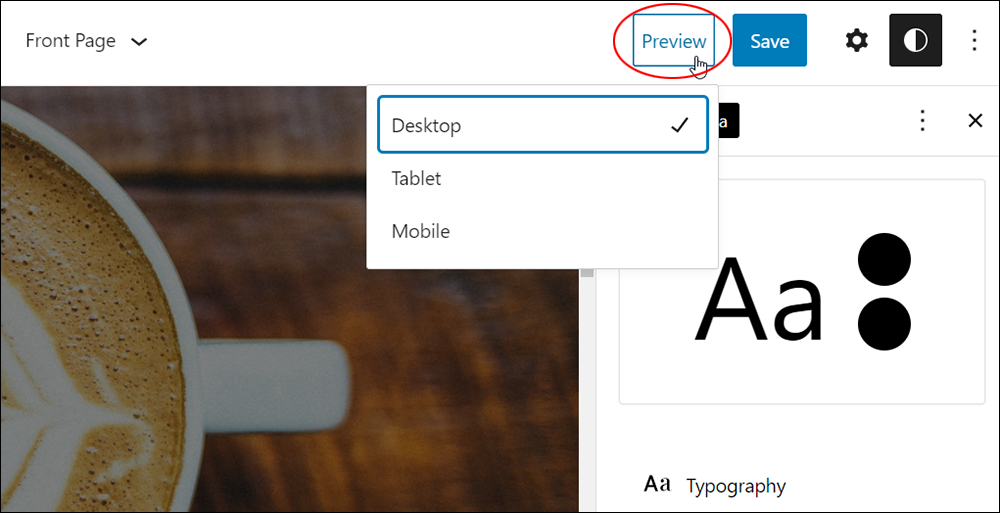
You can preview how your page will look on different device screens by clicking the Preview button.
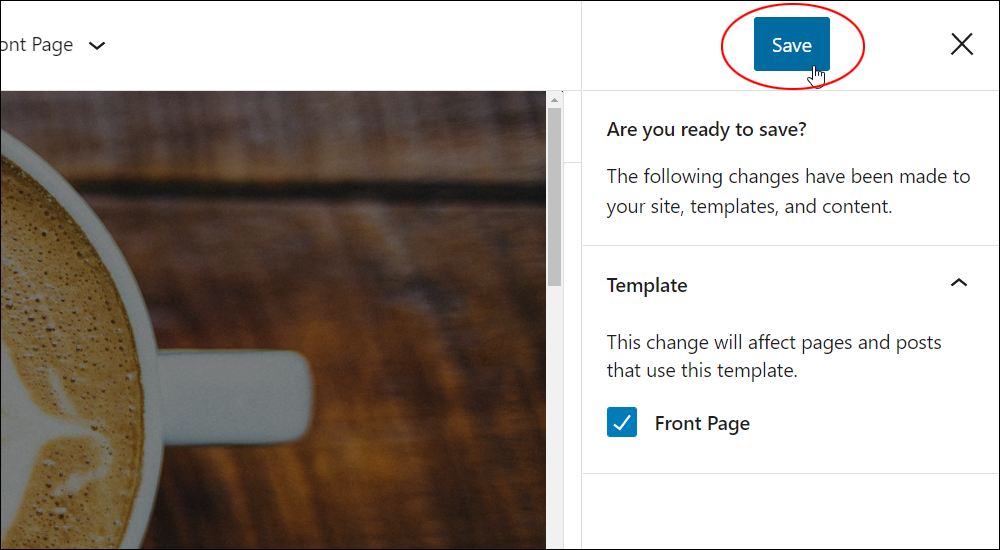
When you’re done creating or editing your template, click the Save button to update your settings. This section will list what changes were made to your site, templates, and content. You can also tick or untick the checkboxes in this section to enable/disable saving.
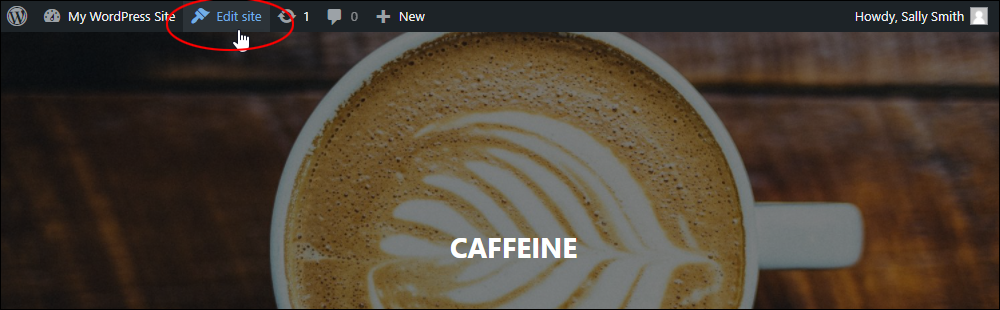
After saving, visit your site to view your changes.

To return to the Site Editor and continue making changes to your templates, click on the Edit site button in the admin toolbar.
You can also delete the template by clicking on the vertical ellipsis icon and selecting Delete template.

To learn how to select a static page for your homepage, see this tutorial: How To Set A Home Page For Your Website
How To Customize Your Home Page
Here is some additional information on customizing your home page:
Latest Blog Posts
To customize your blog, go to Administration Screen > Appearance > Editor. The editor will open to your homepage, and you can start editing.
Block themes display lists of blog posts with the Query Loop block and the Post Template block.
When you add a block inside the Post Template block, it is repeated for every post in the list. The Post Title and Post Featured Image, Post Author, Post Date, Post Category, and Post Tags are examples of blocks that you can use to customize your blog.
Static Page
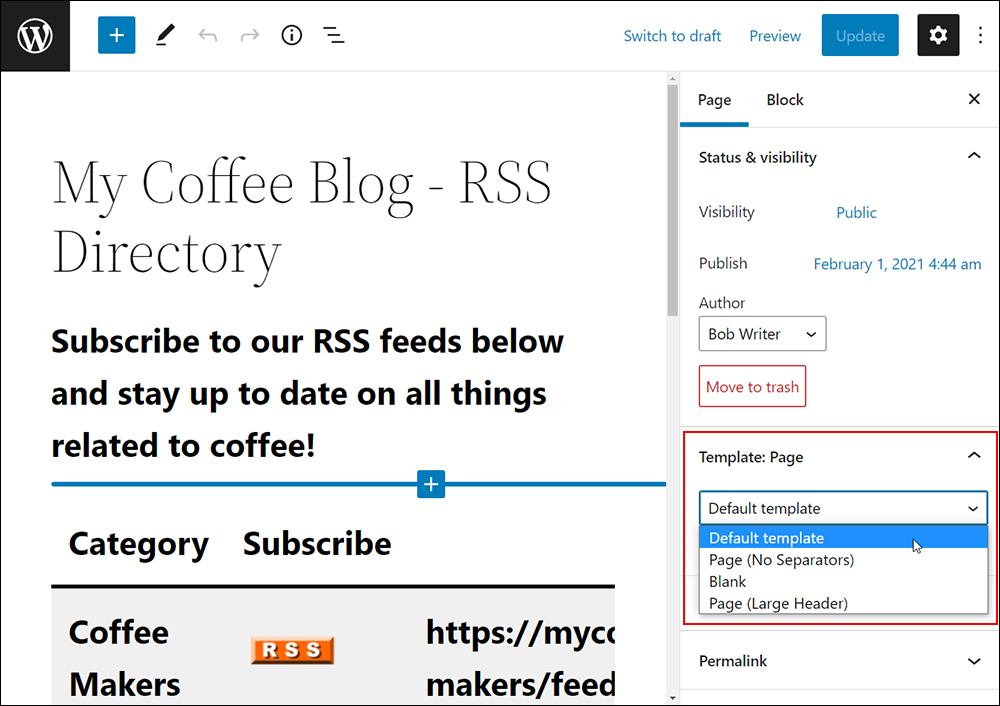
If you have selected a static page for your home page and you want it to have a different design than other pages, you need to assign it a different template.
To assign an existing template to your home page:
- From your WordPress dashboard, select Pages > All Pages.
- From the list of pages, select the option to edit the page you have set as your home page.
- In the editor screen, open the settings sidebar.
- Under Template, you can then select whichever Template you want your home page to use.
- When you’re done, select Update to save the changes.
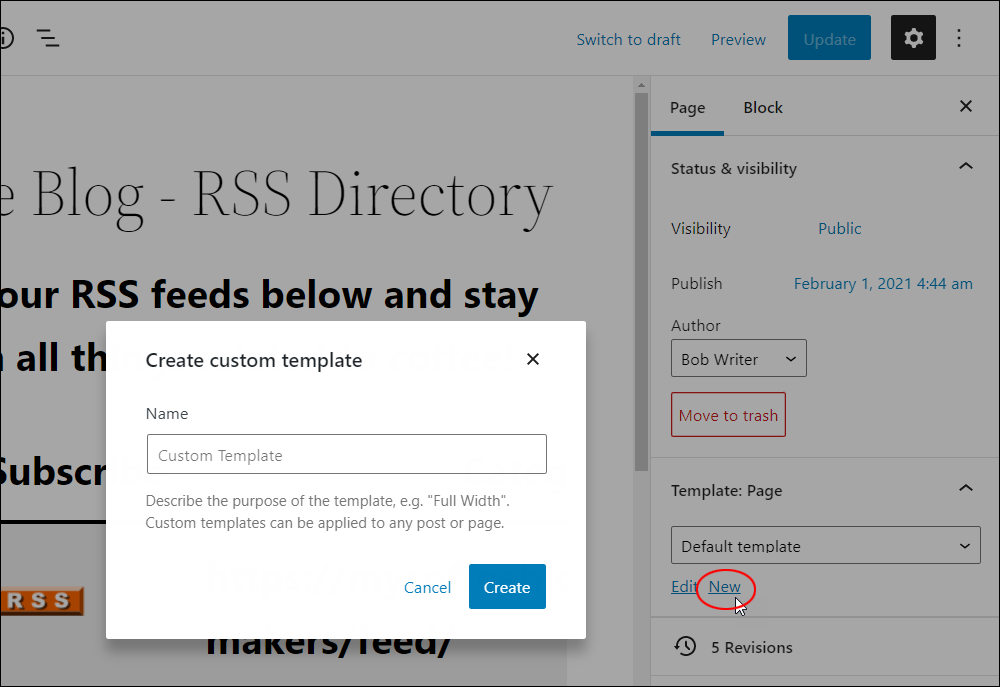
To create a new template for your home page:
- From your WordPress dashboard, select Pages > All Pages.
- From the list of pages, select the option to edit the page you have set as your home page.
- In the editor screen, open the settings sidebar.
- Under Template, select New.
- Name your new custom Template and click the Create button to go to the Template editor.
- Create, edit, and customize your new template in Template mode.
- When you’re done, select Update to save the changes.
Note: if you add a Front Page template in the Site Editor, it will always be used as the front page of your site regardless of which setting you choose under Admin > Settings > Reading. You will need to either customize this template to your liking or remove it to adjust the homepage settings again.
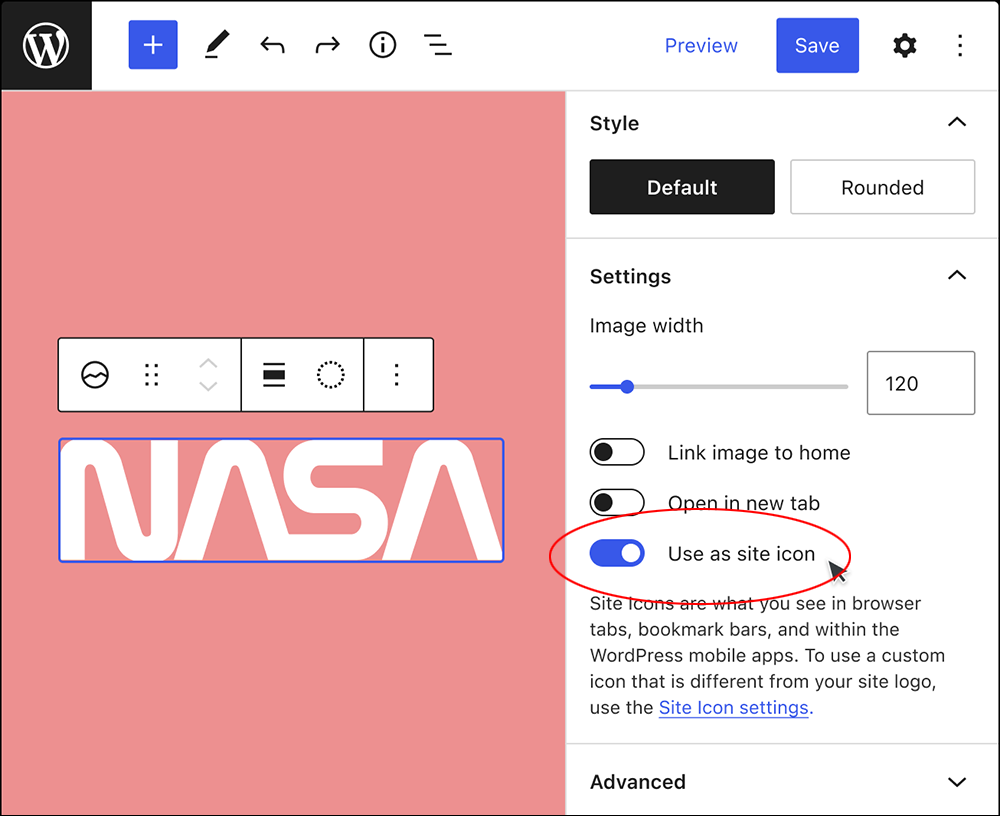
How To Update Your Site Icon
Block themes include the ability to use the Site Logo block, which has a built-in option to set your Site Logo as your Site Icon.
Note: The Site Logo simply displays whatever logo you set for your site whereas your Site Icon is also known as a favicon and is used to help identify your website.
To learn more about using a favicon, see this article: How To Add A Favicon To WordPress
Follow the steps below to use the same image for the Site Logo and Site Icon:
- Go to Appearance > Editor. This will open up your homepage.
- Either find the Site Logo block added by your theme or add the block yourself. See this tutorial for help using blocks.
- After adding and clicking on the block, you’ll see the option to upload or select an image to use from your Media Library.
- Choose an image and with the Site Logo block selected, open the block settings sidebar (click on the cog icon).
- Under the settings for the Site Logo block, toggle on the option to Use as site icon.
- Save your changes.
Tools
The following are tools that might be helpful to explore when using the Site Editor.
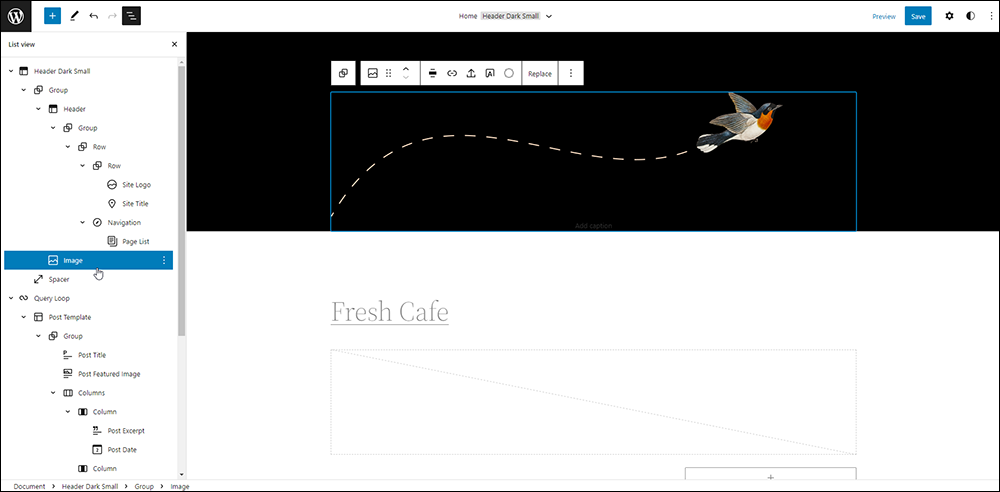
Using List View
The List View allows you to navigate through a complexity of blocks, select the block you need, and easily view all the blocks that make up your content. It’s a helpful tool when editing your site.
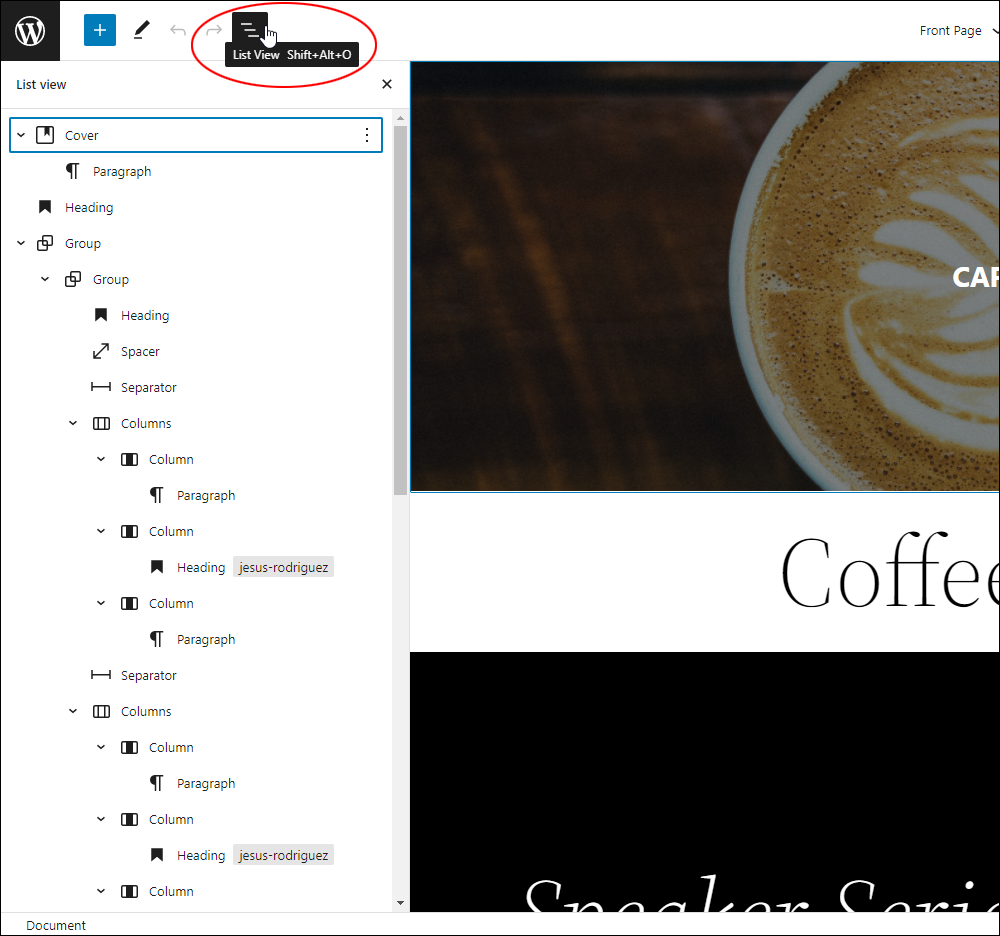
For more information about using the List View tool, see this tutorial: Block Editor – Toolbar
Using Block Patterns
Block Patterns are a collection of predefined blocks that you can insert into posts and pages and then customize with your own content. While there are standard patterns you can use with any WordPress installation, they are also often bundled into block themes.
Go here to learn more: WordPress Block Patterns
Exporting Templates and Template Parts
Similar to the Tools > Export option, there is an option to export what you create from within the Site Editor. This will export your templates and template parts.
To export your templates and template parts:
- Go to Appearance > Editor to open the Site Editor.
- Select the three-dot menu next to the Styles and Block settings options.
- Under Tools, select Export.
- The export will begin and you will receive a downloaded zip file of your templates and template parts.
Additional Resources
Editing block themes and templates requires basic web design skills. If your site uses a block theme and you need help editing or customizing your theme or theme templates, ask your website developer, or refer to the external resources listed below for more information:
- Template Editor – Allows block editor users to edit and create templates used in pages or posts.
- Template Part Block – An advanced block that can be used with a block theme or a theme that supports template editing. These often come with your theme and are used to organize and display your site structure. You can only use them while creating and editing templates to manage blocks in areas repeated across the website. This block is best used to create areas like your site header and site footer. When you change blocks inside a template part, the editor updates the blocks on every block template that includes the template part.
- WordPress Course – Simple Site Design With Full Site Editing – This course reviews the interconnected features of full site editing (FSE) in WordPress and how these are used to create site designs without using code.
WordPress Site Editor – FAQs
Here are frequently asked questions about the WordPress Site Editor:
What is the WordPress Site Editor?
The WordPress Site Editor is a powerful tool that allows users to design their entire website using blocks, from the header to the footer.
How does the Site Editor differ from the classic editor in WordPress?
Unlike the classic editor, the Site Editor utilizes a block-based approach, offering more flexibility and ease of customization for designing web pages.
Can I use the Site Editor to customize my website’s header and footer?
Yes, you can design everything on your site, including the header and footer, using blocks within the Site Editor.
Is it possible to create custom layouts with the Site Editor?
Absolutely, the Site Editor provides tools for creating custom layouts using blocks, allowing users to arrange content precisely as desired.
Does the Site Editor support third-party plugins and themes?
Yes, the Site Editor is compatible with various plugins and themes, offering extensive flexibility in website design and functionality.
Can users with no coding experience use the Site Editor?
Definitely, the Site Editor is designed to be user-friendly, making it accessible for users with no coding experience to design and customize their websites.
How can I learn to use the Site Editor effectively?
WordPress provides documentation and tutorials to guide users in utilizing the Site Editor efficiently. (Note: Most tutorials on the official WordPress site are aimed primarily towards web developers and tech-savvy WordPress users.)
***
Congratulations! Hopefully, now you have a better understanding of the WordPress Site Editor.
***

Updated: July 5th, 2024