WordPress Block Editor – Navigation Block
 In this tutorial, you will learn what the WordPress Navigation block is, what it does, and how to use it.
Refer to the tutorials below if you need help with this section:
- What’s New In WordPress – WP 5.9
- The WordPress Block Editor
- How To Use WordPress Blocks
- WordPress Block Themes
- The WordPress Site Editor
- How to Use WordPress Menus
- How To Use WordPress Post Categories
- Video Course – WordPress Gutenberg
***
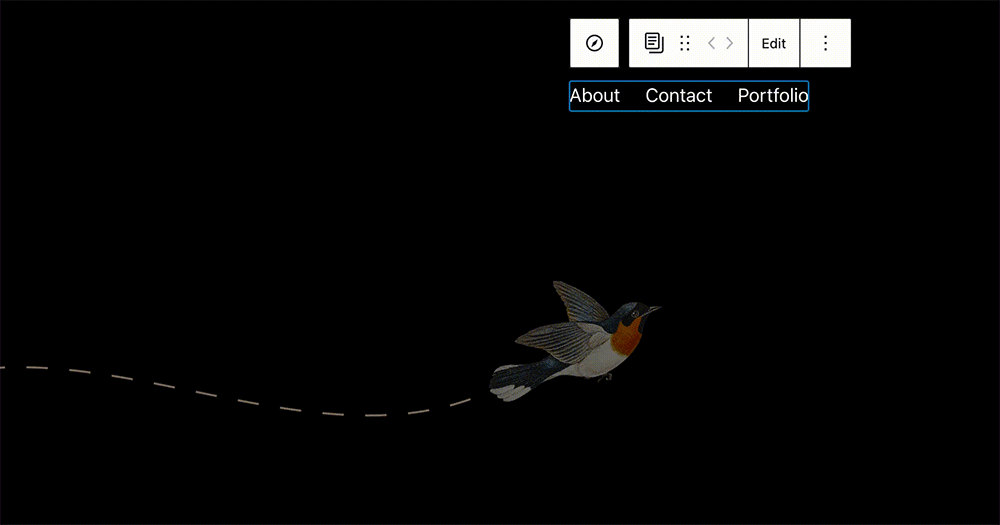
What Is The Navigation Block?
The Navigation Block is an advanced block introduced in WordPress 5.9 that lets you edit your site’s navigation menu if your site uses a block theme or a theme that supports template editing.
We recommend watching the Navigation block video in the WordPress updates section of our tutorials for an overview of this block.
How To Use The Navigation Block
Follow the step-by-step tutorial below to learn how to add, edit, customize, and use the Navigation block on your website.
If you need help with these steps, see our tutorial on How To Use Blocks.
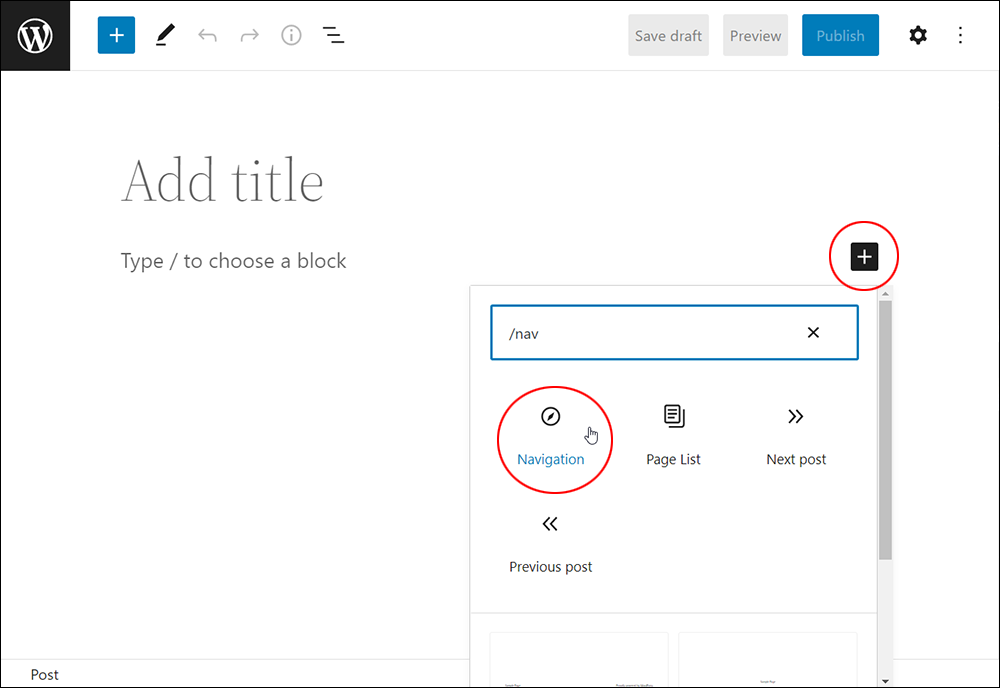
Adding The Navigation Block
You can add the Navigation block o your content or theme templates using the following methods:
- Enter a forward slash and begin typing any portion of the phrase “/navigation” then hit enter in a new paragraph block.
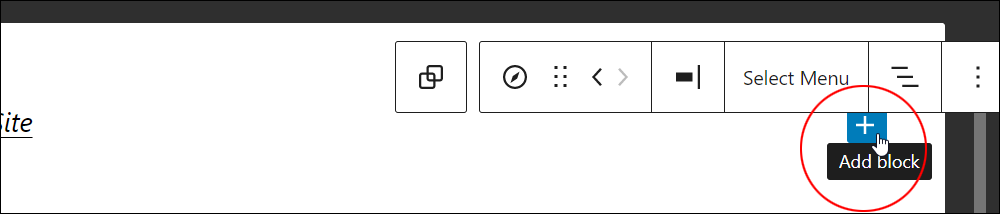
- Click the Add block button (+) and select the Navigation block from the menu.
- Click the Toggle inserter button [+] in the Block Editor Toolbar and select the Navigation block from the block library.
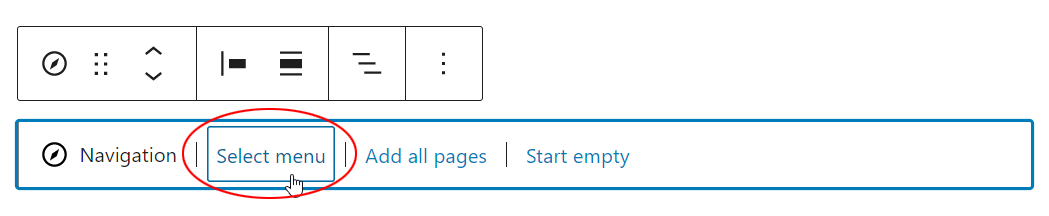
Navigation Block Configuration
After adding a Navigation block, you have three options for adding menu links:
- Select menu: This lets you select an existing menu that you have already created on your site – even a custom menu created using the WordPress Classic editor.
- Add all pages: This lets you add every existing page of your site, which you will then be able to edit and rearrange.
- Create empty: This creates a blank menu and lets you add the pages or links of your choice.

Let’s go through each of these options.
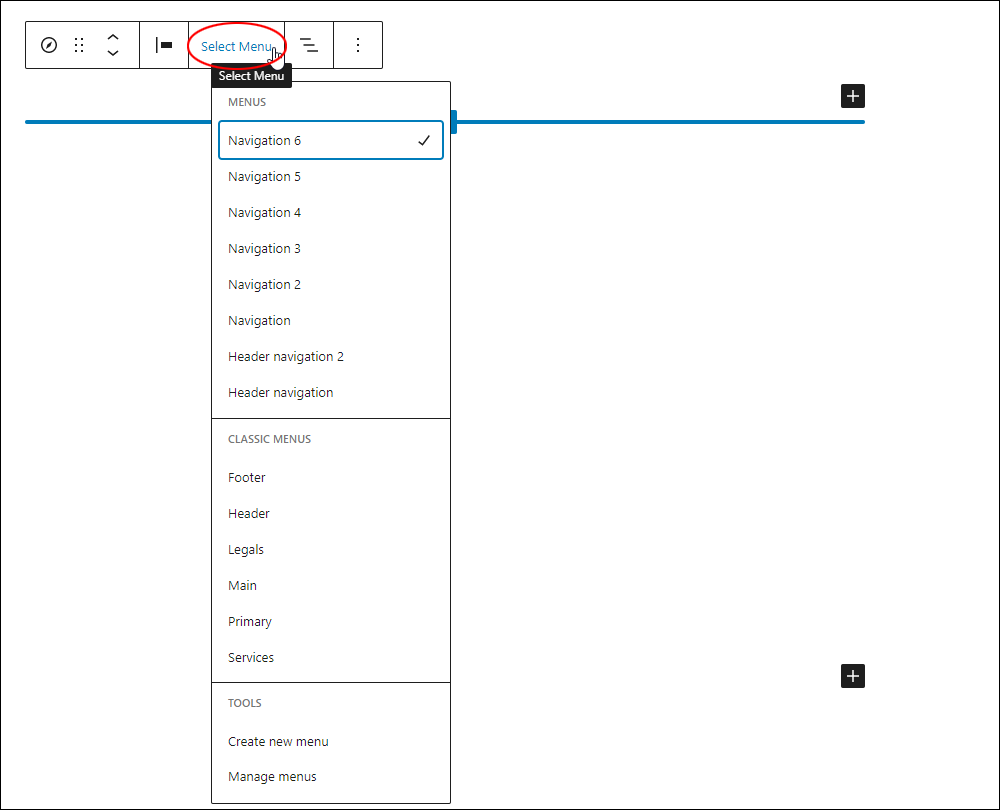
Select An Existing Menu
If you have already created a menu using either the Navigation block itself (see “Start empty”) or a menu created using a previous theme, you can select it after adding a Navigation block.
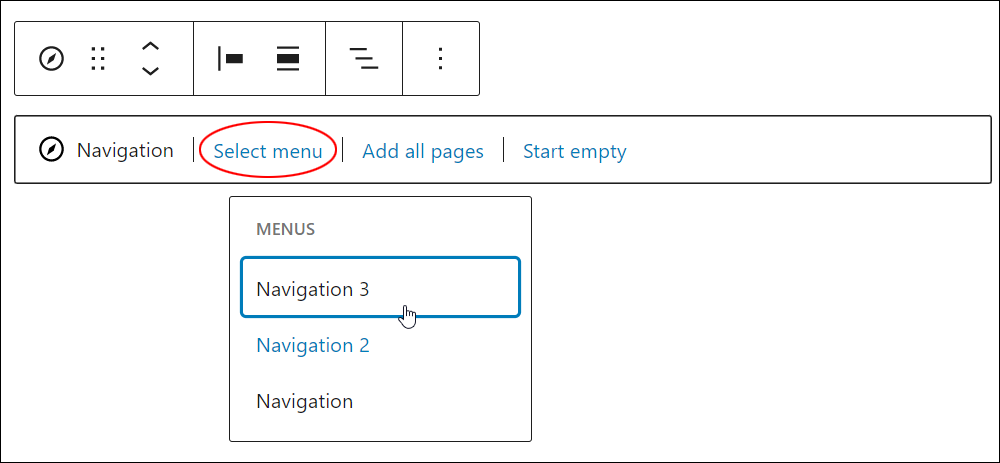
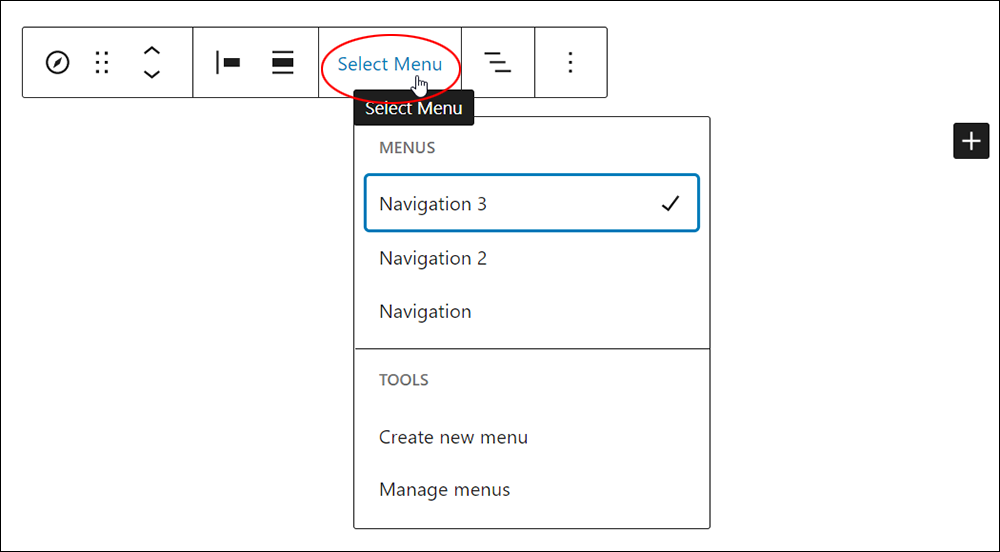
To do this after adding a Navigation block, click on Select Menu.
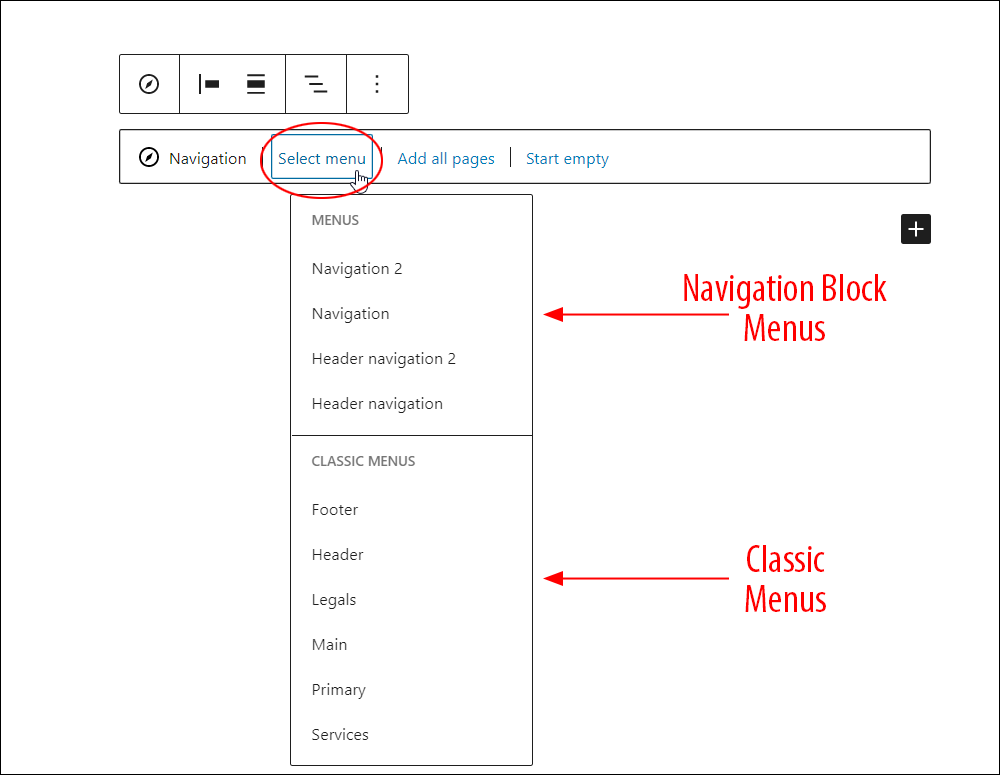
This will display and allow you to select and use all the menus you’ve created, including menus from any classic themes.
For example, here is a Navigation block displaying only existing Navigation block menus…
And here is a Navigation block displaying menus for use in block themes and custom menus created using different/previous themes…
Add All Pages
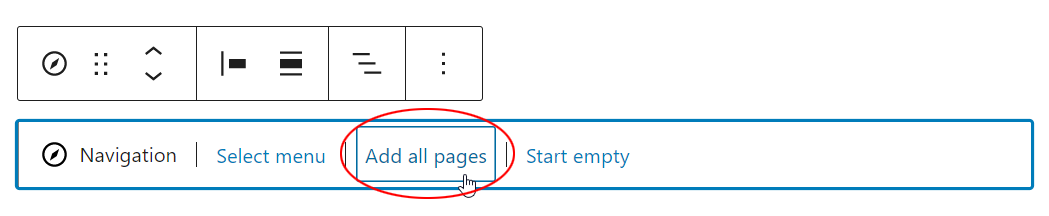
Selecting this option will automatically add all of your site’s pages to the Navigation block, which you can then customize to your liking.
Notes:
- Depending on the number of pages you have on your site, this option can help streamline menu creation.
- If you add new pages to your site, they will automatically appear in this menu.
- If there is a limited amount of space where the block is being added, this option may not display when setting up your menu. Instead, the setup state will be simplified to the “Select Menu” and “Start Empty” options only to make it easier to get started.

If you use this option, you’ll need to do the following to move around the menu items:
- In the Navigation block, select an individual menu item that you’re unable to move around or move a block near.
- Click on “Edit” in the Block Toolbar.
- From there, select “Convert” on the pop-up that appears. This will convert the menu items to links so that you’re able to move them around.
- You will then see the options to move your menu items around.
Below is a video showing these steps.
Start Empty To Create A New Menu
To create a menu from scratch, add a Navigation block, then select the “Start empty” option.
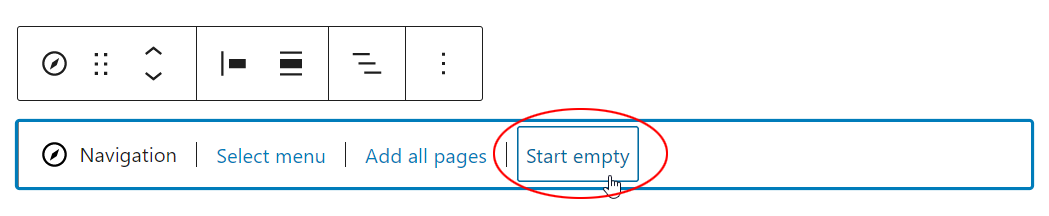
This gives you a blank canvas and lets you customize your menu to your liking.

You can also select an existing menu or create and manage menus (see “Create Menu” and “Manage Menu” sections below)…
Navigation Block Editor

In addition to the options for changing block type (see section further below) and controls for dragging and moving the block up and down on your layout, the Navigation block includes the following options:
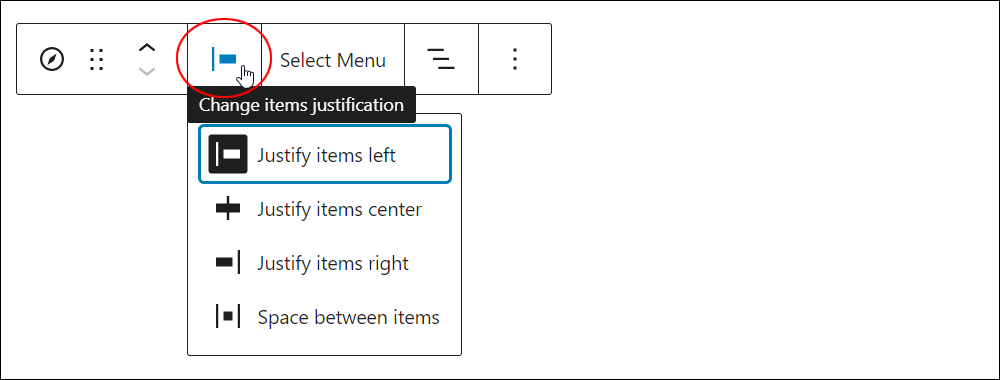
Change Items Justification
You can adjust the space between items and change their justification:
- Justify items left: align the overall block and its contents to the left.
- Justify items center: align the overall block and its contents to the center.
- Justify items right: align the overall block and its contents to the right.
- Space between items: automatically add space between menu items.
Change Alignment
This option displays when you add the Navigation block.
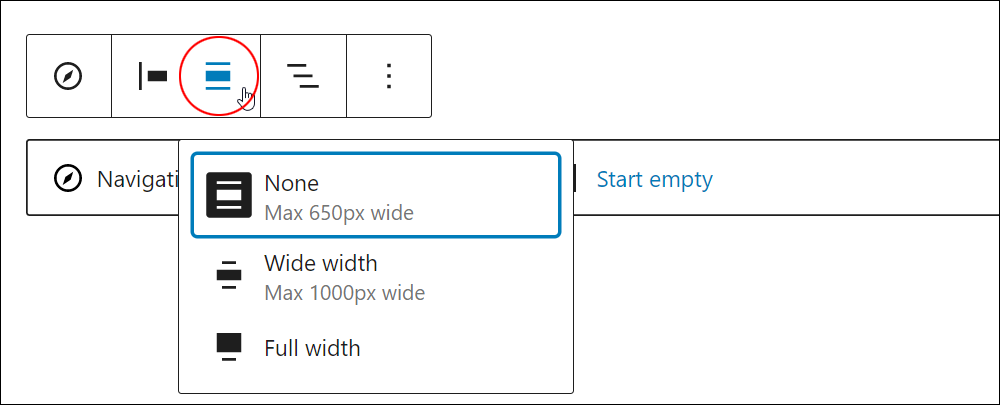
Select different alignment options for your Navigation block (e.g. None, Wide width, and Full width.)
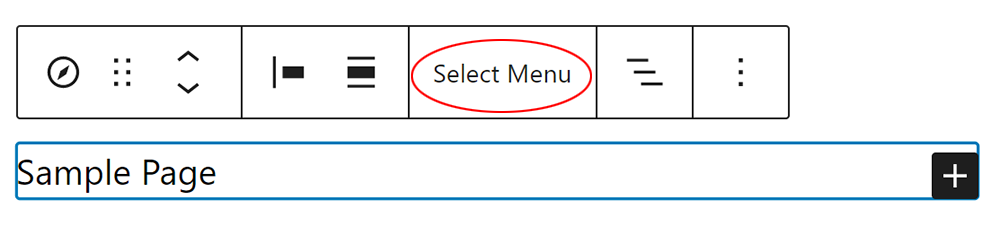
Select Menu
This option lets you select a different menu than the one being displayed.

List View
List View allows you to move around the blocks within the overall Navigation block.
After selecting a menu in the Navigation block, click on List View…
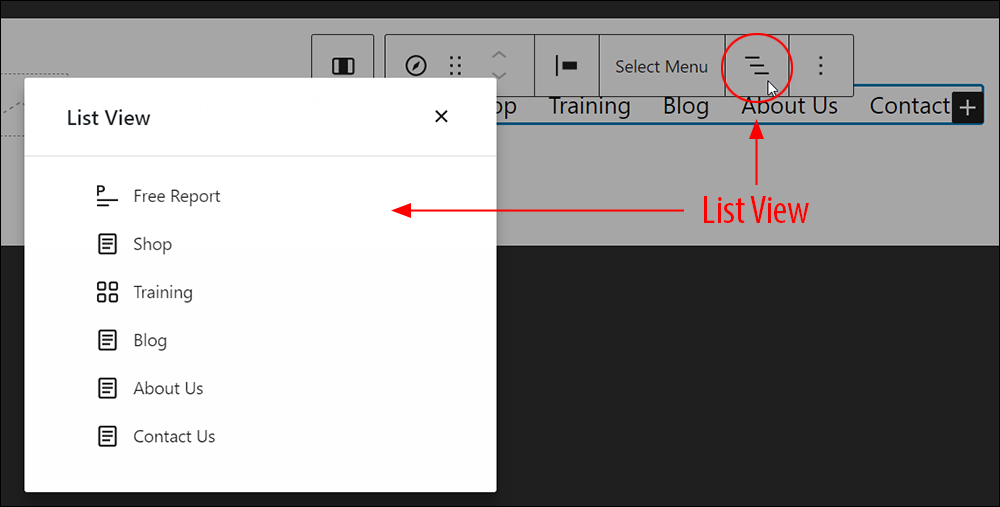
This lets you further organize your menu items (e.g. rearrange their positions on the menu).

Options
Click on the vertical ellipsis (3 vertical dots) to bring up additional options for configuring the Navigation block.
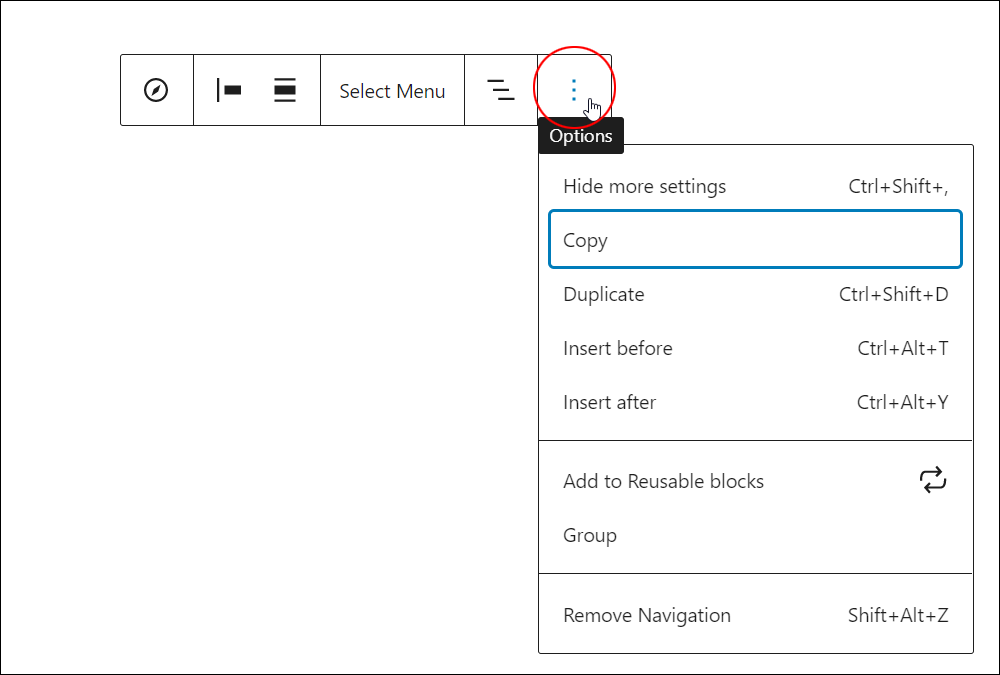
To learn about using the different options in the Options section go here: How To Use Blocks
Navigation Block Customization
Let’s take a look at some of the ways you can customize the Navigation block.
Add Additional Menu Items
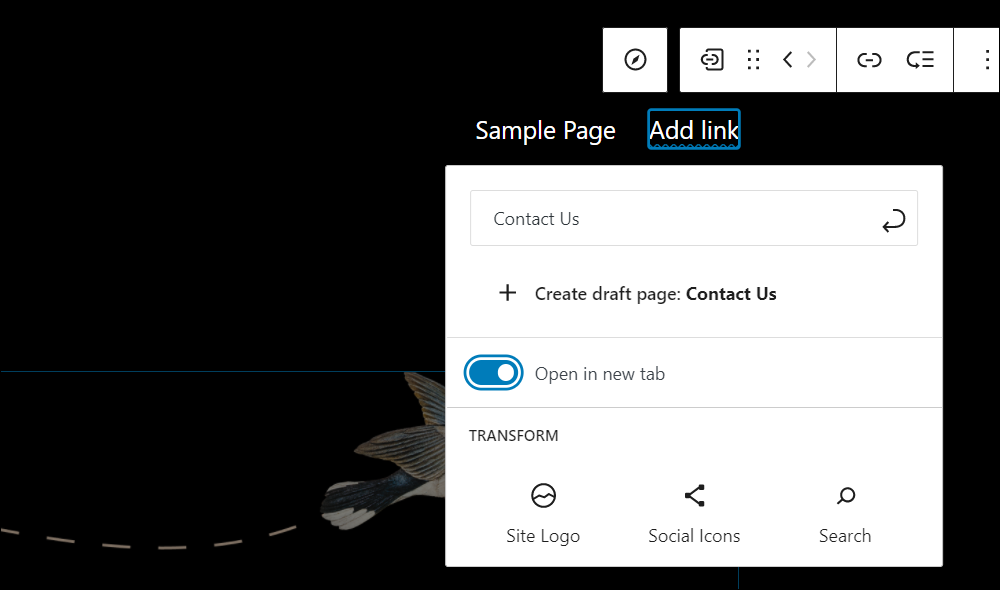
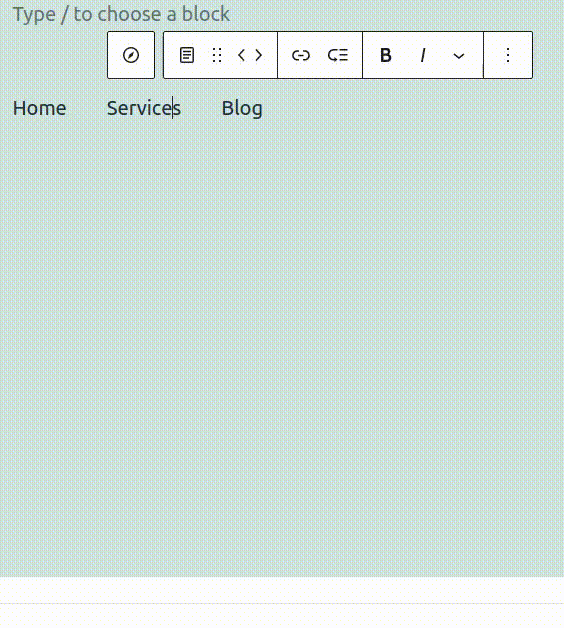
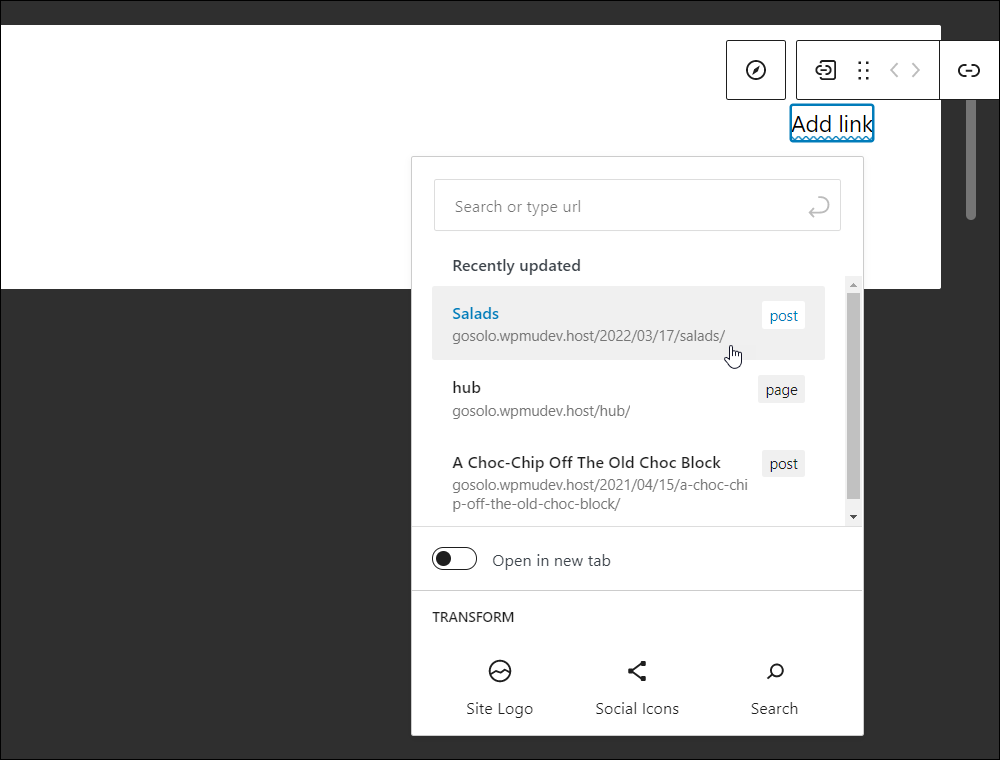
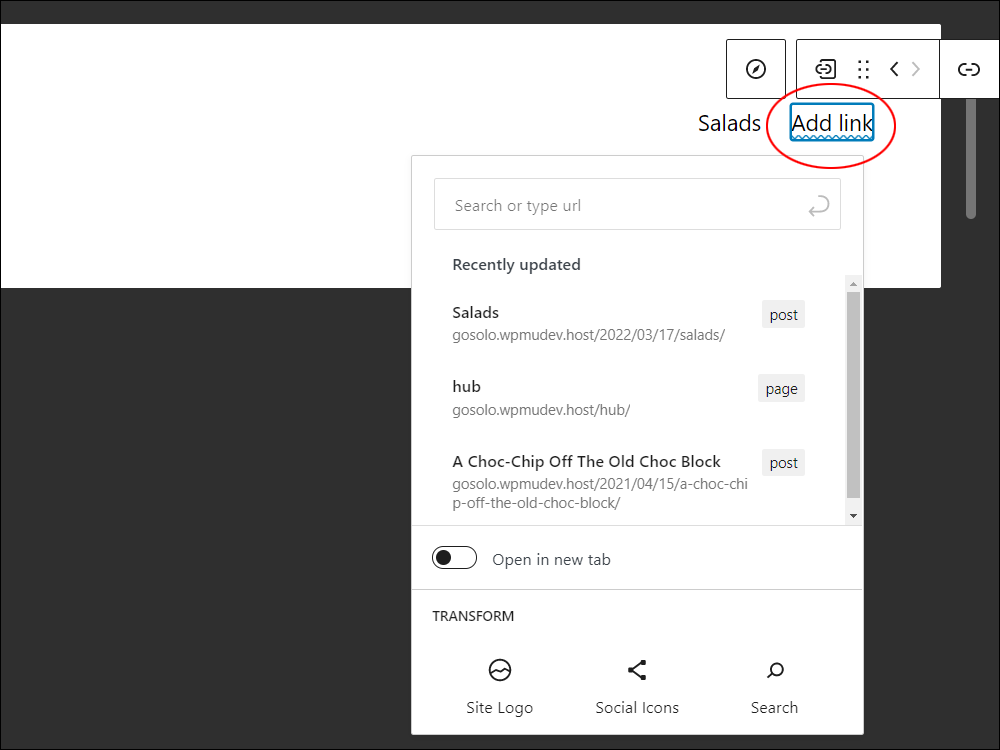
After adding a Navigation block, click on Select Menu to insert an existing menu. In this example, the menu contains a link to Sample Page.
Click on the [+] icon to add a new link. In this case, we will add our existing Contact Page by typing in “Contact Us” and clicking on the apply button. Note that if the page doesn’t exist, WordPress gives you the option to create it as a draft page. We’ll also toggle the Open in new tab switch to open the page in a new tab when a user clicks on the link.
Open the Inserter and select a block to add.
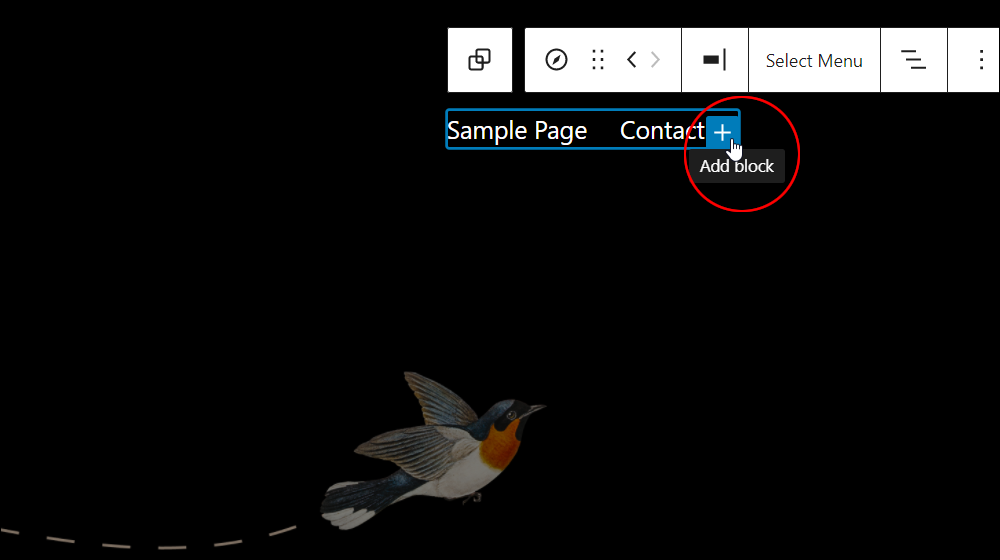
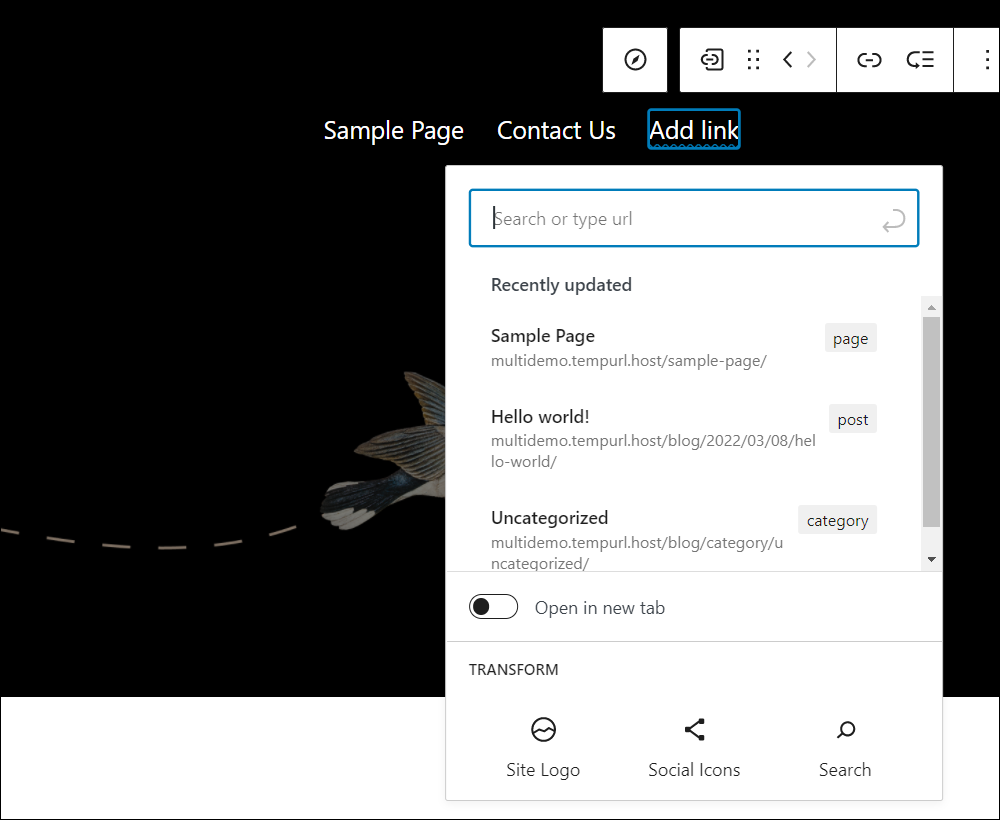
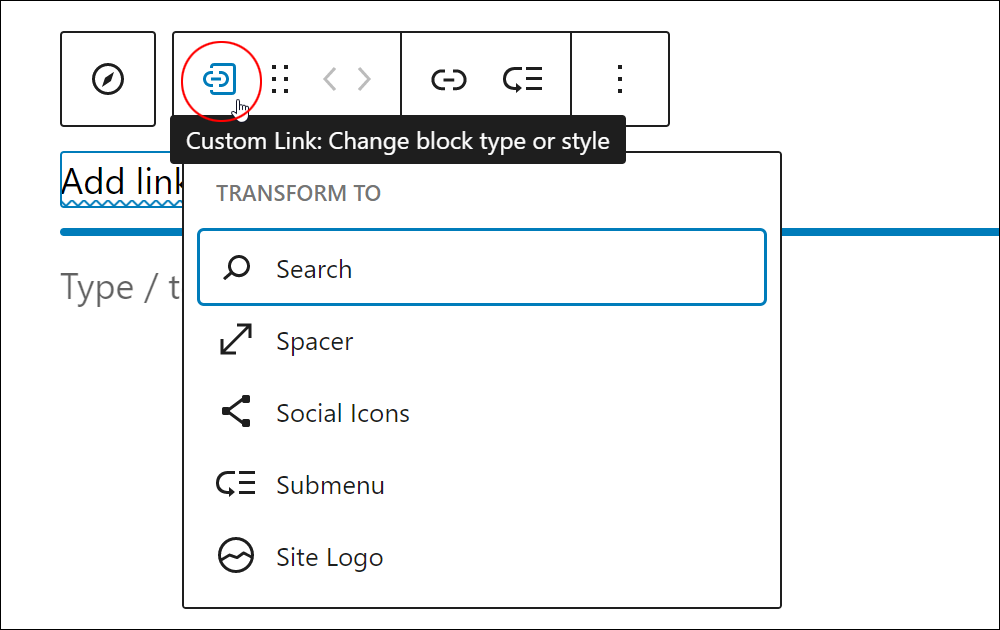
Select a new item to add to the menu. you can use the search bar, type in a URL, or use the scroll bar to search through the items. In addition to links, you can also add additional blocks to your navigation menus by selecting items from the Transform section.
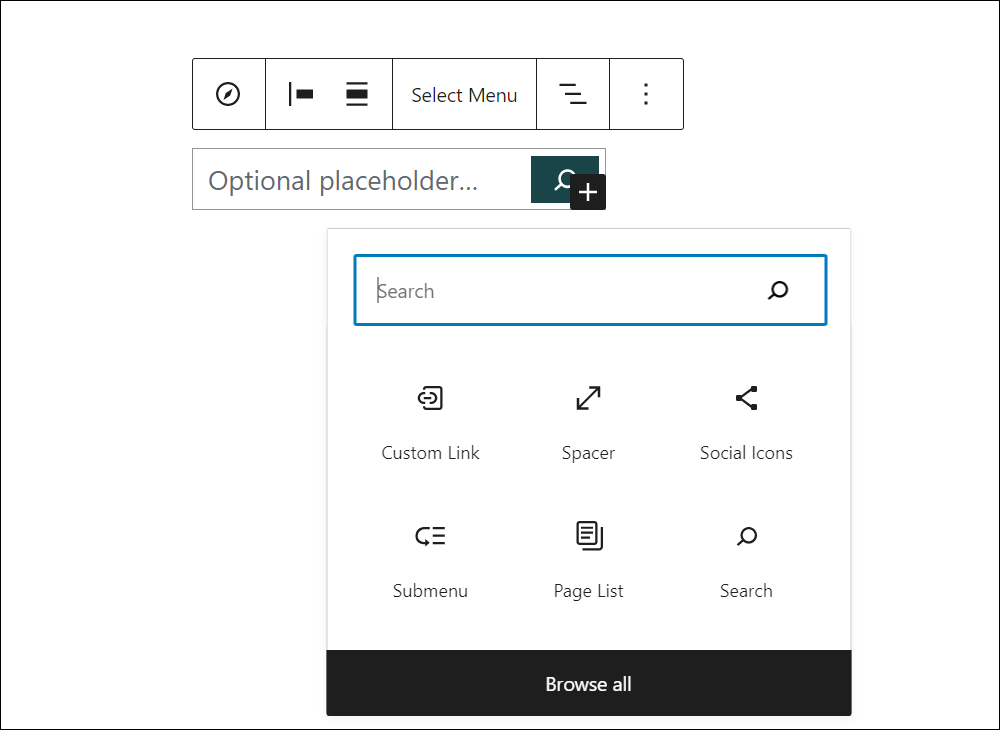
Note: the Navigation block lets you select and add the following blocks:
- Spacer block – Adjust the space between menu items.
- Custom link – Add a link to any page or website.
- Post link – Add a link to a post.
- Page link – Add a link to a page.
- Category link – Display posts assigned to a specific category.
- Tag link – Display posts assigned to a specific category.
- Home link – Add a link to your site’s home page.
- Page list – Display a list of all your site’s pages.
- Search – Add a search box to your menu.
- Social Icons – Add social icons to your menu.
- Site Logo – Add your site logo to your menu.
- Site Title – Add your site title to your menu.
- Submenu – Add a submenu item to your menu.
To learn more about using the Navigation block menu blocks, see this video in the WordPress 5.9 updates post.
Each block contains its own customization options and settings. These additional options will display after you add the block to your Navigation block.
After adding an item, click on the block to edit it.
Add Submenu Items
To add submenu items, select the block you want to add a submenu item to and click on the submenu icon in the block toolbar.
This will automatically add a submenu item below the block you selected.

The video below shows you how this feature works:
Move blocks
After adding menu blocks to the Navigation block, you can move blocks and rearrange each menu item as you like.
If you are trying to make quick changes, the easiest option is to use the toolbar movers you normally see when interacting with blocks.

For more advanced and complex moving, we recommend using the Navigation block’s built-in List View.
To access this feature, select the overall Navigation Block and then select the List View Icon:
Note: If you’re unable to move all menu items or certain menu items around, then it’s probably likely that you will first need to convert the menu to links.
This happens if you use the “Add All Pages” option. If this happens, you will not be able to click on the left/right buttons.
Click on Edit to see instructions on how to convert menu items to links.
Change Links And Title
Each block added to the navigation menu has two parts to it: a link and a title.
You can edit the block text directly to change the title.
To edit the link, select the individual block and select the link icon in the toolbar. An option will open up allowing you to edit what the menu item links to and the title.
Create New Menu
To create a new menu, add a Navigation block, then click on the Select Menu button…
Next, click on Tools > Create new menu…
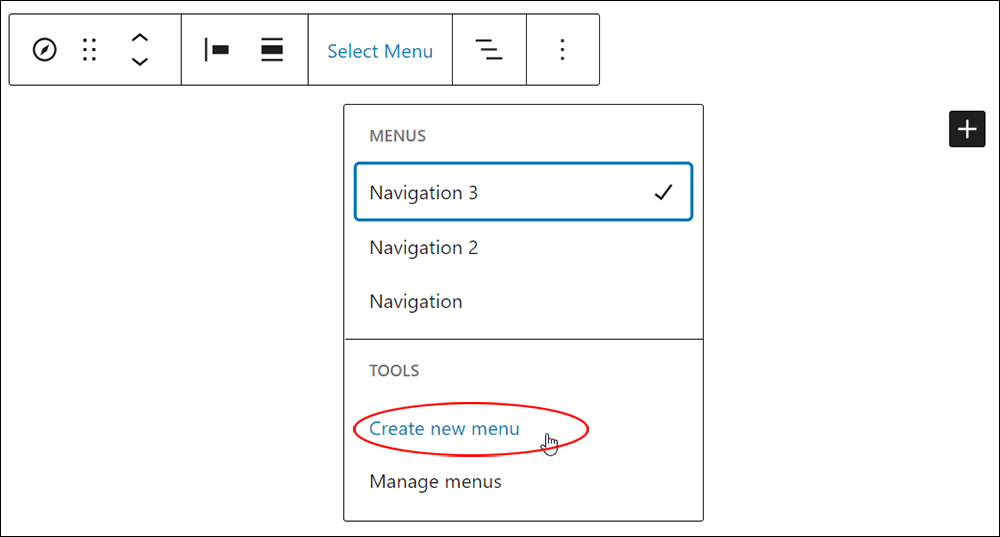
This will bring up the option to select an existing menu, start empty, or add all pages (if screen size allows).
Manage Menus: Delete Or Rename
To delete the currently selected Navigation Menu, expand the Advanced section within the settings sidebar for the block. Selecting the Delete menu button will delete the Navigation Menu and reset the current Navigation block to its default state.
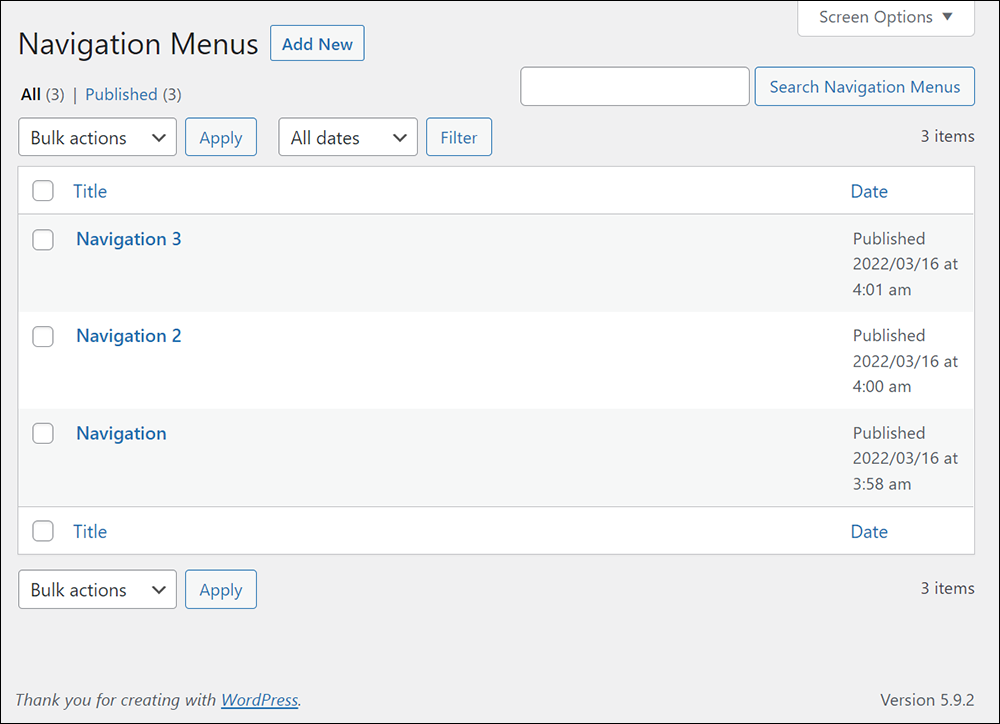
To make it easier to delete and rename all of your menus in one place, click on the Select Menu item in the toolbar and click on Manage menus.
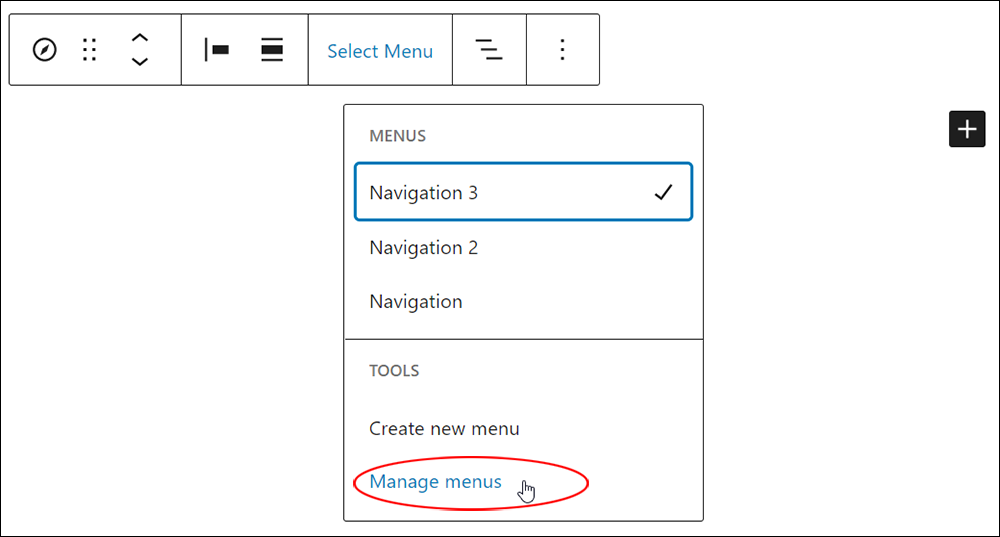
You will be taken to a dedicated screen for deleting and renaming the menus used across your site.
Use A Menu Across Themes
You can reuse menus across other Block themes. However, if you go from a Block theme to a Classic theme, you will not be able to re-use menus created with the Navigation block.
How To Use The Navigation Block – Putting It All Together (Step-by-Step Tutorial)
In the tutorial below, we’ll walk through an example of using the Navigation block in a block-based theme. For more details, refer to the Navigation block and Navigation block menus videos in the WordPress 5.9 updates page.
The navigation block can be used anywhere where you can use blocks, such as in your header, footer, or widget areas, as well as in the content section of a post or page.
Note: In this example, we’ll be adding and customizing the Navigation block in the header area of a block-based theme (we’ll use the WordPress Twenty Twenty Two theme).

Let’s start from scratch.
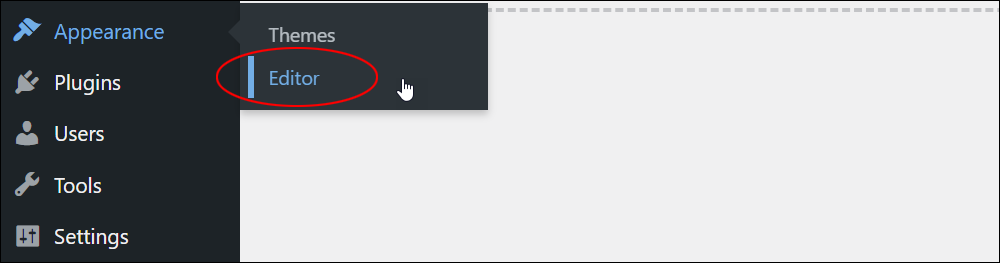
First, select Appearance > Editor from the admin menu to access the WordPress Site Editor…
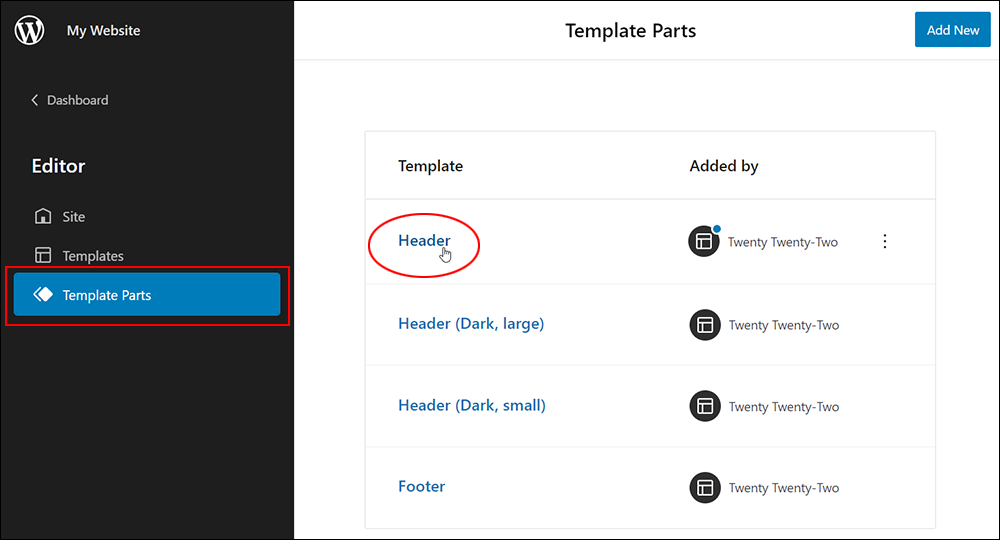
In the Editor screen, select Template Parts > Header…
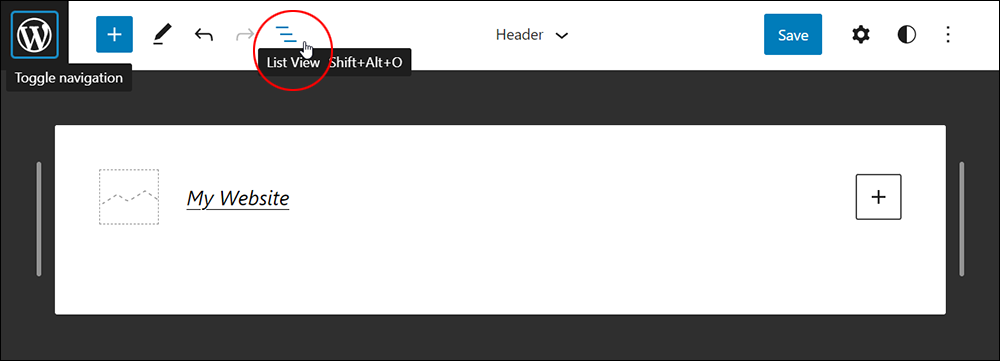
As this is a somewhat complex block to work with, let’s use the List View. The List View makes it easier to see what is going on.
Select List View…
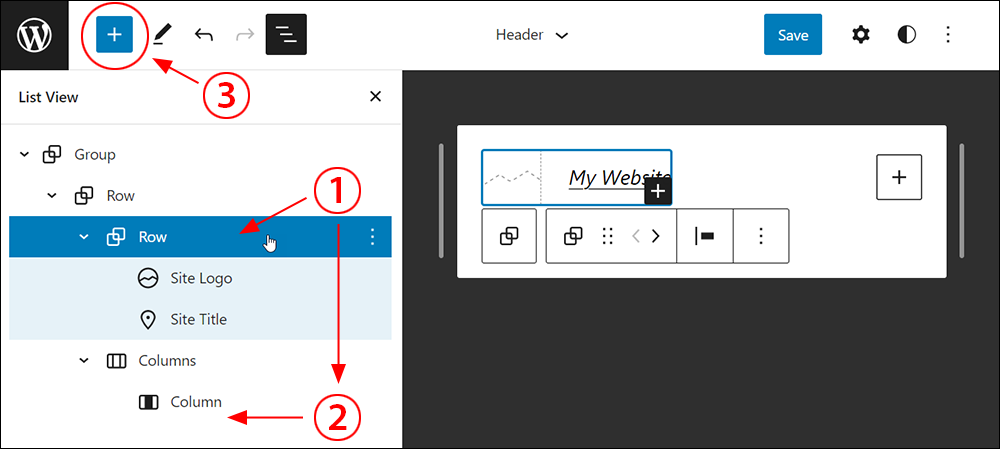
The List view displays all the blocks inside an element (in this case, the Header template).
What we want to do, is to add a Navigation block inside the row where the Site Logo and Site Title are located (1), then move the Navigation block into the Column on the right of the Header Template (2).
To add the Navigation block, click on the Block Inserter tool (3)…
Working in the List View section, do the following:
- Click on Row
- Click on the Block Inserter tool
- Type in NAV or navigation (or scroll down to the theme section)
- Select the Navigation block to insert it into the row
- Drag the Navigation block into the Column
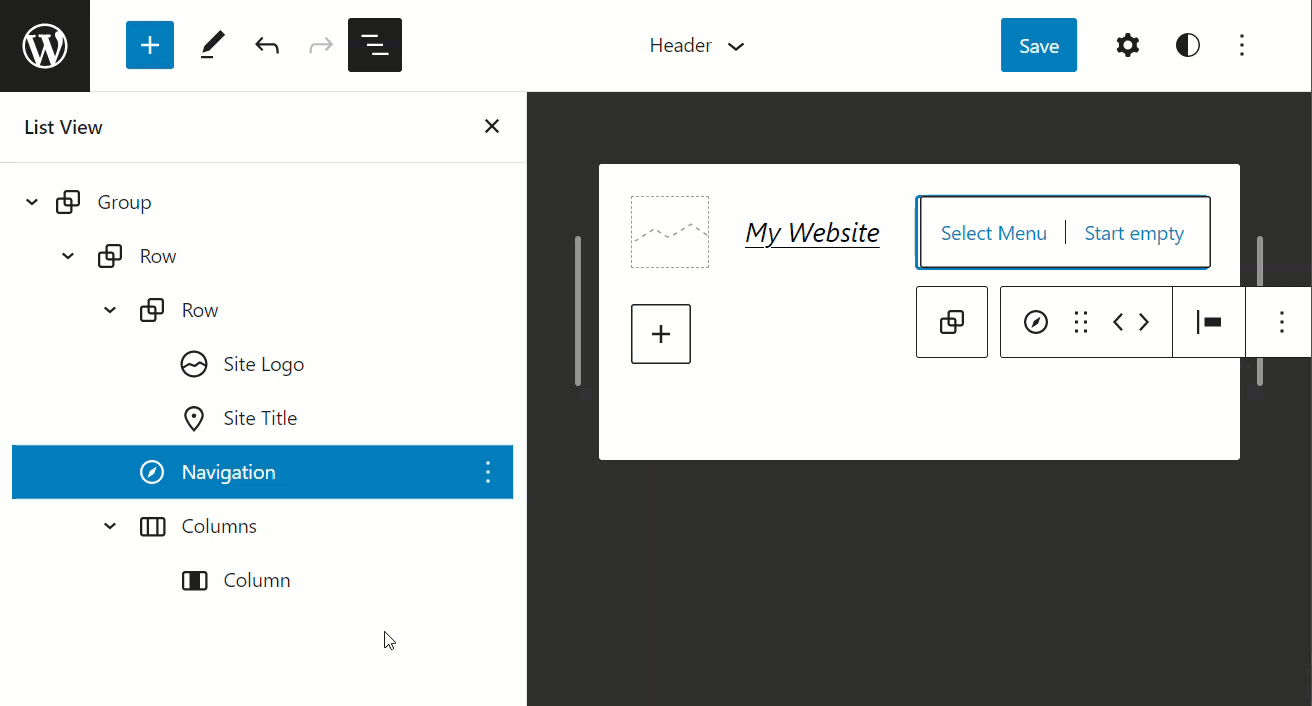
Note: if you put the block where you don’t want it, you can always drag it to another location in the ListView tool.
As explained earlier, if you insert the Navigation block into an area with limited space, you will only see two choices: Select Menu or Start Empty (i.e. the Add all Pages option does not display).
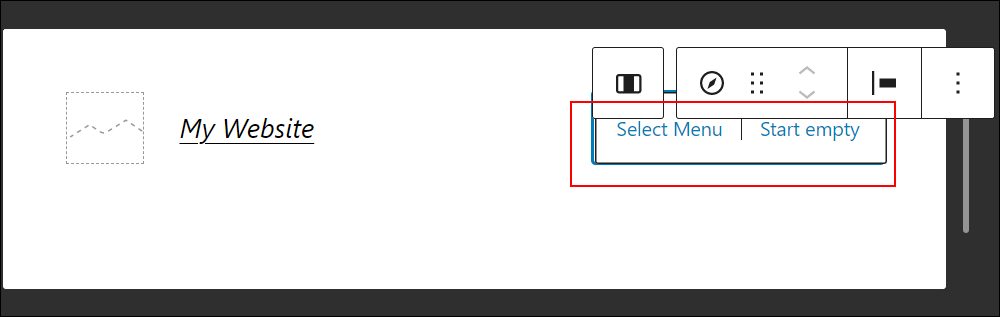
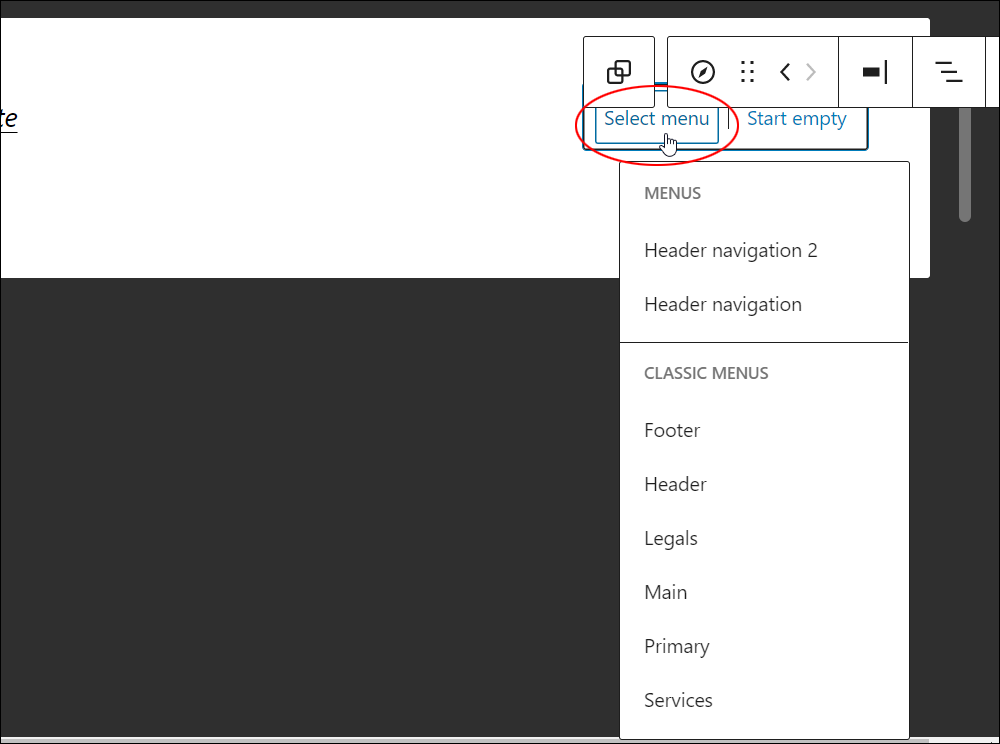
Choose Select Menu to display and select an existing menu…
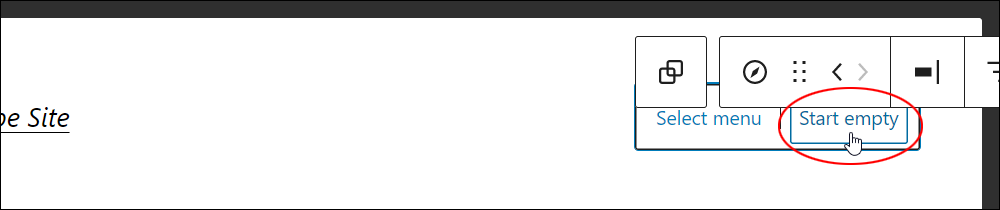
Or click on Start empty…
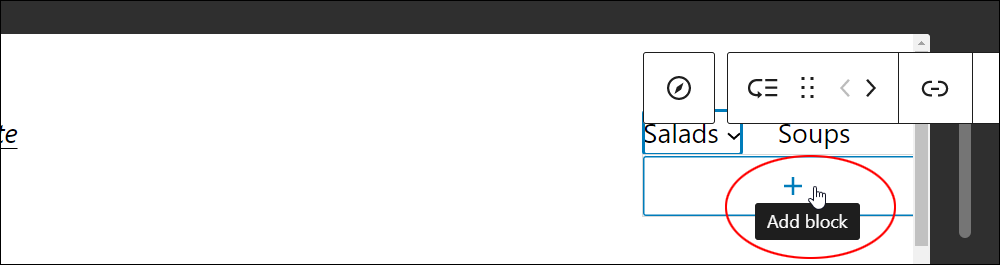
Then click add block [+] …
This lets you add menu-related blocks only (e.g. pages, posts, categories, custom URLs, etc). In other words, you’re not going to find columns or embed or any of the other blocks…only menu-related blocks. You also have the option to toggle the Open in new tab switch on or off for each link you add to your menu and add a search box, social icons, or a site logo.
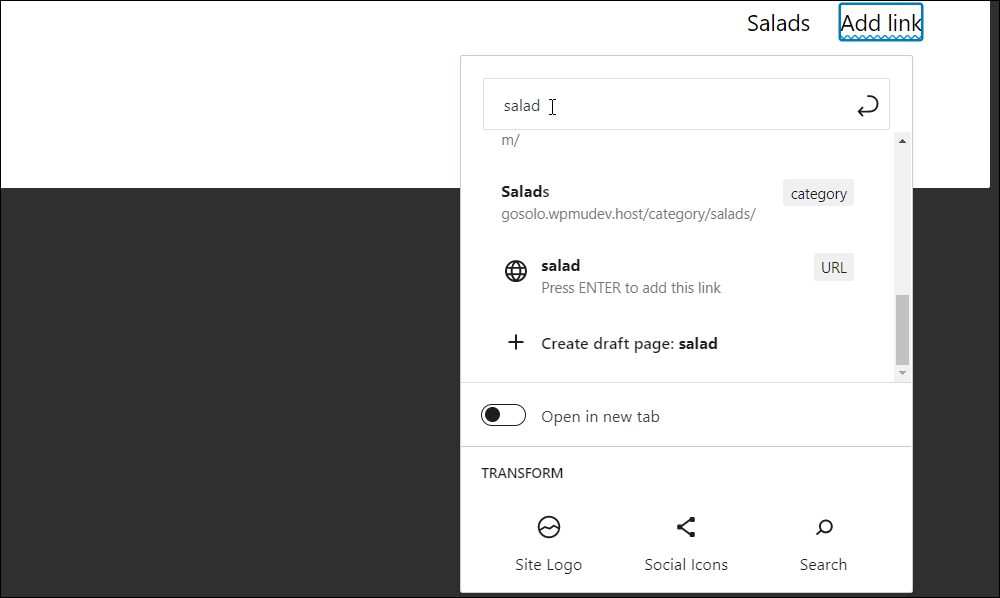
Select an item to add to your menu.
To add additional menu items, hit the enter key, then repeat the process.
To add something that is not displayed in the Recently Updated list, do a search or type in a URL and then hit the enter key.
Notes:
- If the item list is long, use the scroll bar in this section to navigate to the bottom of the list.
- If what you’re searching for doesn’t display (e.g. a category), make sure to spell it out fully (e.g. “Pets” instead of “Pet”).
- You can also create a draft page for a menu item (and fill it out with content later).
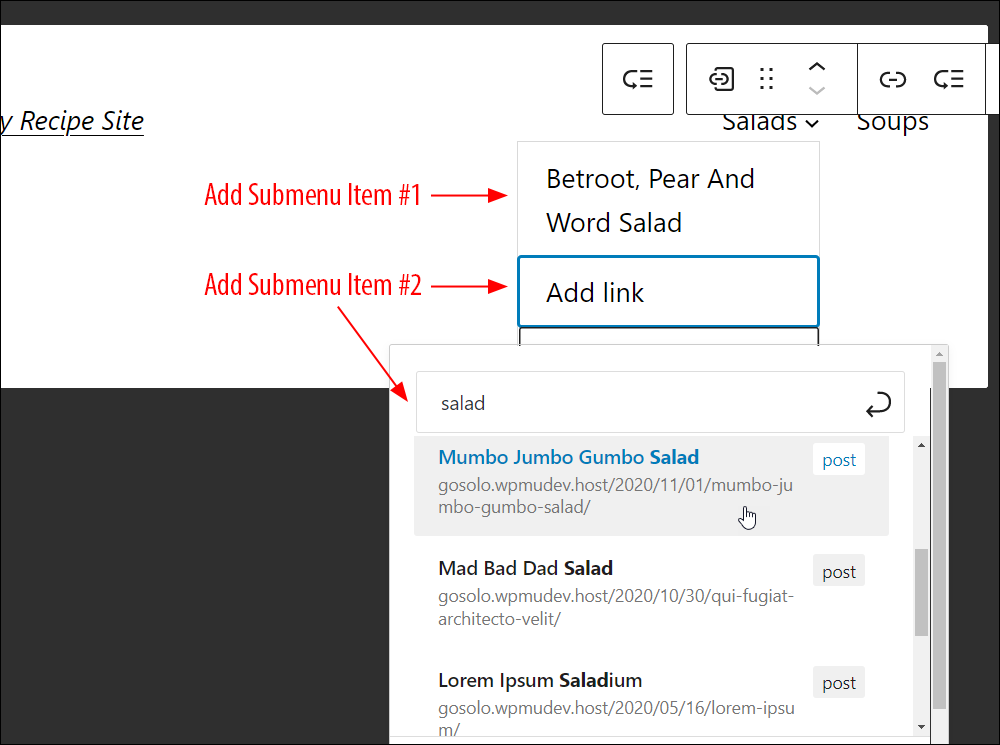
To add submenus, select the link (1) and in the inline toolbar, click on Add Submenu…

Then click on the plus icon (Add block)…
Search for the item and select it to add to your menu as a submenu and repeat this process to continue adding new submenu items.
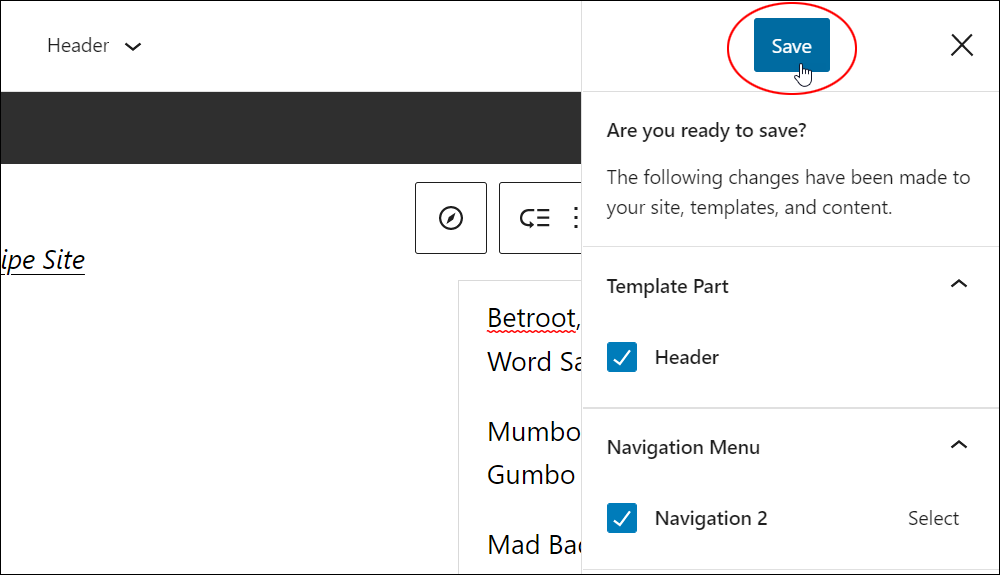
Remember to save your work as you go…
Repeat the above process to continue adding items to your menu.
As mentioned earlier, you can also add your site logo, a search box, or social icons.
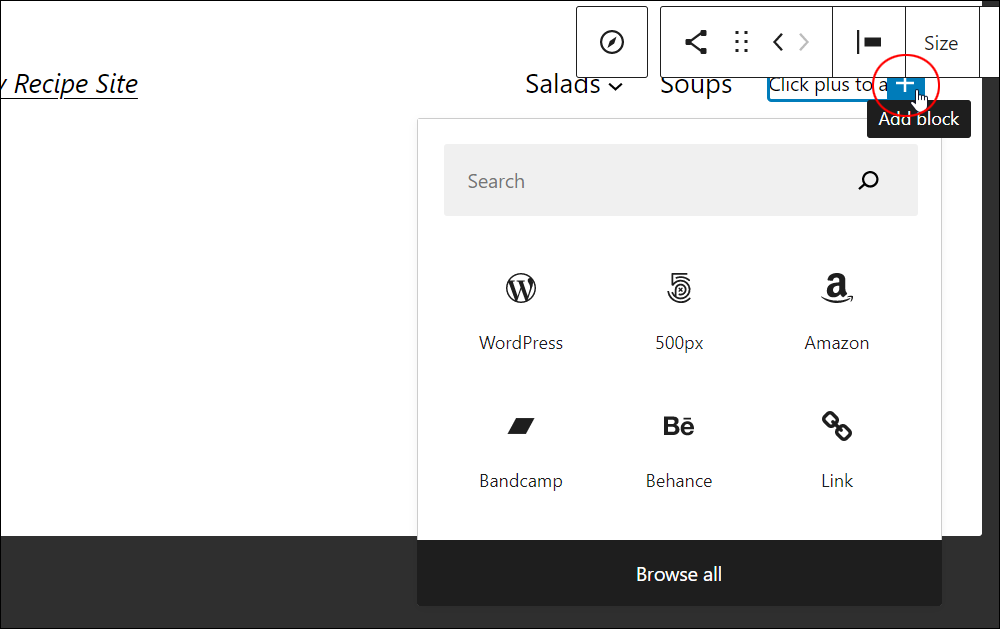
For example, to add social icons, hit enter in your Navigation block to create a new link, then click on Transform > Social Icons.

This brings up the Patterns section. Select a style to display your social icons (hover over the Style to preview it).
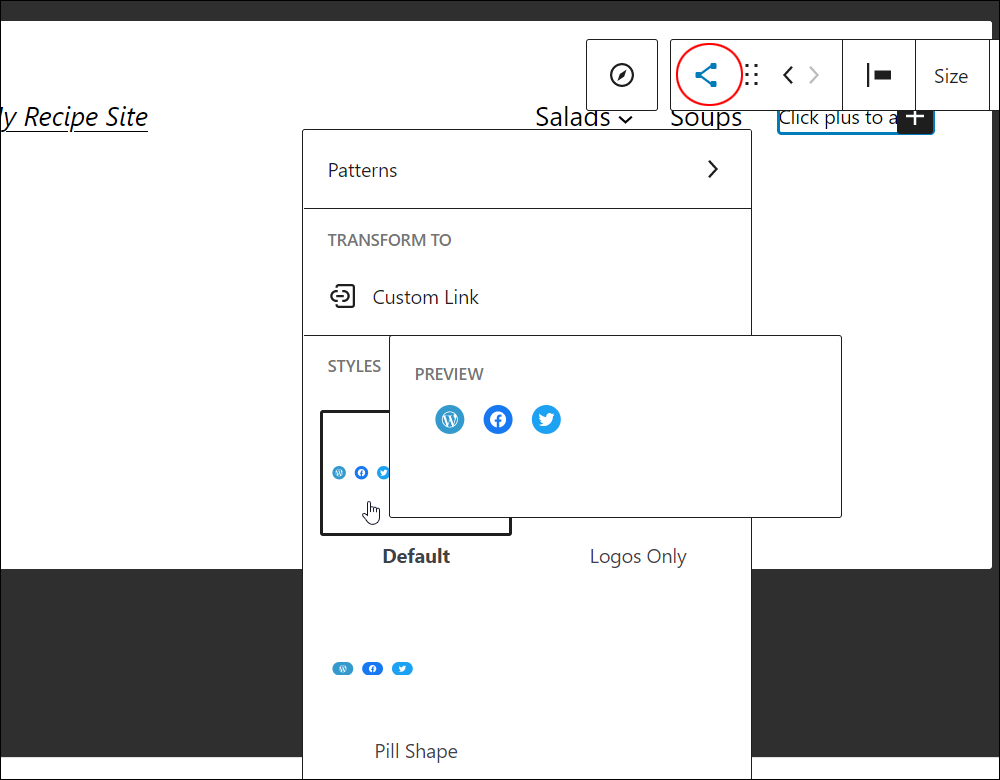
Click on the Add block icon [+] to insert a specific social icon (e.g. Twitter, Facebook, WordPress, etc.)
Generally, the most used icons will display at the top of the list, but you can also use the Search box, or click on Browse all to view all available social icons and select one to add to your menu.
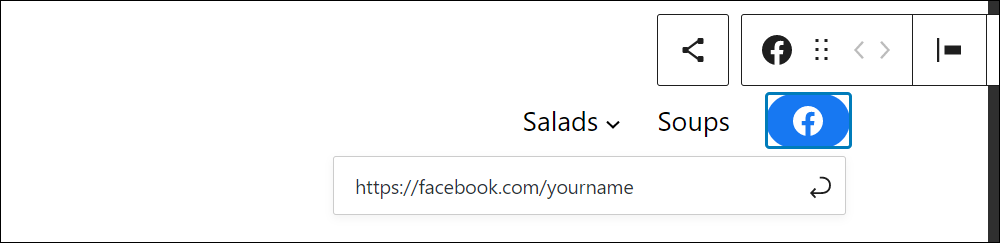
After inserting a social icon, click on it and enter the URL of your social media account (or poster group, hashtag, etc.), and then click on the Apply arrow.
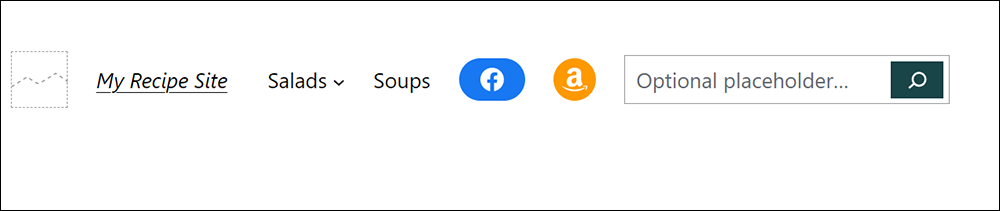
Repeat this process to insert additional social icons or any of the available menu blocks into your navigation menu. For example, if your menu starts to get a little busy, you can insert the spacer block to add space between the menu items. Likewise, you can add page lists, category links, custom links, etc.
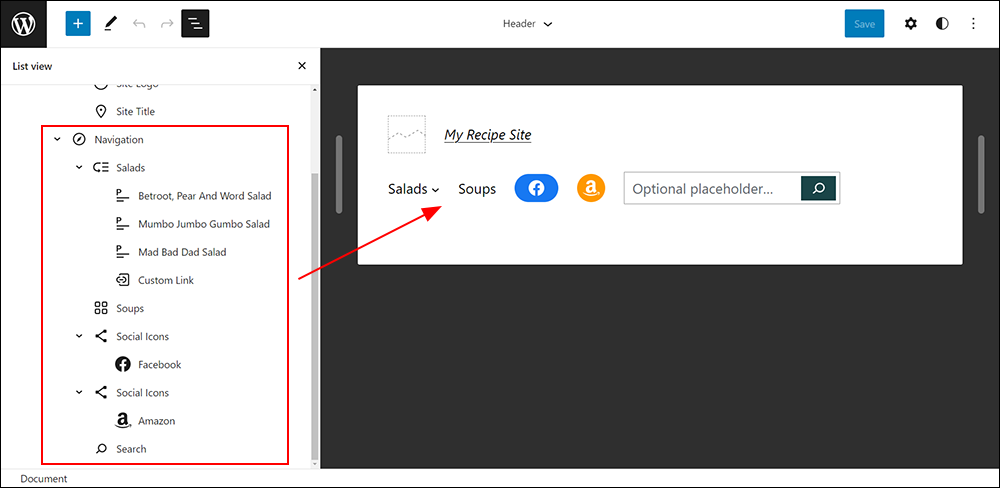
As stated earlier, the Navigation block is a complex block and it can be comprised of a number of other embedded blocks. For this reason, we recommend using the list view to arrange blocks however and wherever you want them.
Remember to save your block layout when done.
For more information on adding menu blocks to the Navigation block, see this Navigation block menus video.
Navigation Block Settings
Every block has specific options in the editor sidebar in addition to the options found in the block toolbar. You can use these settings to customize the overall block.
Note: If you do not see the sidebar, simply click the ‘cog’ icon next to the Publish button.

Block Description
This section provides a brief description of what the block does.
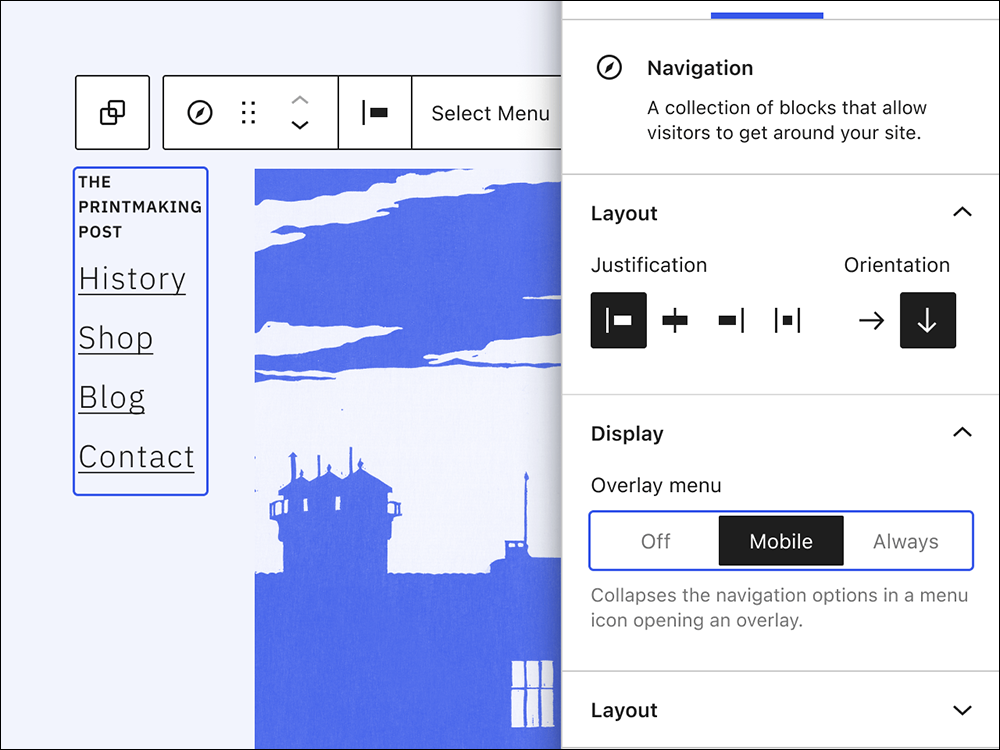
Layout
These options allow you to control the overall positioning of the Navigation block. This includes the following:
- Justification: The setting allows you to justify the items in the Navigation block to the left, center, or right. Alternatively, you can insert space between items.
- Orientation: This setting allows you to switch between vertical and horizontal orientations for all items within the Navigation block.
- Allow to wrap to multiple lines: This is an option that you can toggle on and off that allows the Navigation block to overflow into multiple lines if there isn’t enough space.
Settings
Display
Show icon button (toggle on/off) – This lets you configure the visual appearance of the button opening the overlay menu.
Overlay Menu
This section lets you control what is shown for the Navigation block across different screen sizes, allowing for a responsive menu option:
- Off: This turns off displaying a menu icon when on smaller screen sizes.
- Mobile: This enables a menu icon to be displayed when viewing your site on smaller screens that one can click on to see the entire menu.
- Always: This enables the menu icon to be displayed regardless of screen size.
By default, this option is set to Mobile, meaning that it will show a menu icon on smaller screen sizes automatically. When you click on the menu icon, it will open up an overlay that shows your entire menu.
Submenus
If your menu has submenu sites, this option will display with the following settings:
- Open on click – Clicking on a submenu item opens the item when clicked.
- Show arrow – If the Open on click toggle is set to on this item will be greyed out. If the Open on click toggle is set to off this item lets you display or hide the submenu icon.
Color
Color settings allow you to customize the appearance of your Navigation block with the following options:
- Text: Controls the color of the text of the Navigation block items.
- Background: Controls the background color of the Navigation block items.
- Submenu and overlay text: Sets both the color of the submenu text and the overlay built into the responsive display options.
- Submenu and overlay background: Sets both the color of the submenu background and the overlay built into the responsive display options.
Typography
These options allow you to customize the typography of the Navigation block items. This block currently supports the following options:
- Font family
- Appearance
- Line height
- Decoration
- Letter case
- Font size
You can access all of these options by clicking on the vertical ellipsis found in this section:
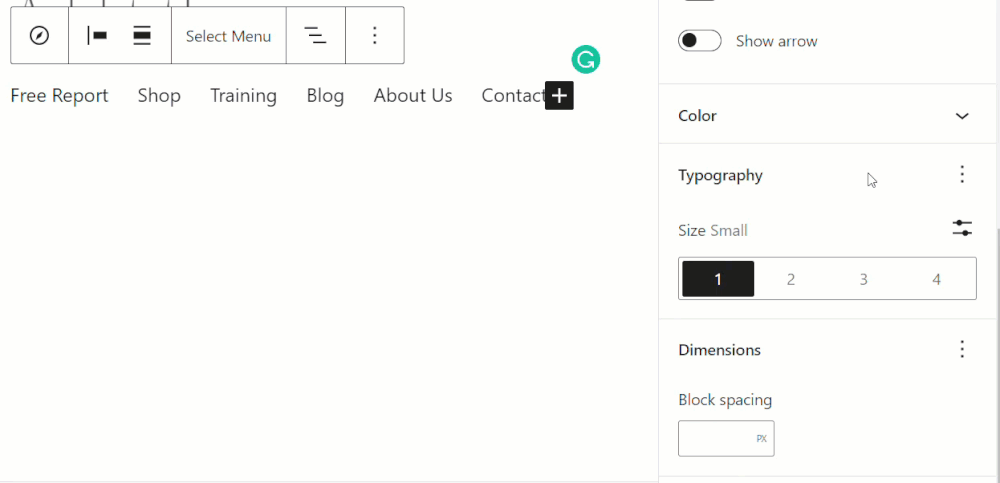
Dimensions
The Navigation block supports Block Spacing, which allows you to add custom spacing between each block. This makes it easy to set a uniform appearance across the entire block.
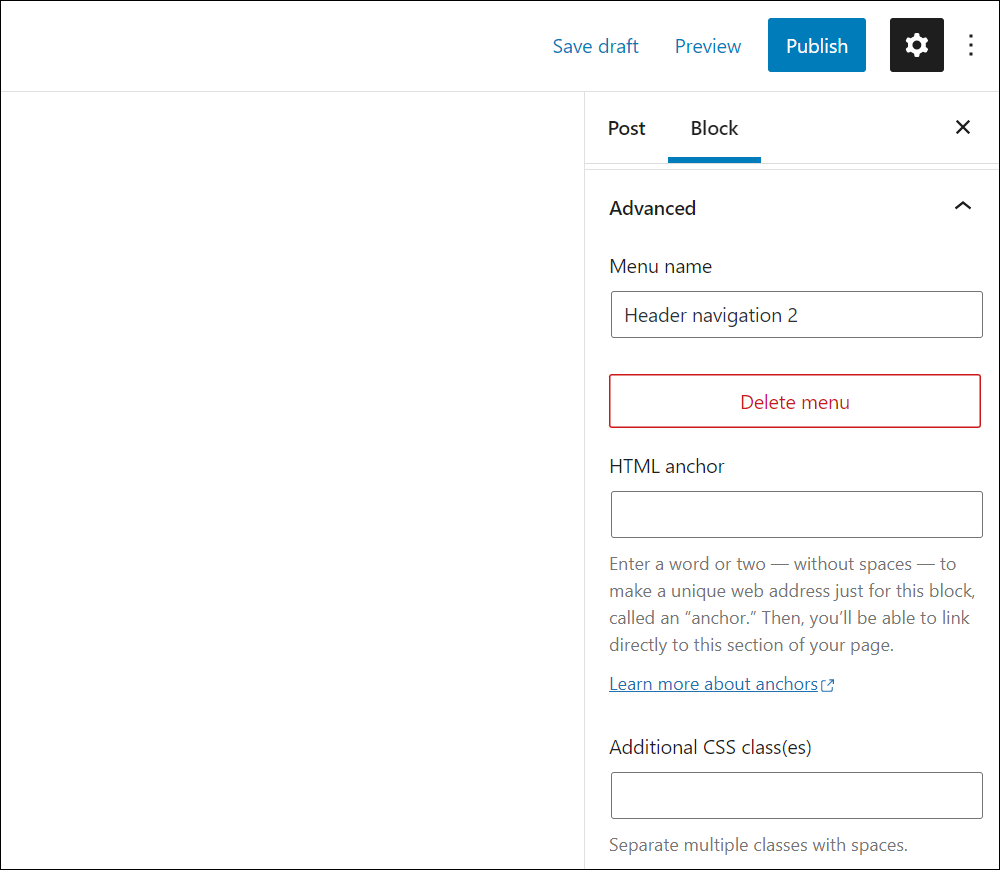
Advanced Settings
The advanced tab lets you accomplish a few things:
- Rename the menu.
- Delete the menu.
- Add an HTML anchor.
- Add a CSS class in order to style the block as you’d like.
Navigation Loop Block – Additional Info
The Navigation Loop block can be converted into the following block types:
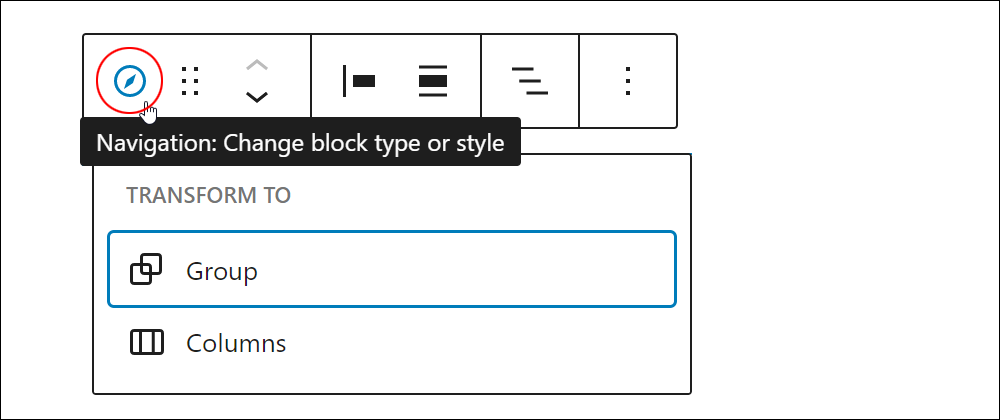
Transform Menu Items Into Other Blocks
Each block within the Navigation block can be transformed to other blocks via the Transform menu. This option makes it easy to build your menu with different blocks.
Congratulations! Now you know how to use the WordPress Navigation block.
***

Updated: July 5th, 2024