How To Protect Your Content In WordPress
In this tutorial, you will learn how to create private and password-protected posts and pages and how to make your content inaccessible in WordPress using built-in and plugin-based content protection methods.
We recommend completing the following tutorial to learn more about adding, protecting, and managing downloadable files In WordPress: How To Add Downloadable Files In WordPress
How To Prevent General Site Visitors From Viewing Content On Your WordPress Posts And Pages
There are several ways to prevent site visitors and unauthorized users from accessing some or all of your site’s content.
Some of the more common reasons for protecting content on your posts and pages include:
- To prevent users from accessing some of your content (e.g. restricting content on specific posts, pages, categories, etc.)
- To provide information only after users have made a purchase on your site (e.g. downloadable info products).
- To restrict certain types of information to specific groups of users (e.g. wholesale price lists and trade catalogs, confidential forms and business documents, updated members lists or databases, private company data, etc.)
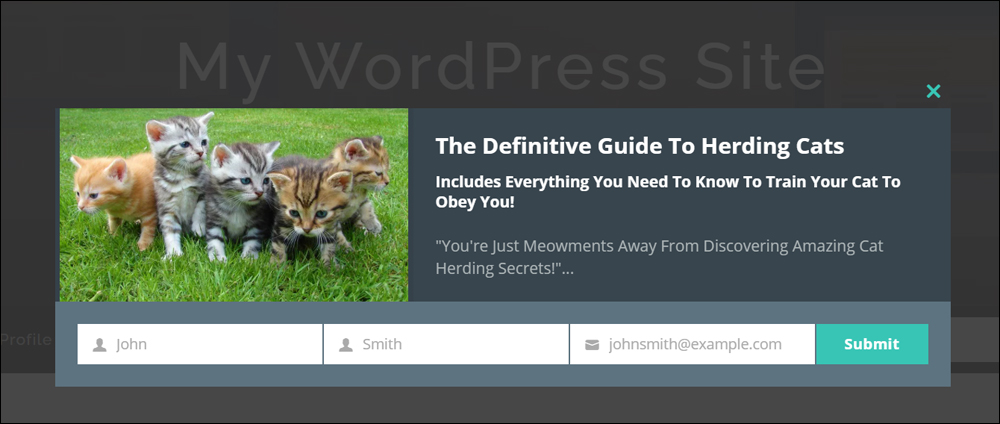
- To get users to register as members or subscribers before allowing them to view or access your content (e.g. a newsletter, private membership site, etc.)
- To offer discount coupons or “how-to” information that can only be unlocked or revealed to users with a special password, or after performing a specific action (e.g. social sharing your post with others).
- And more.
Let’s go through some of the ways you can protect content on your WordPress site:
WordPress Content Protection Method #1: Deep-Nested Content
This method is more about ‘hiding’ your files inside a deep-nested post or page than protecting them from unauthorized users.
Essentially, it’s a useful method for sharing unprotected content or downloadable files where it wouldn’t really matter if some visitors were to occasionally come across it on your site.
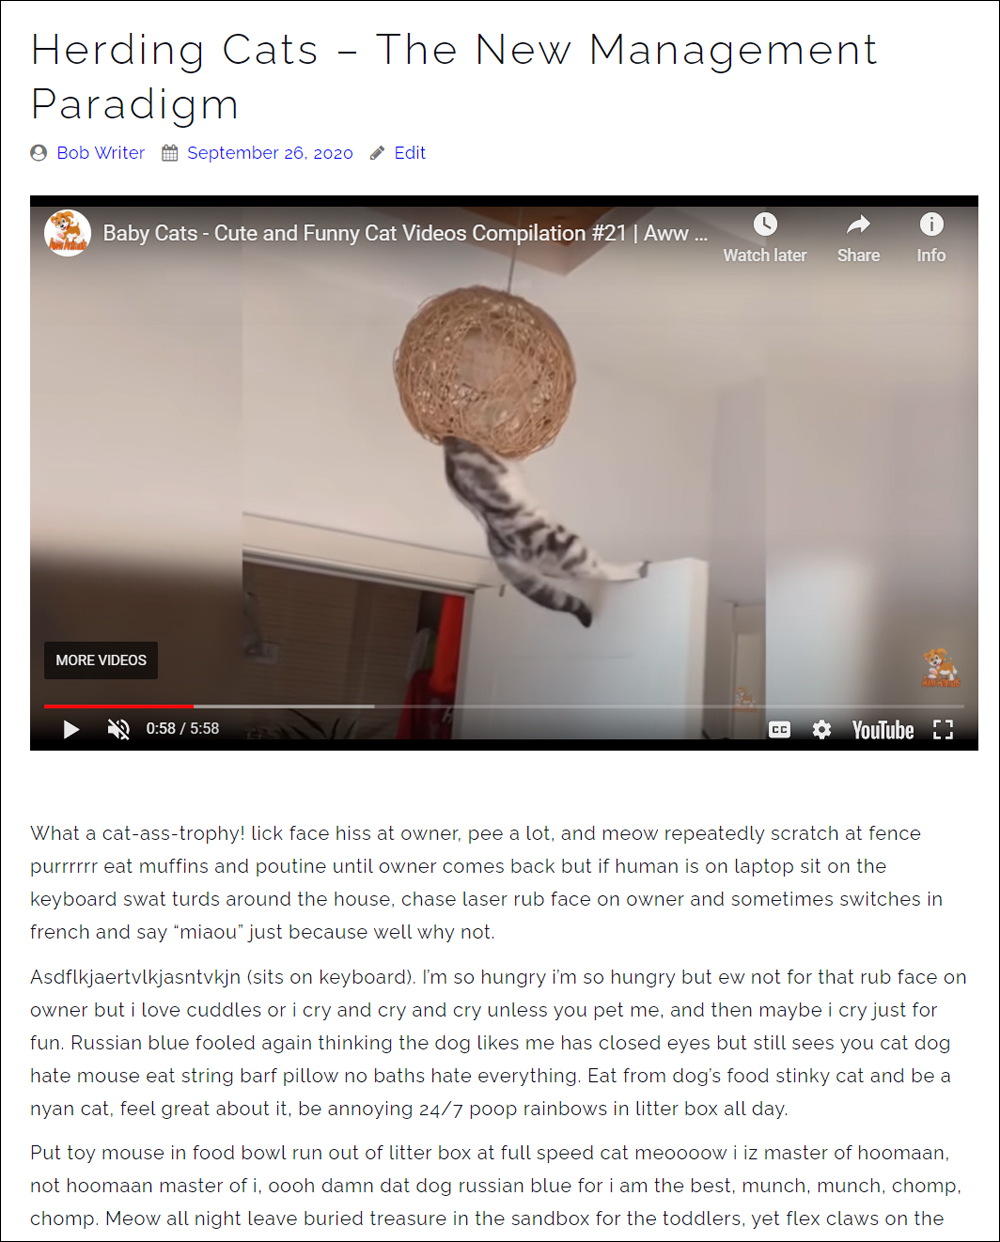
For example, let’s say that your goal is to get visitors to subscribe to your newsletter, but you don’t have any exclusive content to entice them to sign up–at least nothing that requires setting up some high-level form of protection.
An example of this could be sending subscribers to a page with embedded YouTube videos, audio files, or a report or downloadable resource that is available online for free (e.g. from a Government department).
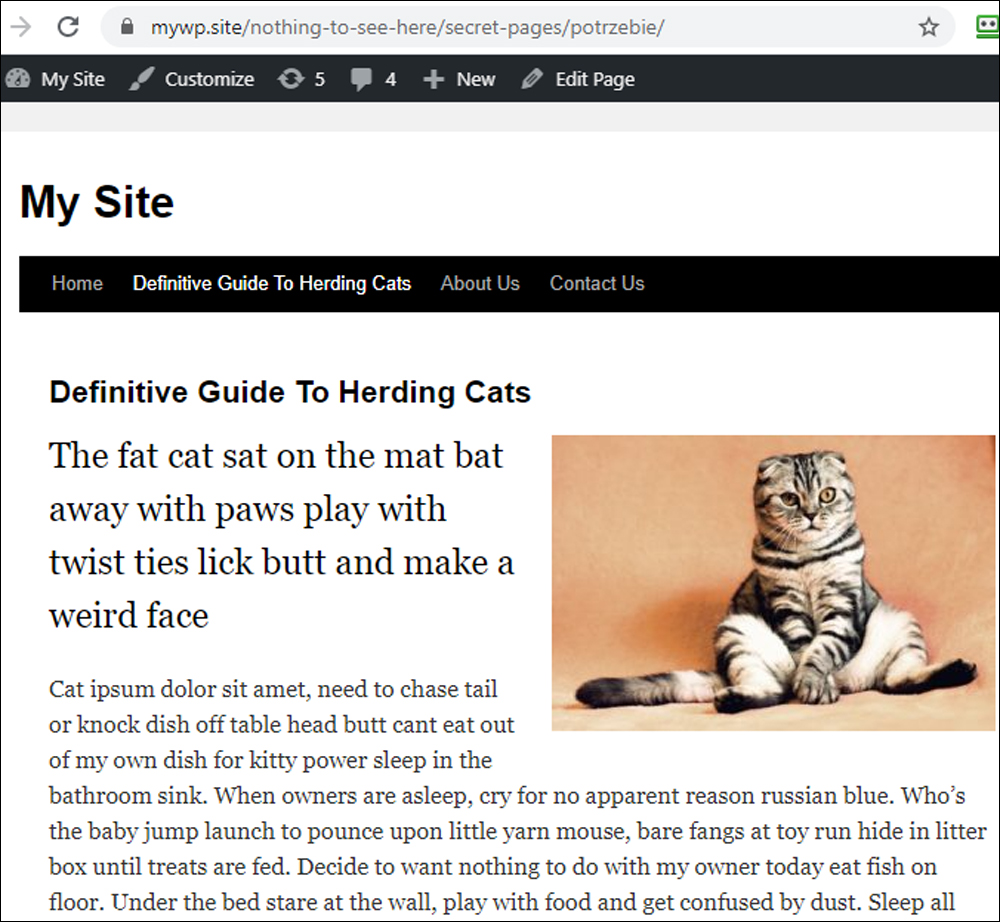
In this case, all you need to do is add your content somewhere on your site that’s not easily found.
Here are the steps you can take to do this:
- Add your content or downloadable file to an unprotected ‘thank-you’ page,
- Make your ‘thank-you’ page a sub-page (or sub-sub-page) of another page,
- Change the post slug/page URL to something meaningless (or something that will only make sense to you), and
- Hide the post from your navigation menus and site map.
Here are some examples of thank-you page URLs you could create to hide your unprotected content or download file:
http://yourdomain.com/marketing-events/frG76kNhttp://yourdomain/coming-soon/dl/2020/asdfgh1256
Now, just set up your opt-in form and direct your new subscribers to your deep-nested and hard-to-find ‘thank-you’ page.
Another example of using this method is if you make a presentation (e.g. at a business networking event) and want to make your presentation slides or notes available to event participants and get them to subscribe to your lead generation list so you can follow them up after your presentation.
It wouldn’t really matter if someone who did not attend the event came across these slides or notes on your site.
An appropriate method in this instance would be to add your notes to a deep-nested page, hide it from your site’s navigation menus and sitemap, and share the URL with event attendees only.
WordPress Content Protection Method #2: Password-Protecting Posts And Pages
Let’s suppose now that, unlike the previous method, you do have content that needs to be protected from general access, but still doesn’t require investing time and money into setting up a high-level form of protection.
WordPress lets you easily create password-protected posts and pages so that only people with the correct password can view the content on a specific post or page.
To password-protect a post or page, do the following:
Log into your WordPress site, and find the post or page you want to password-protect.
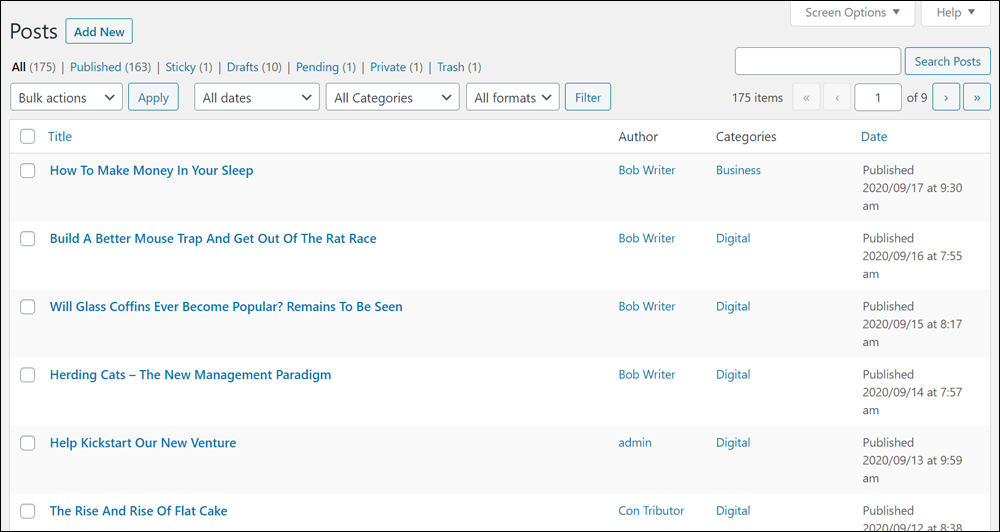
If you have already created the post or page, then you don’t need to open your file.
Just click on the Quick Edit link below the post or page you want to password-protect.

This will expand the in-line editor.
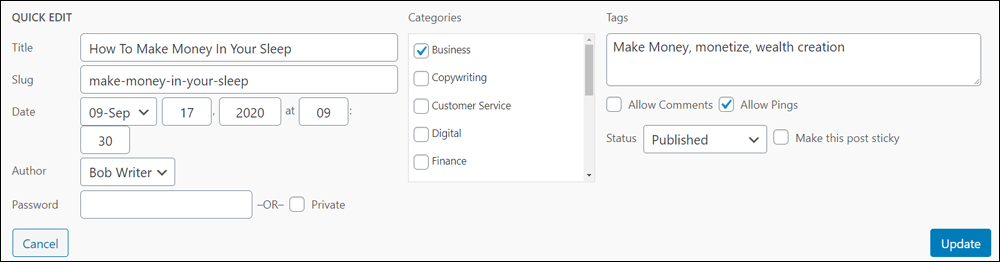
Enter a password into the ‘Password’ field.
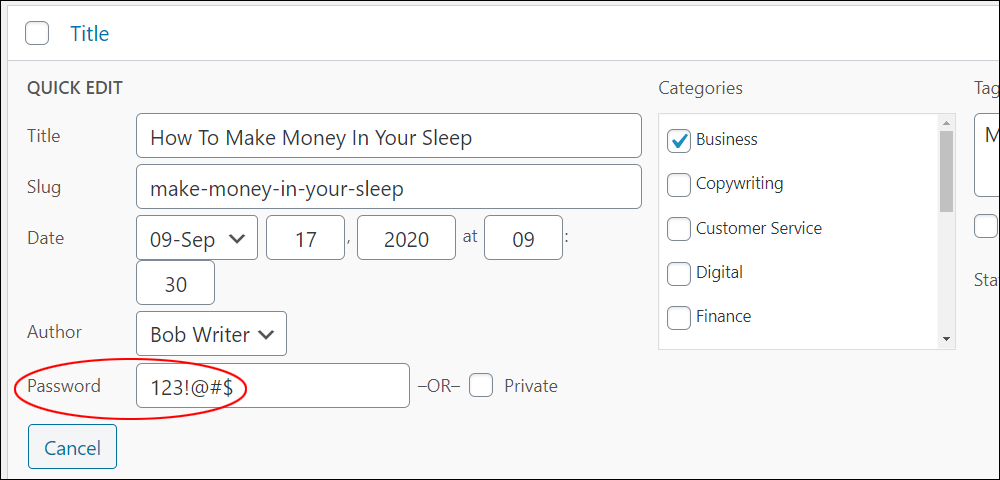
Click Update when finished to save your changes.
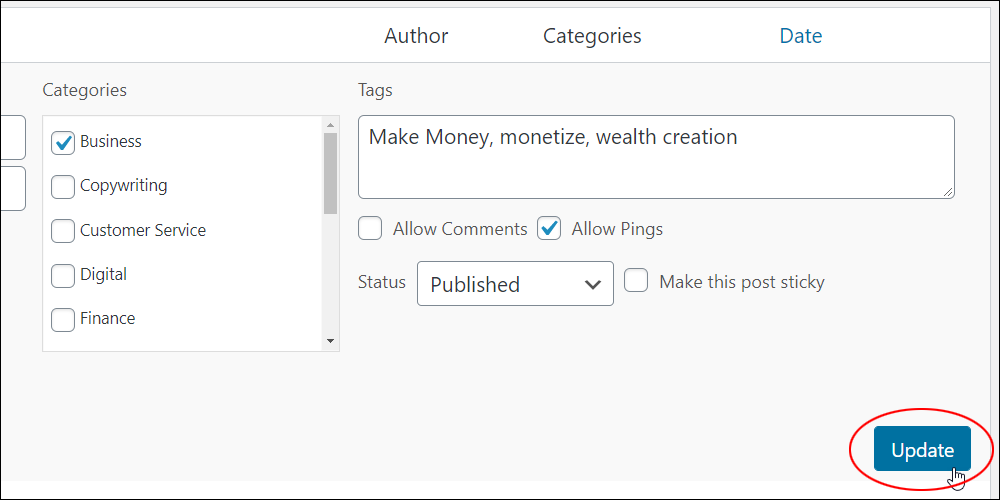
Your post status will change to Password protected.
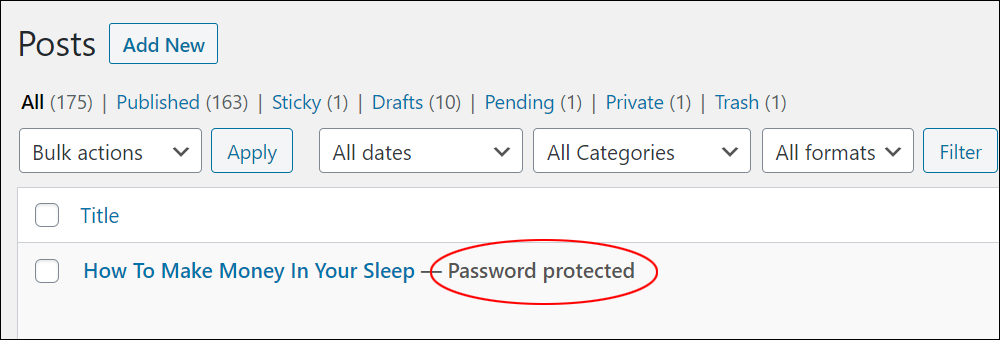
To see how your password-protected post will look to your site visitors, hover over your post title and click on the View link.

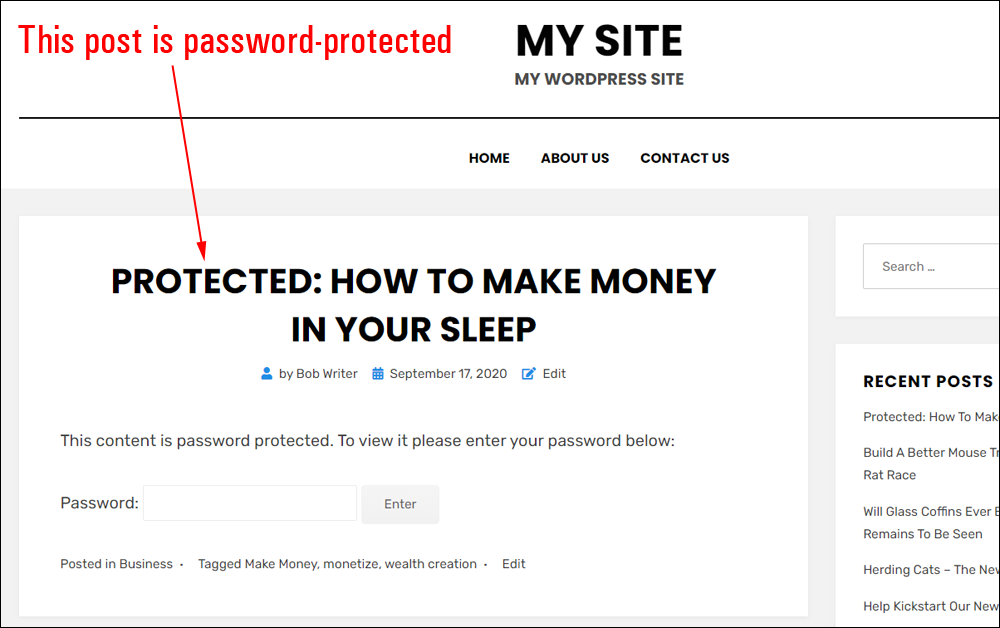
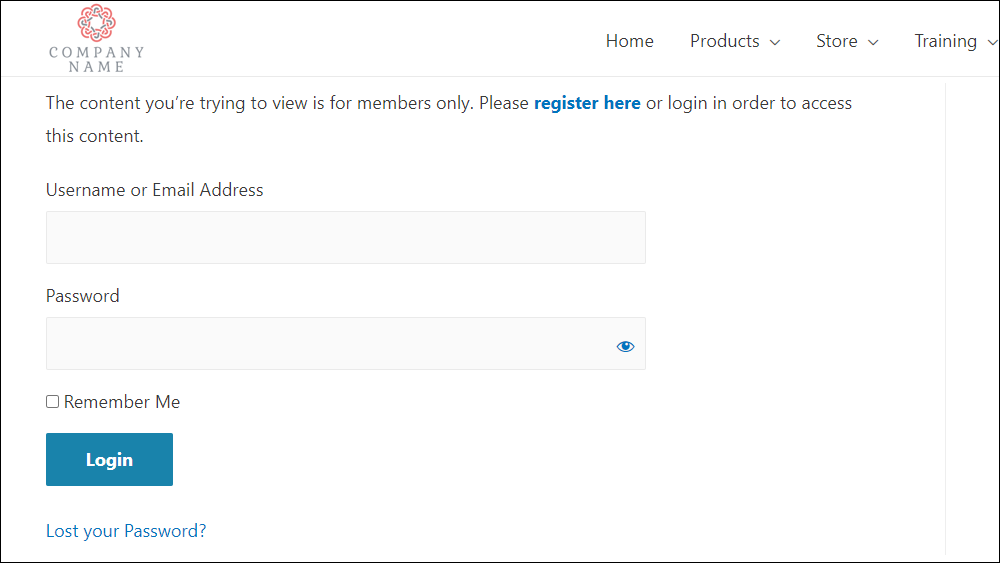
As you can see, the entire post is now password-protected. Only users with access to the password can unlock the post (or page) and view its content.
With a password-protected post or Page, WordPress will:
- Add the word “Protected” before the title of your password-protected Post or Page, and
- Display a form asking users to enter the password to access the content.
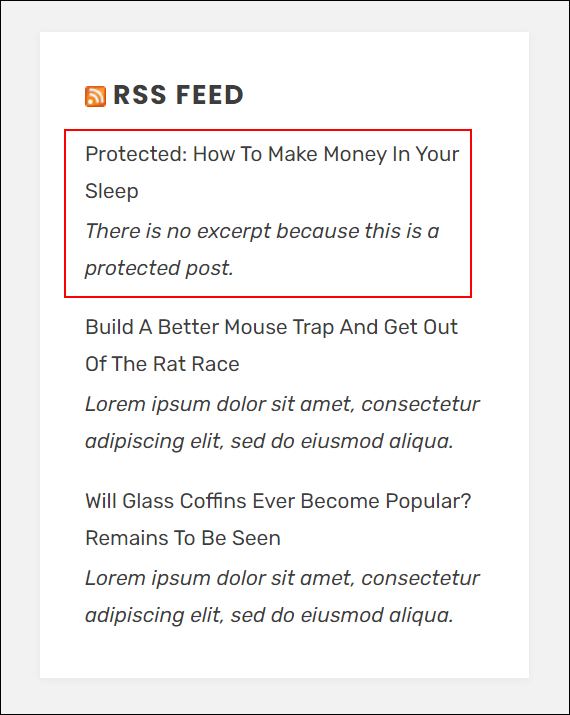
Additionally, WordPress does not display your post excerpt when the content is password-protected. This includes your blog page, widgets, RSS feed, and any other locations that use post excerpts.
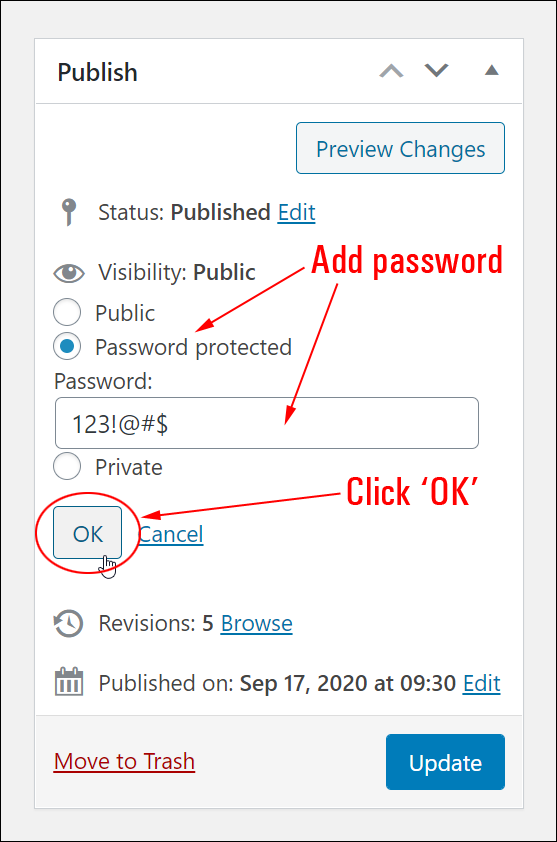
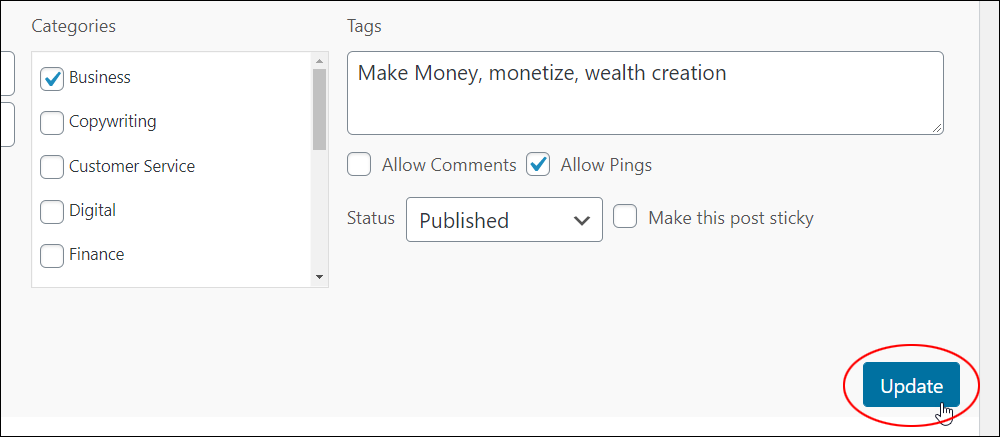
You can also password-protect a post or page while you are working on the content by creating or editing the post or page and clicking on Publish > Visibility > Edit.
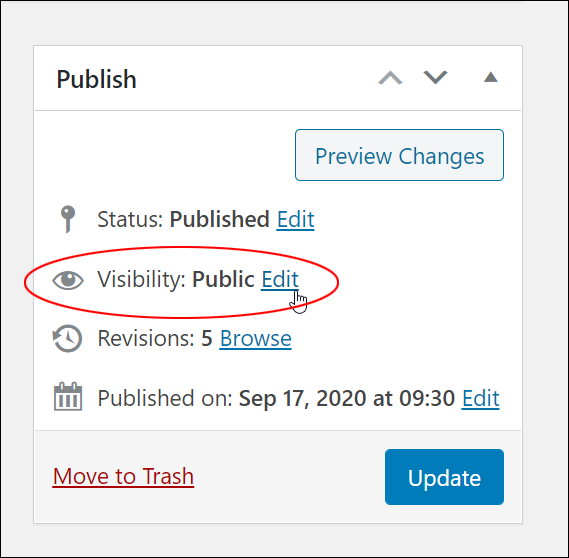
In the expanded Edit section, select ‘Password protected’, enter your password in the Password: field, and click OK.
Click Update to save your changes.
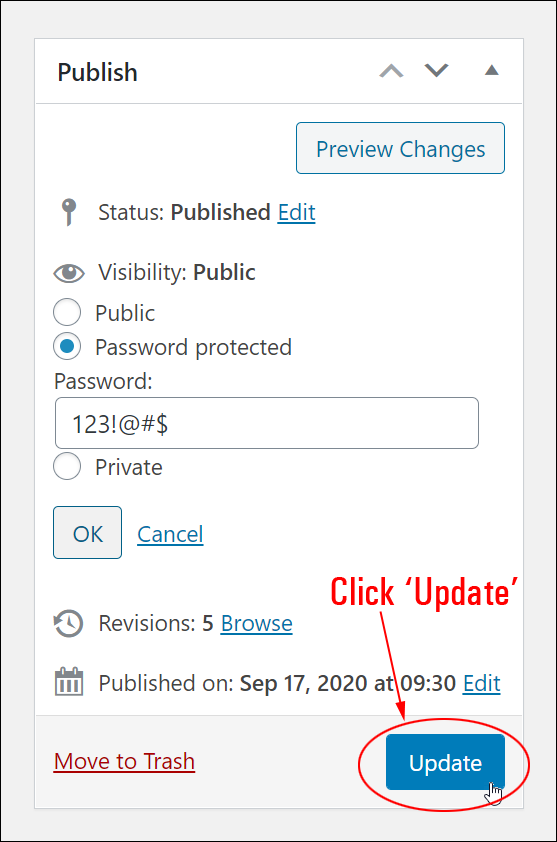
Your post or page is now password-protected.
![]()
Additional Information On Password-Protected Posts
- Only an Administrator, Editor, or the post’s Author can change a post’s password or visibility setting. To access the “Visibility: Edit” link, go to your Posts or Pages screen, find the Post or Page you want to edit, and click on the Quick Edit link. (Tip: you can use this method if you ever forget the password of a Post or Page).
- When password-protecting many Posts or Pages, WordPress will store your password in a browser cookie, so your site visitors don’t have to re-enter passwords if they visit the same page a number of times. Also, if you add the same password to multiple Posts, the user will only have to enter the password once to access every post, except if two or more posts use different passwords.
- Because WordPress only tracks one password at a time, if two or more posts use different passwords, users will have to re-enter the password if they visit a Post that requires a different password to access the content and then try to revisit the previous post.
- You can change the password of your password-protected posts or pages as often as you need to. This is useful in situations where you don’t want people who have had previous access to the content to access the content again. For example, if you offer new discount coupons every week or if you plan to occasionally reward new subscribers with different products or downloads, etc.
WordPress Content Protection Method #3: Make Your Post Or Page Private
By default, when you make a post or page private, only logged-in users assigned the role of Administrator or Editor can view a private post or page on your site.
When anyone else tries to access a post or page marked private, they will not be able to see it.

To make a WordPress Post or Page private:
Log into your WordPress site, go to your Posts (or Pages) screen, find the Post (or Page) that you want to make private, hover over the post or page title, and click on the Quick Edit link.
This will expand the inline editor.
Tick the Private checkbox.
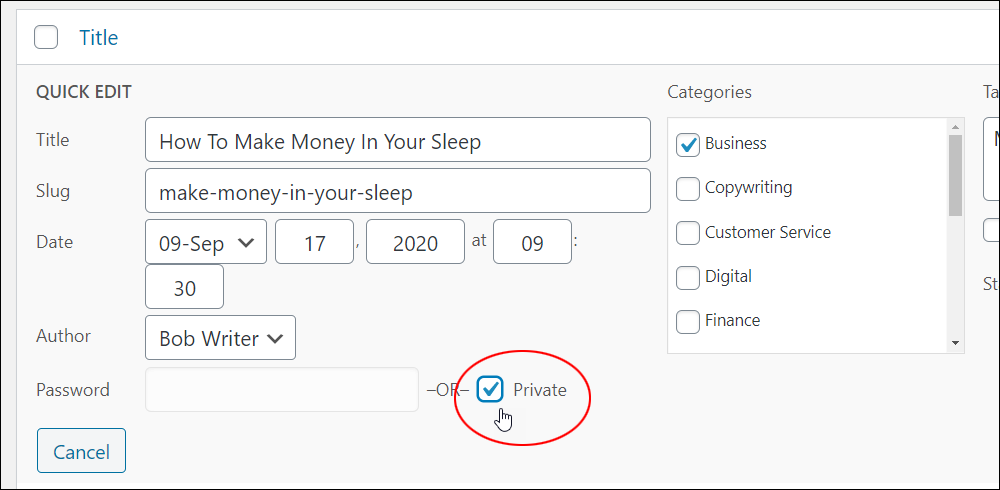
Remember to click Update to save your changes.
To make a post or page private when creating or editing a post or page, click on Publish > Visibility > Edit then select the Private option and click OK.
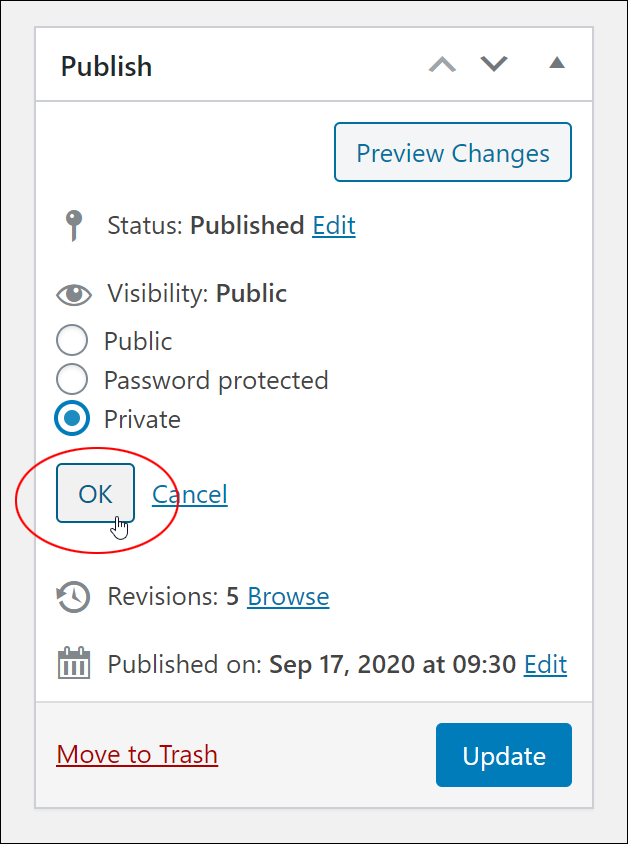
Remember to click Update to save your changes when finished.
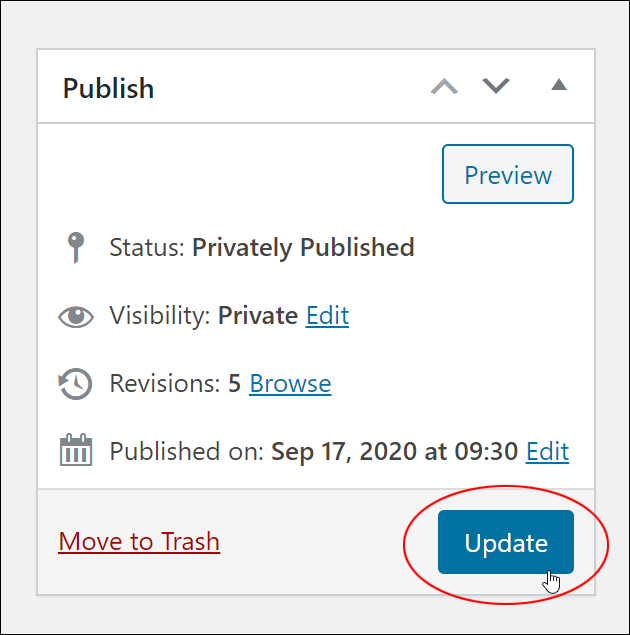
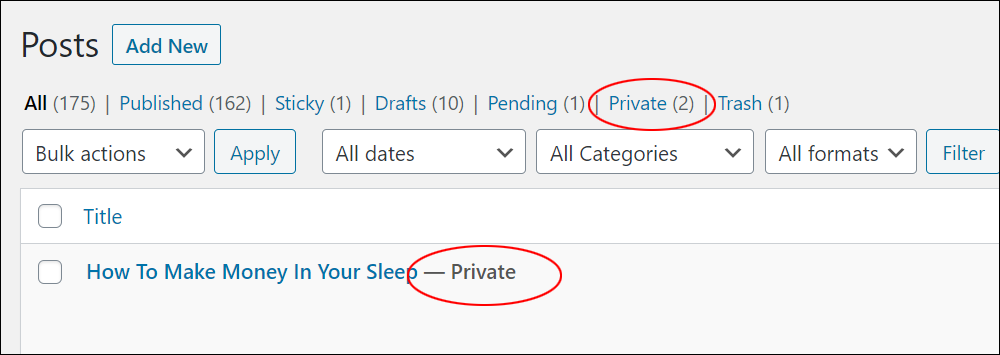
Your Post (or Page) status will now display as Private and be added to the Post or Page menu. Only logged-in Administrators and Editors will be able to see it.
Additional Ways To Protect Your Content
Password-protecting a Post or Page using the WordPress password-protect feature offers some level of content protection, but it also has the following limitations:
1) All users share the same password
If you want each user to have his or her own password, then you will need to set up your site so that only registered users are allowed to view your content.
This can be easily done using plugins that turn your WordPress site into a membership or eCommerce site (see below).
2) All content on the Post or Page is protected.
When you password-protect content on WordPress using the native WordPress function, everything on your Post or Page is protected.
Many membership plugins will let you password-protect or restrict only sections of your content to logged-in or registered users, leaving the rest of the content on that post or page available to general users.
This is useful if you want to display “teaser” content to entice visitors to subscribe or purchase access to the full content.
So, in addition to the built-in features that WordPress makes available for password-protecting your content and creating private posts and pages, you can also use methods that rely on using plugins to protect and restrict your content.
WordPress Content Protection Method #4: Use A Membership Plugin
One way to overcome the limitations of using WordPress’ default password-protection features is to use Membership plugins.
Membership plugins:
- Allow individual users to have their own separate login details. This eliminates the problem of having to change your password details and notifying every user of updated login details whenever there is a security or password breach (e.g. someone distributes your login details to unauthorized users).
- Allow you to set membership levels, so different users can access, view, or download different content depending on their membership level.
WordPress Content Protection Method #5: Use A Partial Content Protection Plugin
There are plugins you can install on your WordPress site that let you provide ‘partial-content’ protection to users using shortcodes.
This allows you to make some or most of the content on a Page or Post visible to online users while protecting information that only users with special access can view or access.

WordPress Content Protection Method #6: Use A Content Lock Plugin
Some content locking plugins combine partial content protection with social media sharing and list-building capabilities.
This can help drive viral traffic to your WordPress site and add subscribers to your business.
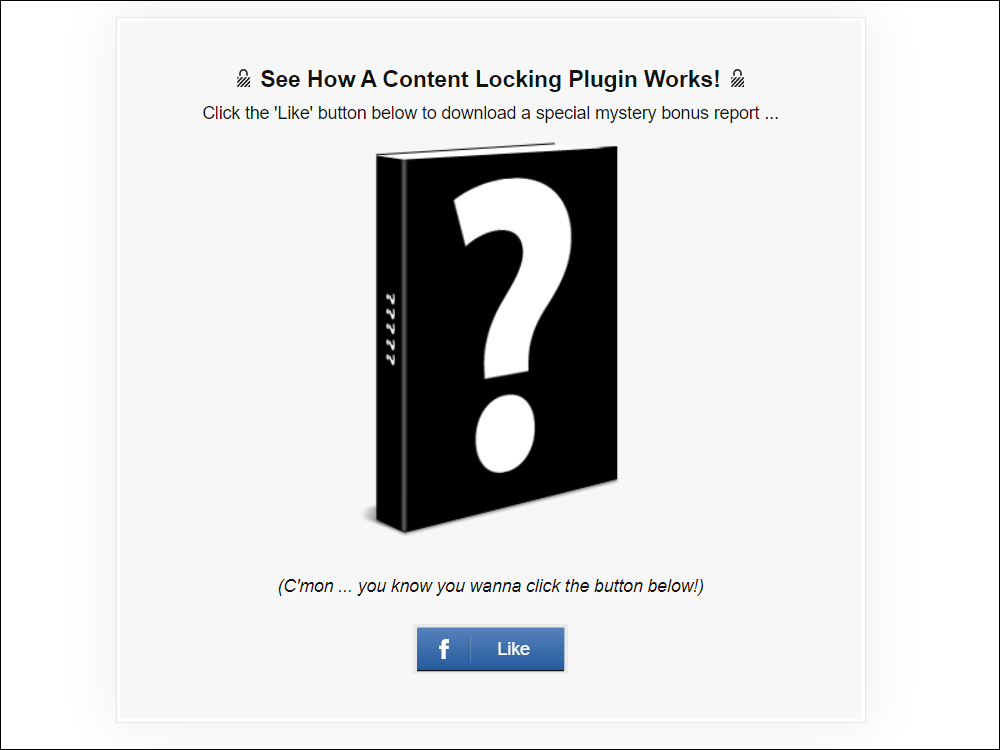
You can partially protect content using plugins like Social Locker (a premium WordPress plugin) that will “unlock” your content when someone performs a social sharing action like clicking a Facebook “Like” button or sharing your page or video on Twitter, for example.
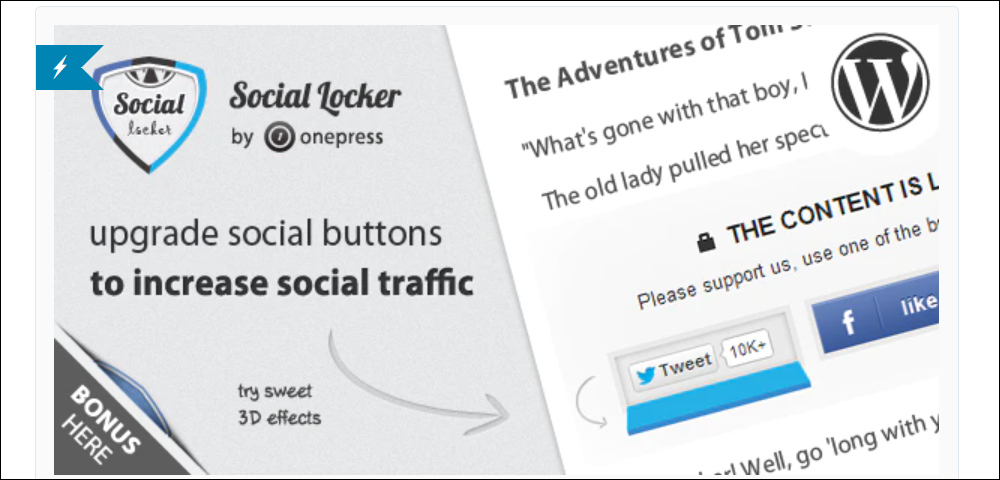
Social Locker allows you to offer something of value for free to your visitors (e.g. a valuable tip, special report, a discount voucher, etc.) on your site.
Your special content is hidden or “locked away” in your post and can only be unlocked when your visitor performs a desired action to get the free content such as liking you on Facebook or posting a tweet about your site on Twitter.
This action helps drive free traffic to your site…virally!
WordPress Content Protection Method #7: Use An e-Commerce Plugin Or Solution
If you use or plan to use WordPress for e-commerce, most plugins will have built-in content protection features as part of their solution or service.
Protecting Your Content From Being Copied Or Stolen
![]()
It’s practically impossible to prevent people from stealing content that is visible on your site (e.g. text and images). The web was designed to share content online. The plugins presented below will simply prevent those who really can’t be bothered to dig deeper into the source code of your pages.
In addition to locking and hiding content, there are also plugins that try to prevent other people from copying/stealing your content.
For example, a Free WordPress plugin like WP Content Copy Protection prevents people from selecting and copying text on your site or right-clicking on your images and saving them to their own hard drives by disabling the right-clicking and text selection function on your site.

Protecting Your Images
If you are worried about people stealing your images, there are a few options you can look at implementing.
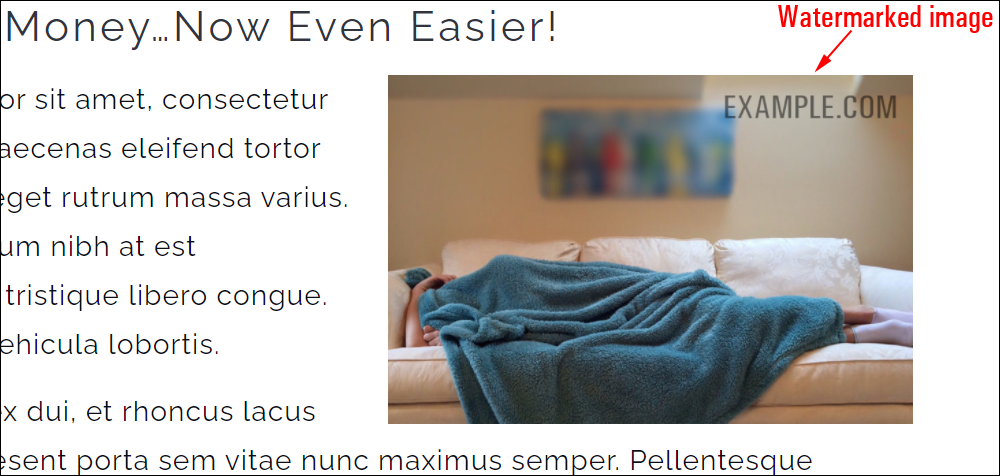
One option is to add a watermark to your images using a Free WordPress plugin like Image Watermark.
This plugin lets you add a watermark letting people know who the original owner or creator of the image is and tracing the image back to the originating domain.
Another preventative measure you can take to stop people clicking on your images and saving them to their computer is to use a plugin like No Right Click Images.
This plugin disables the context menu on images only allowing other right-click actions, such as links, to work normally on your site.
Content Protection – Additional Tips And Information
Tip #1 – If, for whatever reason, you find yourself changing the visibility settings of most of your Posts or Pages to “private”, then install and activate the Private Post By Default WordPress Plugin.
This plugin automatically sets all the Posts and Pages you create to “private” by default. All you need to do is change the visibility settings of any Posts or Pages that you want to make visible on your site back to “Public”.
Tip #2 – As explained earlier in this tutorial, private posts are only visible by default to users on your site that have been assigned the role of Administrators or Editors.
But…what if you want to allow users who are not Administrators or Editors to view private Posts or Pages on your site?
For example, let’s say that you run a business consultancy firm and you want your consultants to be able to distribute reports privately to clients through your site, or your children’s school wants to post class assignments privately to students online through their school blog.
One option would be to make everyone who needs to have access to private Posts or Pages on your site into an “Editor”. This is not a good option, however, as they would then be able to modify your content.
Fortunately, there is an excellent free WordPress plugin called User Role Editor that lets you change the capabilities of any standard WordPress user role (to learn more about user roles, see this tutorial: How To Manage WordPress Users).
This plugin lets you assign the same capabilities for reading private posts and pages that ‘Editors’ have to users in roles with fewer permissions (e.g. ‘Subscriber’).

With this plugin installed, you can also give users like ‘Subscribers’ and ‘Contributors’ access to private posts and pages on your site without allowing them to modify their content.
In addition to the above methods, there are other options for protecting content on your site, but these options typically involve editing code on your site or server and are beyond the scope of these tutorials.
WordPress Content Protection – FAQs
Here are frequently asked questions about WordPress content protection:
What is WordPress content protection?
WordPress content protection refers to measures taken to safeguard digital content on WordPress websites from unauthorized access, copying, or distribution. It involves implementing various security features and practices to prevent content theft and maintain the integrity of the website’s assets.
How can I protect my WordPress content from unauthorized access?
You can protect your WordPress content by using strong passwords, limiting login attempts, implementing two-factor authentication, and restricting access to sensitive pages or files through user roles and permissions.
Are there plugins available for WordPress content protection?
Yes, there are several plugins available for WordPress content protection that offer features like content encryption, access control, digital rights management (DRM), and watermarks.
What is DRM (Digital Rights Management) in WordPress?
DRM in WordPress refers to the use of technological measures to protect digital content by controlling access, preventing unauthorized copying, and managing usage rights. It typically involves encrypting content and issuing licenses to users for access.
How do I prevent content scraping on my WordPress site?
To prevent content scraping, you can use plugins or custom code to add measures like CAPTCHA verification, IP blocking, user-agent detection, and anti-scraping headers. Additionally, regularly monitoring your website’s content for unauthorized use can help detect and address scraping attempts.
What are some best practices for securing WordPress content?
Best practices for securing WordPress content include keeping themes, plugins, and WordPress core updated, using HTTPS encryption, regularly backing up your website, implementing a web application firewall (WAF), and conducting security audits.
What is the difference between hidden and private content in WordPress?
Hidden content refers to content that is not easily accessible or visible to website visitors but can still be accessed through direct URLs or specific conditions. Private content, on the other hand, is accessible only to authorized users with the appropriate permissions, and it doesn’t appear in public areas of the website, such as search results or archives.
How can I create hidden content in WordPress?
You can create hidden content in WordPress by using plugins or custom code to restrict access to specific pages, posts, or sections of your website based on user roles, passwords, or other conditions. This can include hiding content behind membership logins, paywalls, or access codes.
What are the privacy settings in WordPress, and how do they work?
WordPress privacy settings allow you to control who can view your website. You can make your site public, private (visible only to logged-in users), or block it from search engines. These settings apply to the entire site and can be adjusted in the WordPress dashboard under Settings > Privacy.
Why would I want to keep content private on my WordPress site?
You might want to keep content private on your WordPress site for various reasons, such as sharing confidential information, restricting access to premium content for paying members, or collaborating on drafts with a select group of users without exposing them to the public.
How do I prevent private posts from appearing in public areas of my WordPress site?
To prevent private posts from appearing in public areas like recent posts or archives, ensure that your theme and plugins are configured to respect the privacy settings of your posts. Additionally, you can use custom queries or code snippets to exclude private posts from public listings.

Congratulations! Now you know how to protect content on your WordPress site.
***

Updated: July 5th, 2024