
How To Manage WordPress User Data Requests
 In this tutorial, you will learn about managing WordPress user data requests.
Refer to the following tutorials if you need help with this section:
***
GDPR (General Data Protection Regulation) requires all businesses to protect the personal data and privacy of EU citizens for transactions that occur within EU member states. Non-compliance with these regulations could cost companies dearly.
Under GDPR rules, your site needs to make sure that your website users can:
- Request access to their personal data (name, email address, comments, or any other data submitted to your website).
- Download and view their personal data (as per Article 15 of GDPR).
- Request that their personal data be removed from your site (as per Article 18 of GDPR).
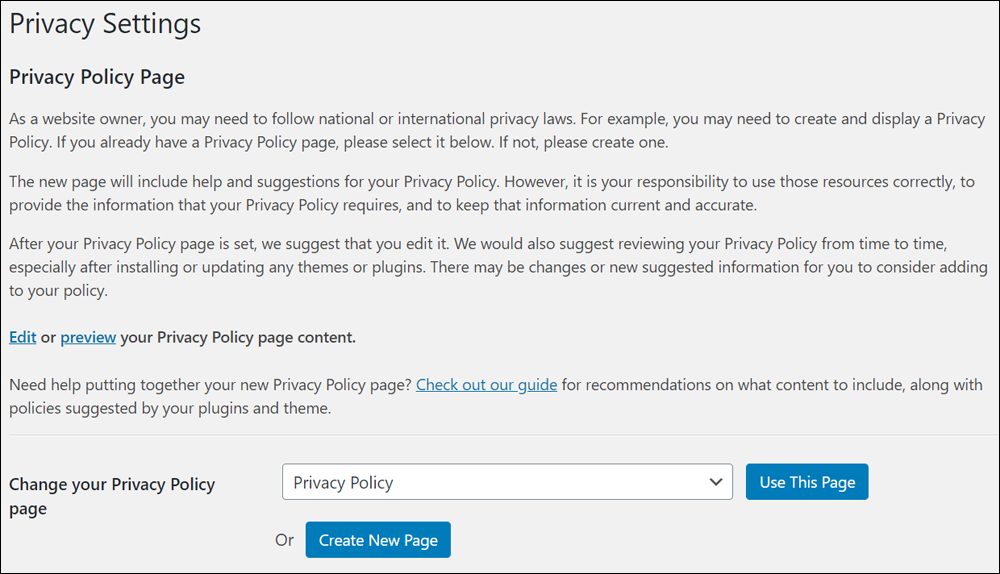
Policies on how your site handles users’ data should be clearly stated on your site’s Privacy Policy page (Access your Privacy Settings by going to Dashboard Menu > Settings > Privacy).
To ensure that your site complies with these GDPR guidelines, WordPress provides tools that let you manage user requests to export and/or delete their personal data from your website.
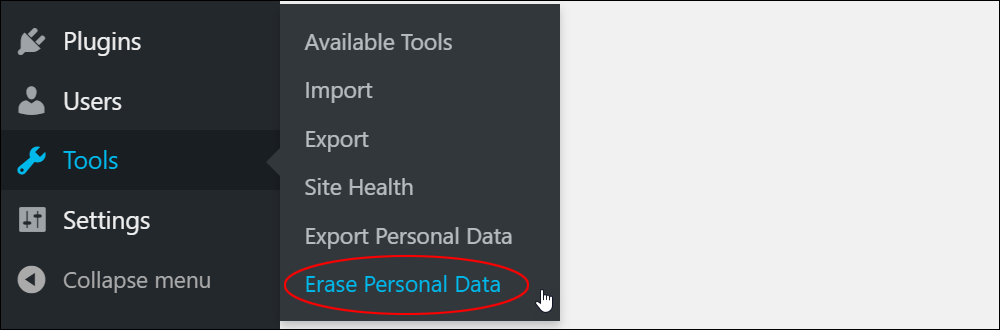
You can access these tools by going to the WordPress Tools Menu and selecting one of the following:
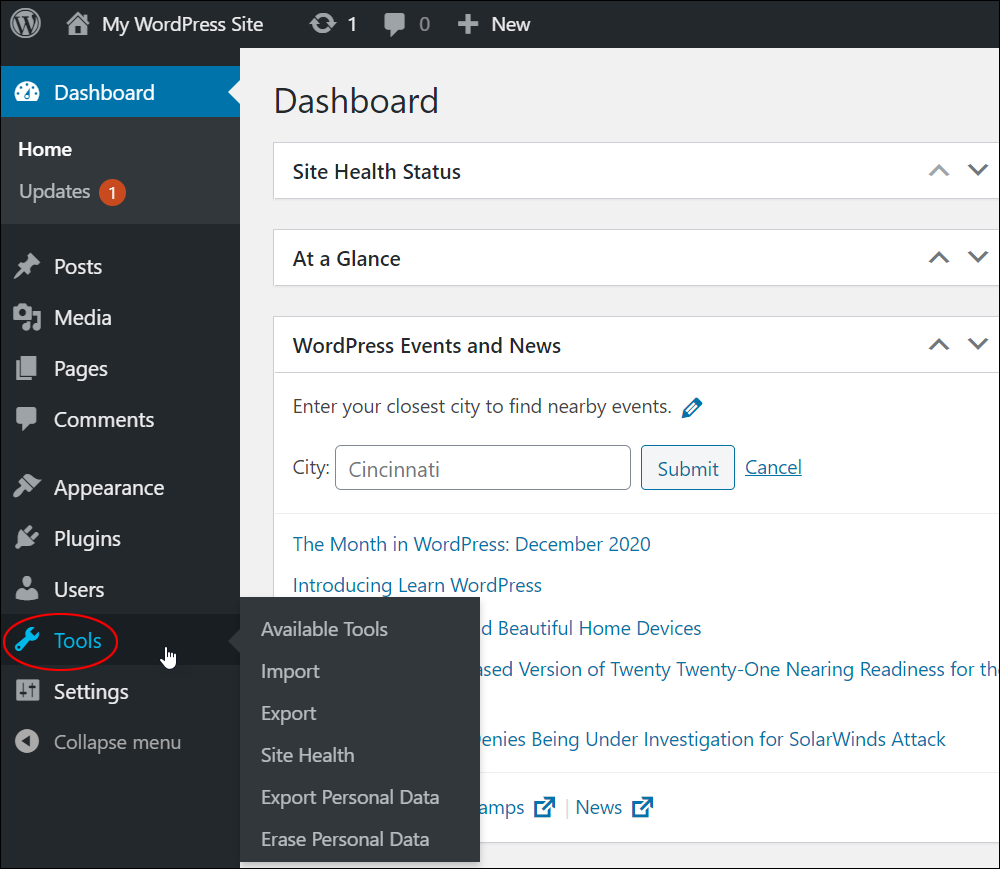
Let’s go through these tools.
Export Personal Data
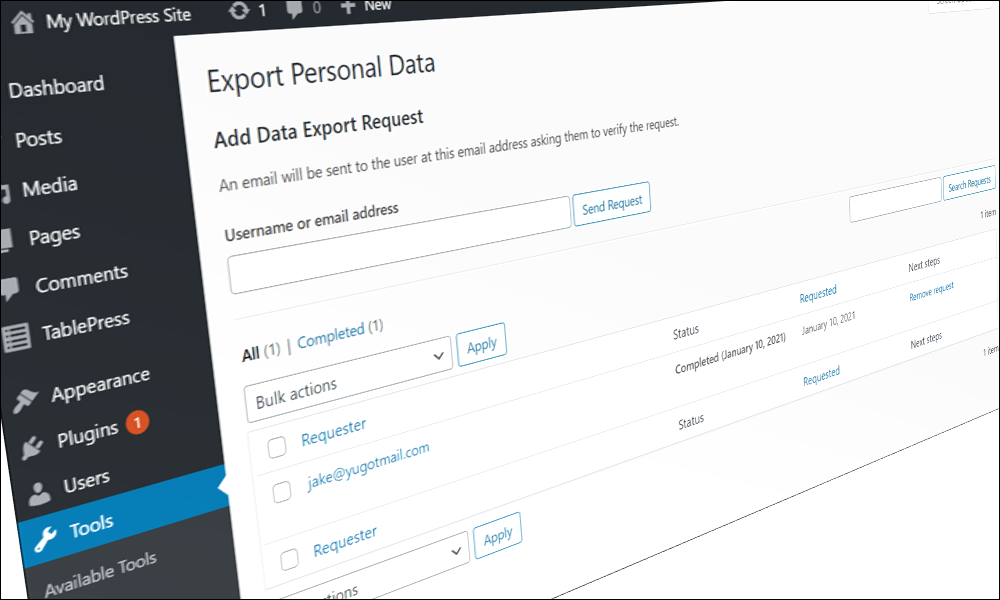
To access this tool, go to Tools > Export Personal Data.
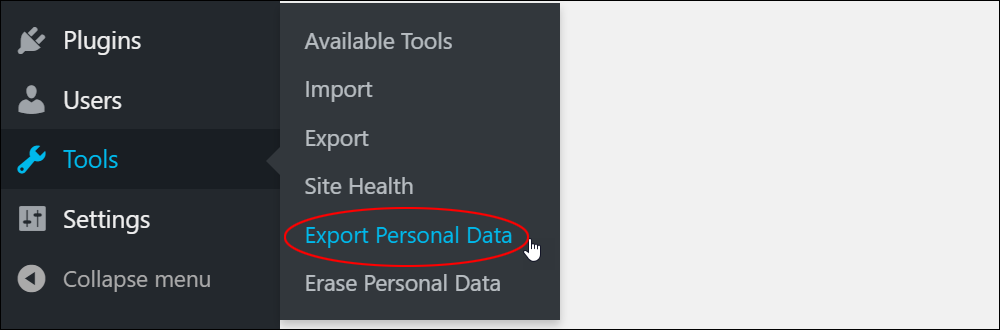
This brings you to the Export Personal Data screen.
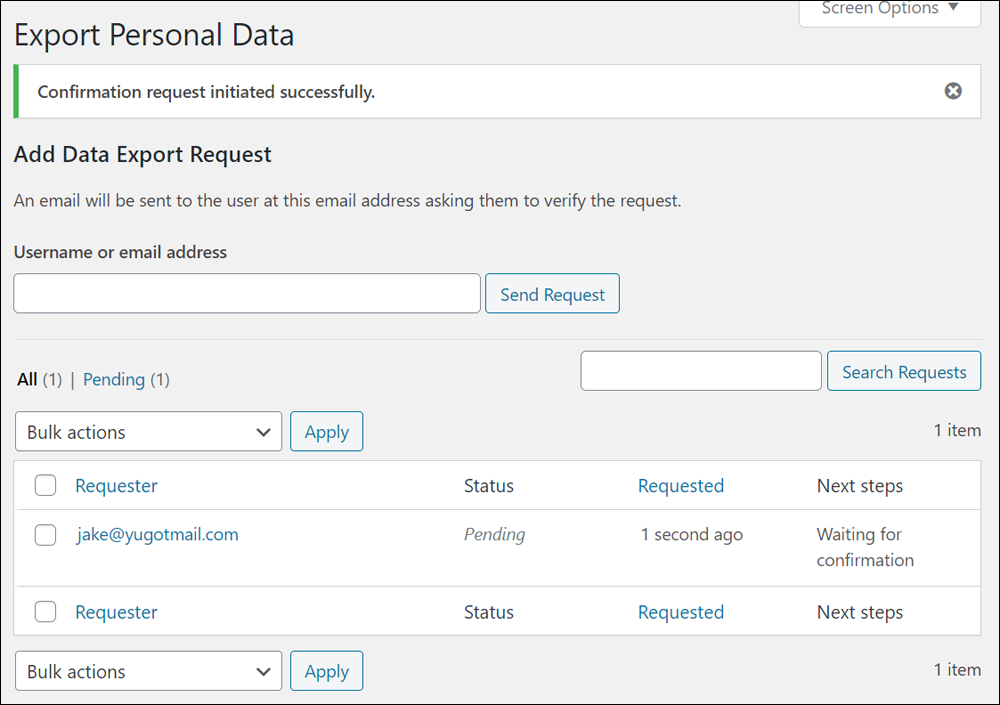
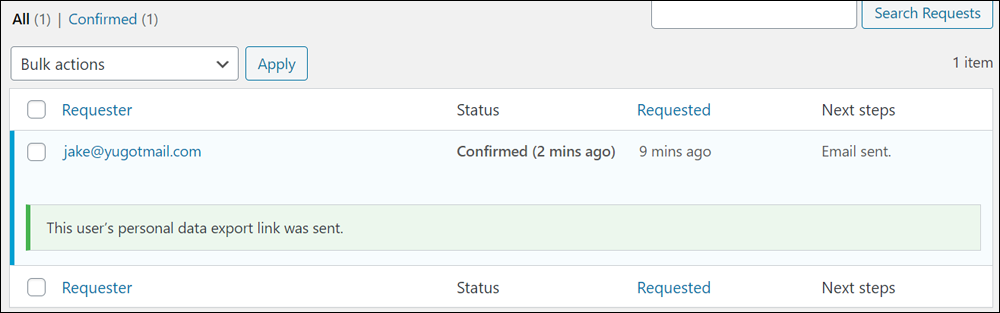
If a user requests access to their personal data, simply enter their details into the ‘Username or email address’ field in the Add Data Export Request section and click the Send Request button.

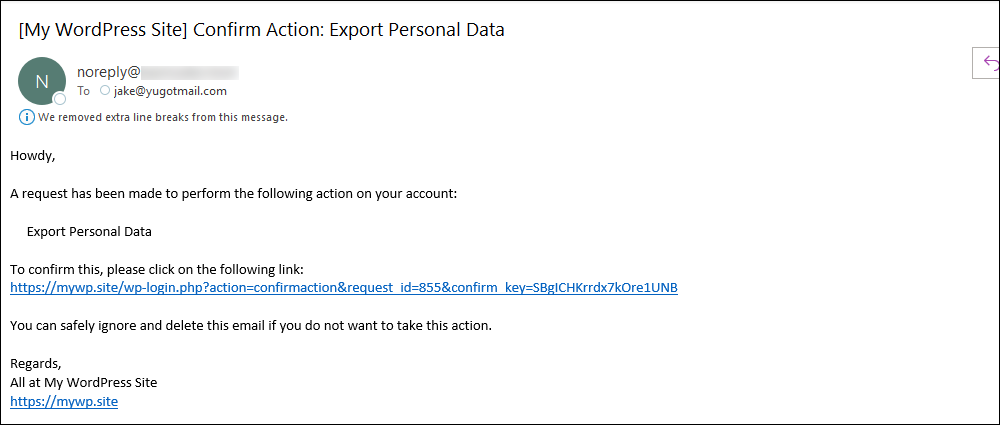
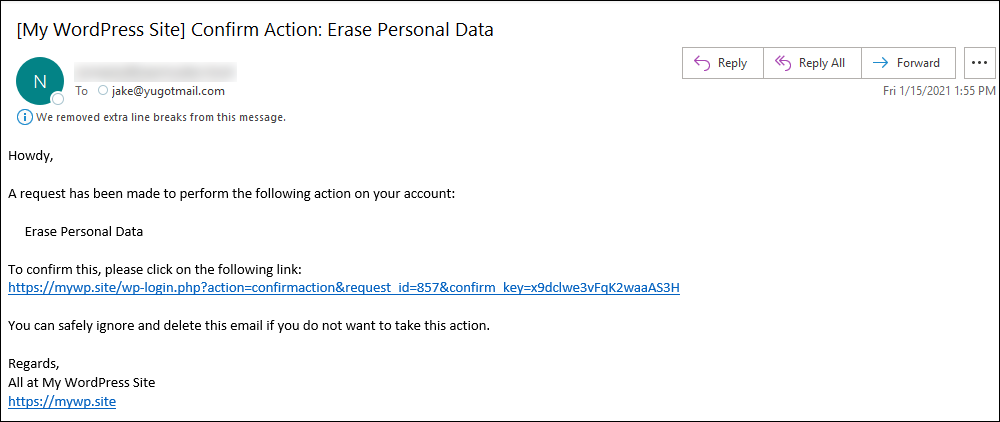
WordPress will send the user an email requesting them to verify and confirm their request.
The request will remain pending until the user has confirmed the email.
Here’s an example of the email WordPress automatically sends to users who request access to their personal data.
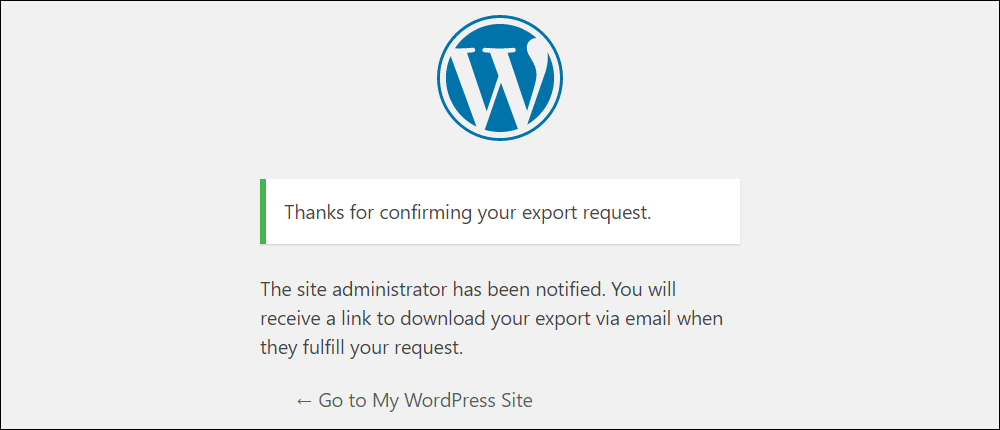
When the user clicks on the confirmation link, they will see an acknowledgment screen informing them that a link to download their exported data will be sent once the site administrator processes their request.
Once the user has confirmed, you (or your site administrator) will then be able to view these details and fulfil the user’s request.
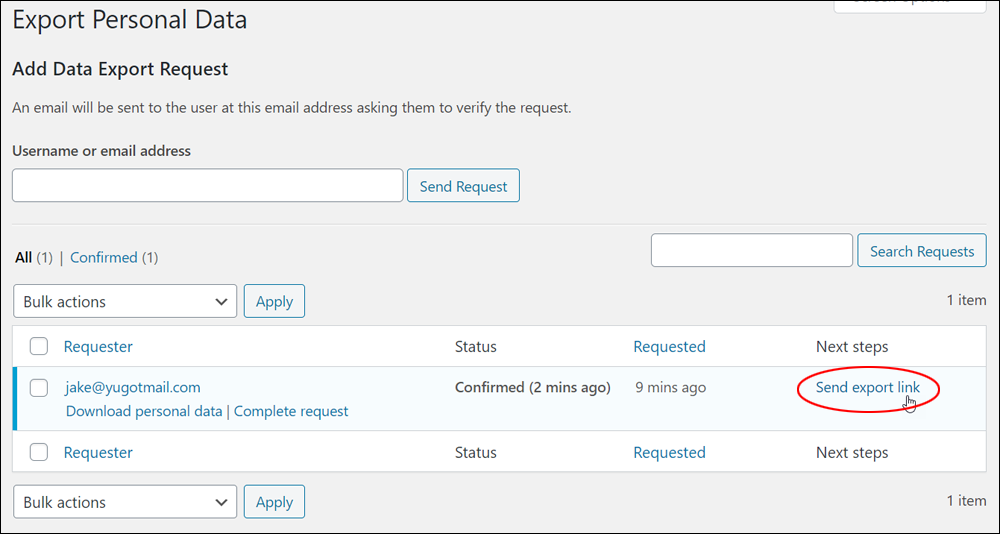
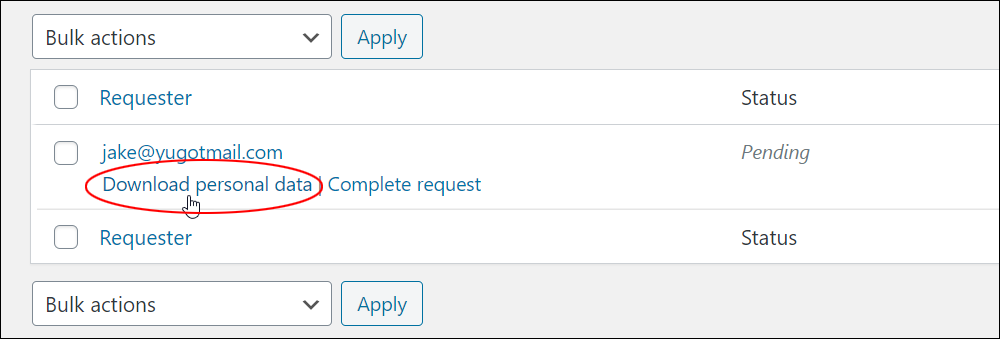
Note: You can also send out an export link without waiting for users to click on the confirmation email.
This is useful if, for example, a user contacts you to say they did not receive your email.
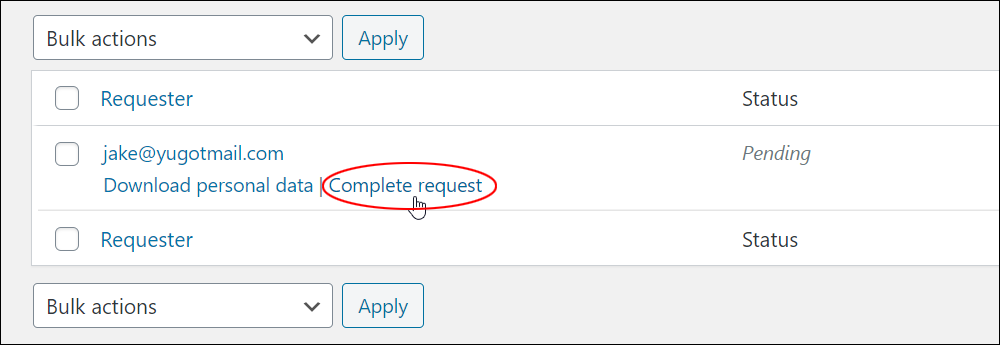
To do this, hover over the user’s name in the ‘Requester’ column and click on the Complete request link.
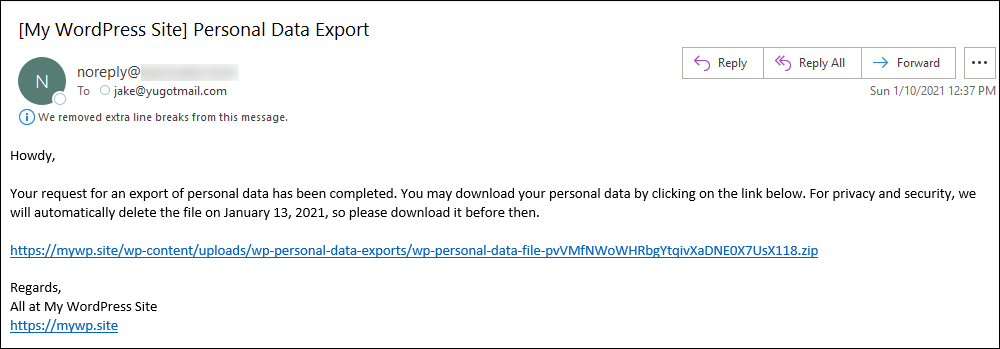
Either of the above methods will send the user an email with a link to download their personal data.
Here’s a sample of the email WordPress will send to the user, with a link to download their personal data export file and a message informing them that for privacy and security reasons, their file will be automatically deleted after a few days.
![]()
WordPress also gives you the option to:
- Download and save the user’s personal data.
- Perform bulk actions.
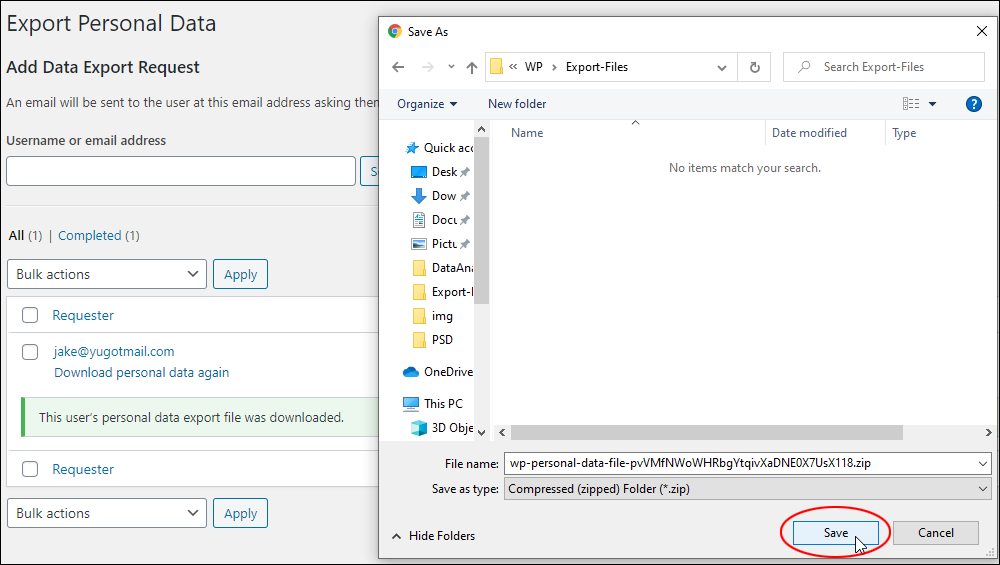
To download and save a user’s personal data:
Hover over the user’s name in the ‘Requester’ column and click on the Download personal data link.
Select a location to download the zip file and click the Save button.
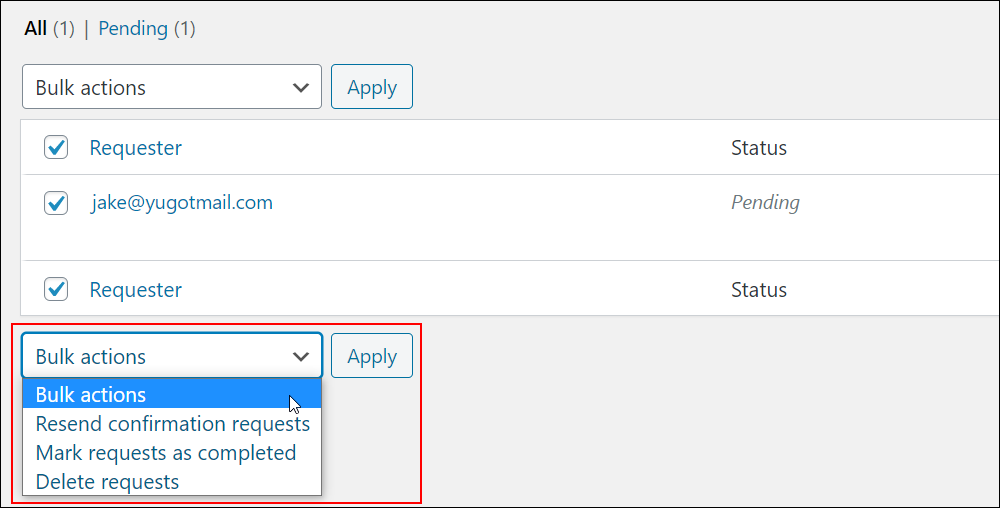
To perform bulk actions:
- Select the user’s name in the ‘Requester’ column.
- Select an option from the Bulk actions drop-down menu:
- Resend confirmation requests
- Mark requests as completed
- Delete requests
- Click the Apply button.
Additionally, keep in mind that there are several GDPR plugins that can help automate this process.
Erase Personal Data
GDPR compliance also requires that site owners comply with a user’s request to delete all personal data store on a site.
This is where the Erase Personal Data tool comes in handy.
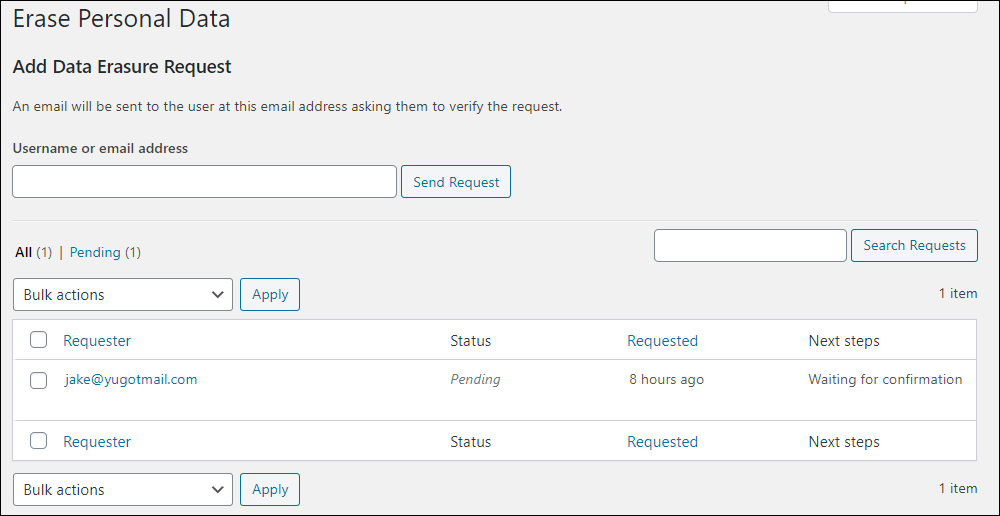
To access this tool, go to Tools > Erase Personal Data.
This brings you to the Erase Personal Data screen.
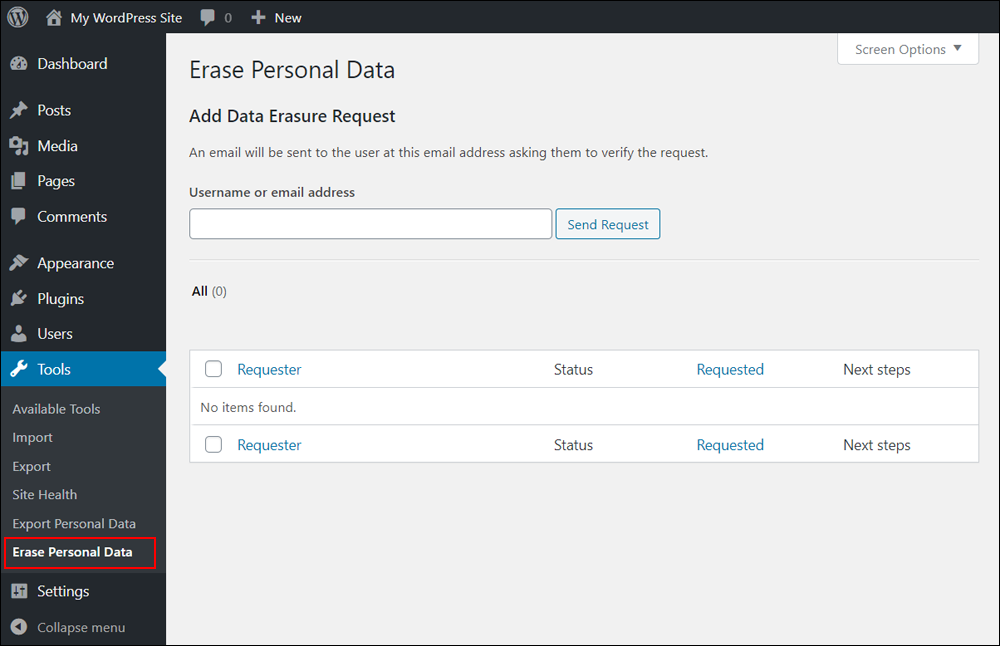
Erasing personal data is like exporting a user’s data.
When users request that their personal data be erased from your site:
Enter their username or email address in the field and click the Send Request button.
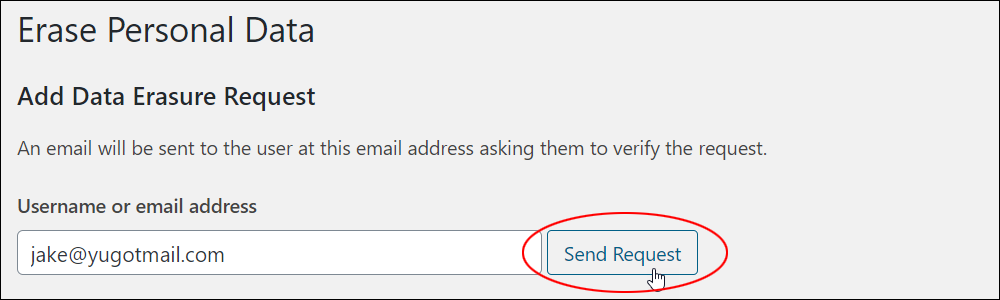
Users will be sent an email asking them to verify their request (you can also click on the Complete request link under their name if they haven’t confirmed).
Until users click on the confirmation link sent in the email, their request status is set to Pending.
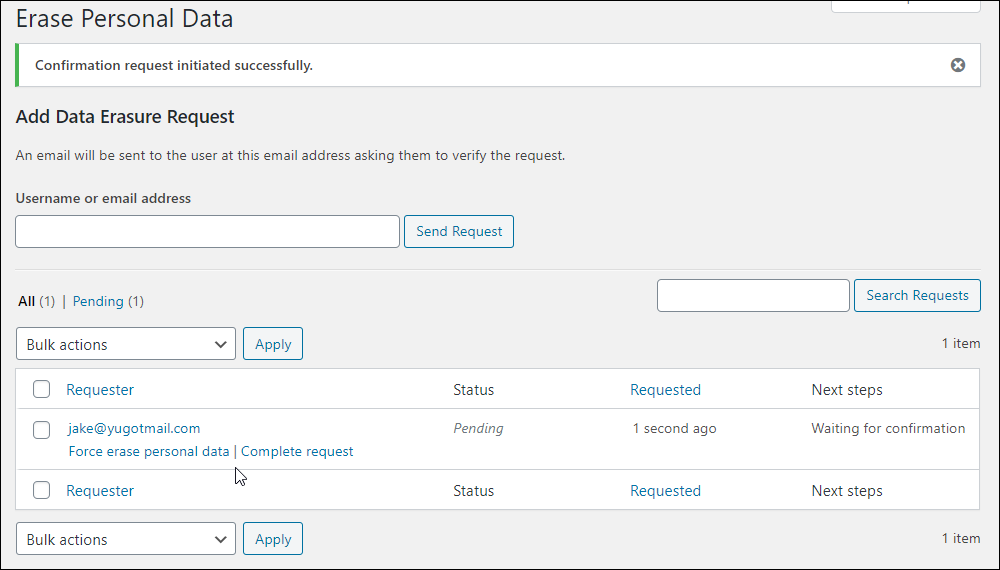
You can erase the user’s personal data:
- When users confirm their request by clicking on the email confirmation link, or
- By hovering over the user’s name and clicking on the Force erase personal data link.
WordPress User Data Requests – FAQs
Here are frequently asked questions about managing user data requests in WordPress:
What is GDPR compliance?
GDPR compliance refers to adhering to the General Data Protection Regulation (GDPR) guidelines set forth by the European Union to protect the privacy and personal data of individuals within the EU. WordPress sites must handle user data responsibly and transparently.
What is WordPress’s approach to GDPR compliance and user privacy?
WordPress is committed to GDPR compliance, providing tools and resources to help users understand and adhere to GDPR regulations, ensuring user privacy and data protection.
How can I make my WordPress site GDPR compliant?
To make your WordPress site GDPR compliant, implement privacy features such as cookie consent notices, data protection policies, and user data request mechanisms. Additionally, utilize GDPR compliance plugins and regularly update your privacy settings.
What are user data requests in WordPress?
User data requests in WordPress are requests made by individuals to access, modify, or delete their personal data stored on a WordPress site. These requests are typically made in accordance with privacy regulations like GDPR.
How can users make data requests on a WordPress site?
Users can typically make data requests through a designated email address or contact form provided by the website owner. WordPress plugins like GDPR Cookie Consent offer built-in tools to facilitate user data requests .
How can I handle user data requests in WordPress?
Handle user data requests in WordPress by providing users with mechanisms to submit data access, modification, or deletion requests. Utilize plugins or built-in WordPress features to streamline the process and ensure compliance with privacy regulations.
What plugins can I use to manage user data requests in WordPress?
WordPress offers various plugins like GDPR compliance plugins, data access request plugins, and privacy management plugins to assist in managing user data requests. Some popular options include GDPR Cookie Consent, WP GDPR Compliance, and Delete Me.
How does WordPress ensure user privacy?
WordPress ensures user privacy through features like data encryption, secure login mechanisms, and privacy settings for user accounts. Additionally, WordPress regularly updates its software to address security vulnerabilities and improve privacy protection.
What steps should WordPress site owners take when handling user data requests?
Site owners should have processes in place to promptly respond to user data requests, verifying the identity of the requester and fulfilling the request within the specified time frame dictated by privacy regulations like GDPR.
How can WordPress site owners export user data?
WordPress provides built-in tools to export user data, accessible from the admin dashboard under Tools > Export. This feature allows site owners to export personal data associated with specific users in a downloadable file.
What are the implications of not complying with user data requests in WordPress?
Failure to comply with user data requests can result in legal consequences, including fines and penalties, particularly in jurisdictions governed by strict privacy regulations like GDPR. WordPress site owners must prioritize data protection and compliance.
Are there plugins available to assist with user data management and compliance in WordPress?
Yes, several plugins are designed to help WordPress site owners manage user data requests, implement privacy policies, and ensure compliance with regulations like GDPR.
***
Congratulations! Now you know how to comply with user requests to export or erase personal data using the tools that WordPress makes available.
***

Updated: July 5th, 2024